
This is one of those “it just came to me” ideas. Some projects aren’t consciously nurtured over the years; instead, they emerge spontaneously at any random moment.
Once born, they either reveal their flaws and are quickly forgotten, or, on the contrary, prove to be unexpectedly useful and find a permanent place in everyday life. This particular project turned out to belong to the latter category. As is often the case, the realization that it had suddenly become a “project” only came after quite some time had passed.
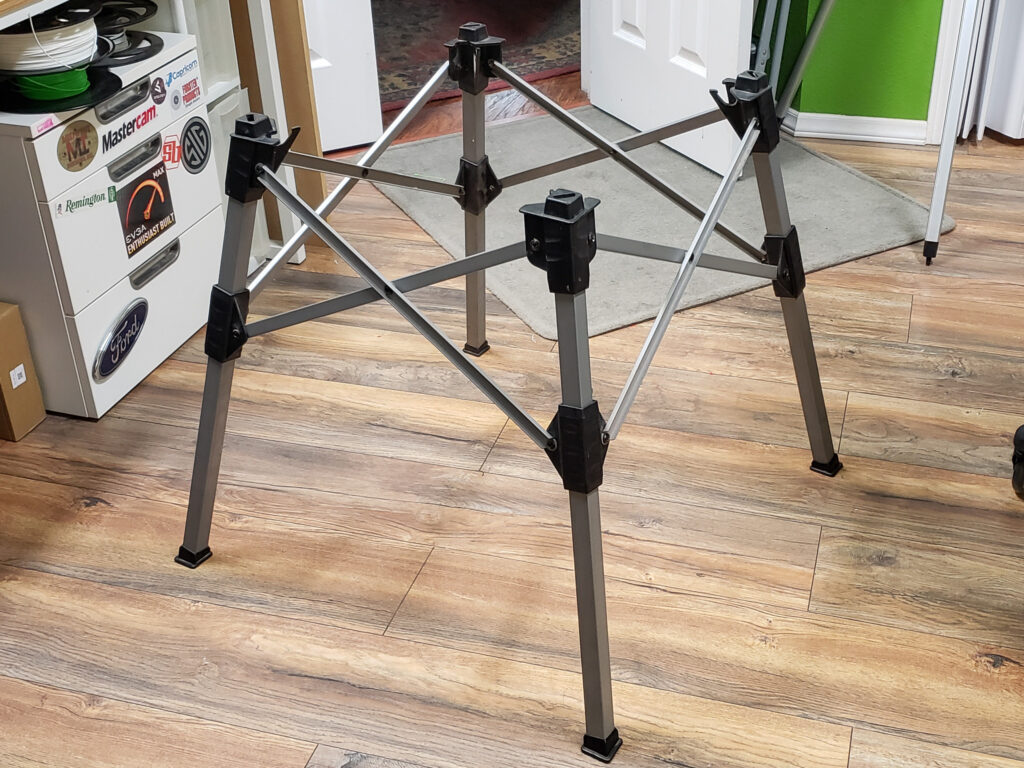
It all began earlier this year during the “printer hunt.” The newly acquired treasure needed something temporary to rest on. Very quickly, a makeshift folding stand was unearthed from the stash. It had originally come with a circular saw:
The saw itself was an absolute piece of junk. It didn’t even last a year — which, incidentally, is typical for tools from pseudo-brands in this price range. This all happened more than a decade ago, during the early days of my time here. Back then, exploring the local range of products meant that mistakes of this kind were inevitable and frequent.
The stand survived simply because it was never actually used. I couldn’t bring myself to throw it away along with the saw. Over the years, it sat gathering dust on the highest shelf of the garage storage rack, long forgotten by everyone.
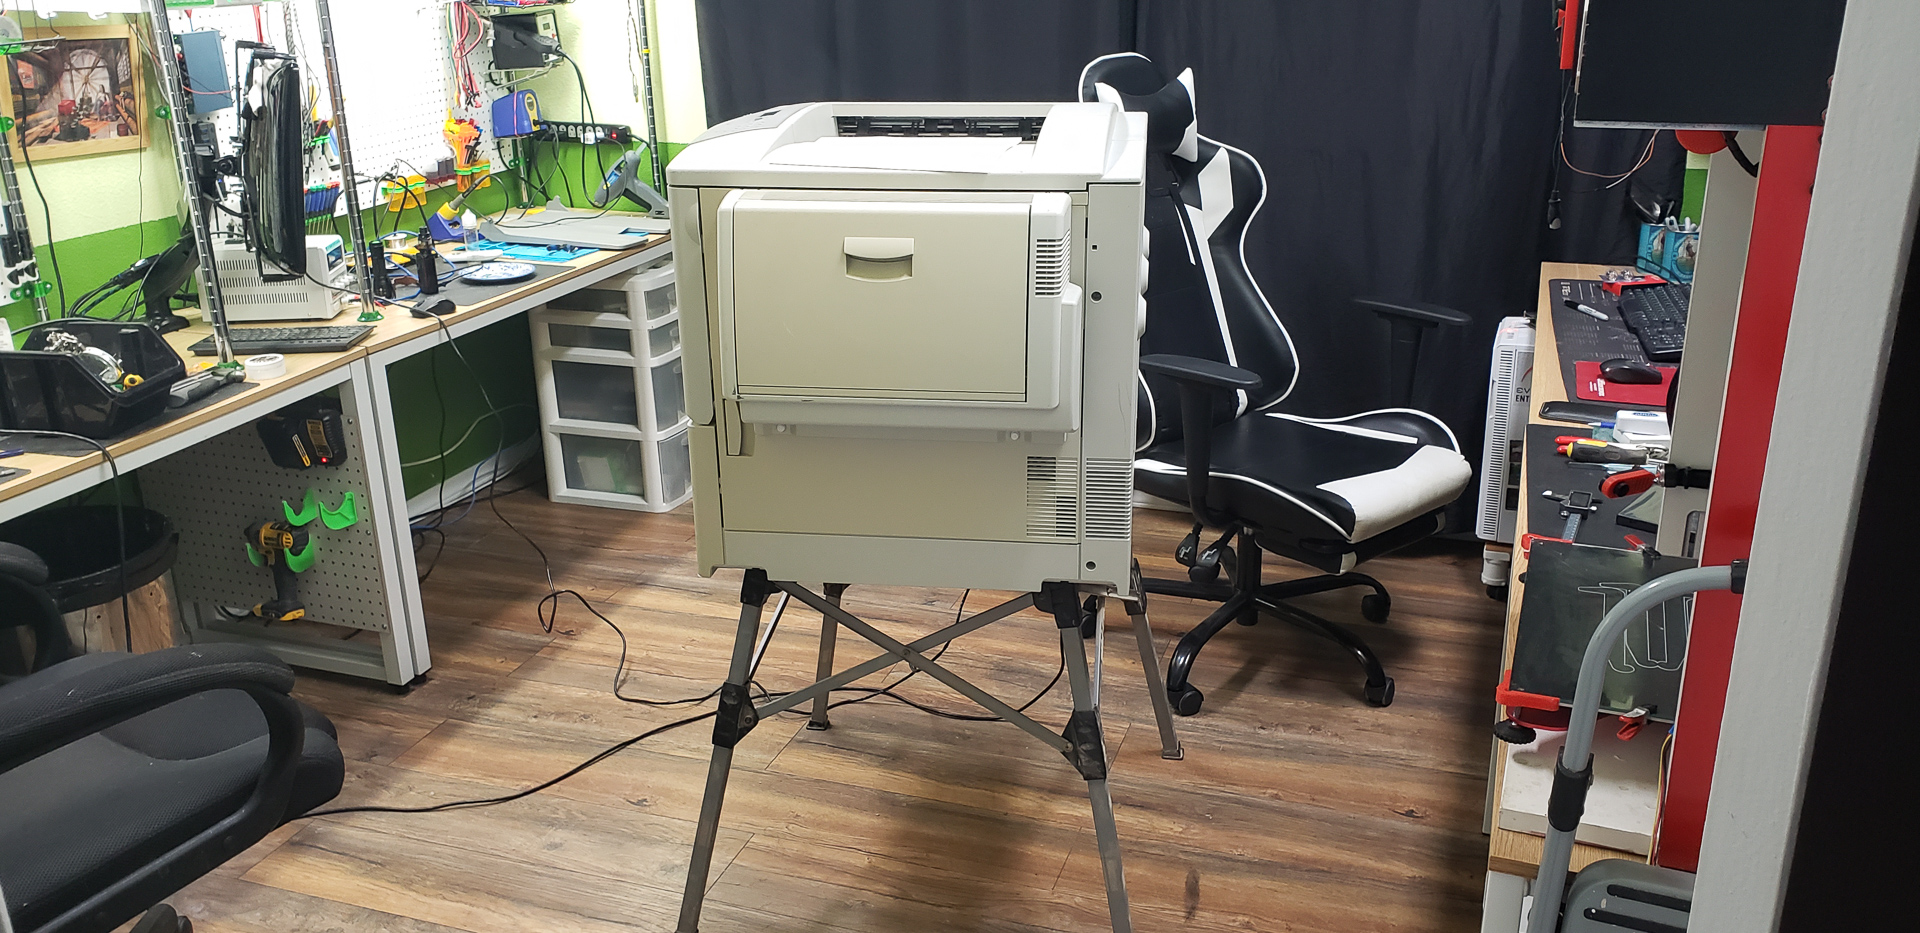
I’m not quite sure how it managed to resurface at just the right moment. I suspect it had to “kiss a few butts” in the stash to pull off this stunt. During my frantic search for something — anything! — to quickly place a giant office printer on in my office, it was the first thing that came to hand:
And that’s how the folding stand from the lousy circular saw began its illustrious career as a surprisingly useful household item. At that moment, however, I didn’t yet realize it. I thought that once I built a proper stand for the printer, this temporary solution would go back to the storage rack to continue its slumber.
But, of course, that’s not what happened! Naturally, when the folding stand was no longer needed, I didn’t get around to returning it to the storage rack. I folded it up and placed it in a corner of the office. Temporarily, of course. One more thing in the corner wouldn’t make much of a difference. I figured I’d put it away properly later.
Then, unexpectedly, the 3D printer project came along. It quickly became apparent that assembling a relatively large structure on a desk pushed against a wall was extremely inconvenient. Access to the mechanism being built was required from all sides — and often all at once. The search for a solution began. Once again, the folding stand somehow managed to be the first thing to come to hand. This time, of course, it was easier for it to do so — it had never actually left the office.
The only thing missing was a suitable tabletop of the right size to pair with it. A piece of MDF panel from the garage fit the bill perfectly. There was no need to fasten or secure anything — one piece was simply placed on top of the other. The resulting makeshift table was crude but perfectly adequate for the task at hand:
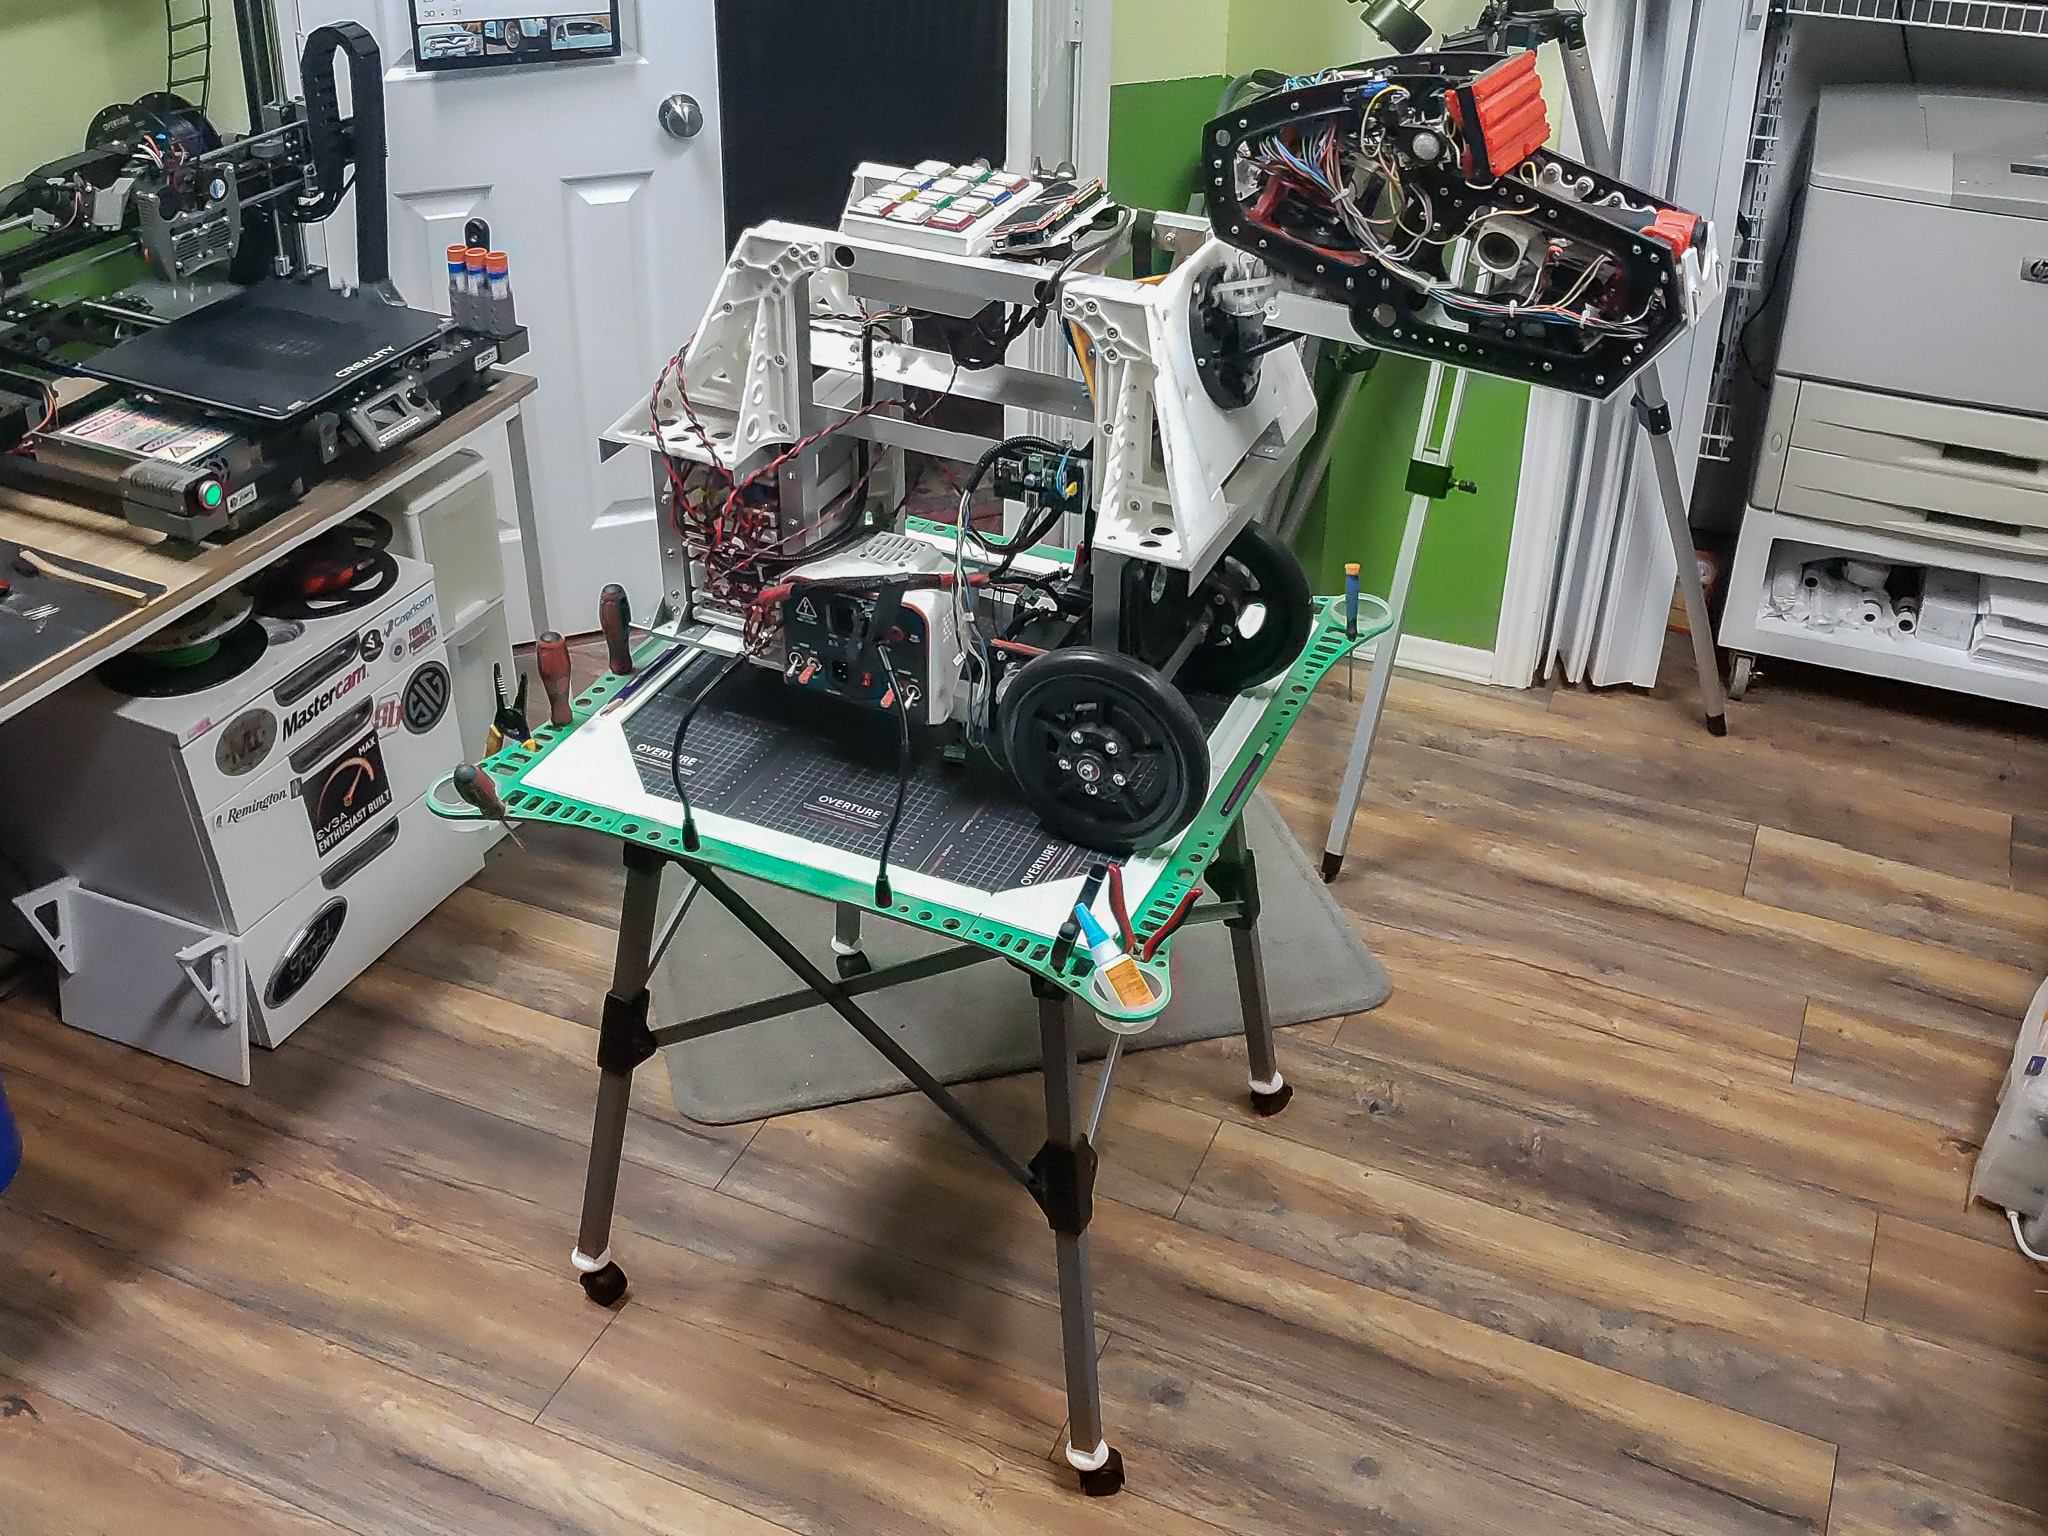
At this point, the idea began to dawn on me that such a piece of furniture might be a permanent necessity in my workshop-office. Now that I had a fully functional 3D printer again, I could start thinking about resuming the mechanical dog project. Its dimensions were quite similar to the printer’s, and during assembly, access to it would also be needed from all sides at once.
It would be a stretch to call the improvised assembly table a perfect solution. There were more than enough problems with it.
The table itself wasn’t mobile. The only way to move it was to drag it — contents and all — across the floor. While doing so, it was necessary to carefully ensure that the tabletop didn’t slip off the stand.
The tabletop itself lacked a proper finish. Bare MDF is far from the best working surface. It’s too porous and absorbs everything at an alarming rate — from spilled solder flux to Dog’s drool when he stopped by the office to check on the progress.
There wasn’t enough space for tools I needed to have on hand. I had to spread them out on the floor and surrounding tables, which was inconvenient and cluttered the space. Screws and pencils constantly rolled off the makeshift table, fell to the floor, and stayed there until I was too tired to pick them up.
But honestly, what else could you expect from a simple board resting on folding legs from an old circular saw?
That said, as the faint understanding began to take shape into a coherent idea, all of these accompanying problems turned out to be easily and quickly solvable. The idea became a project.
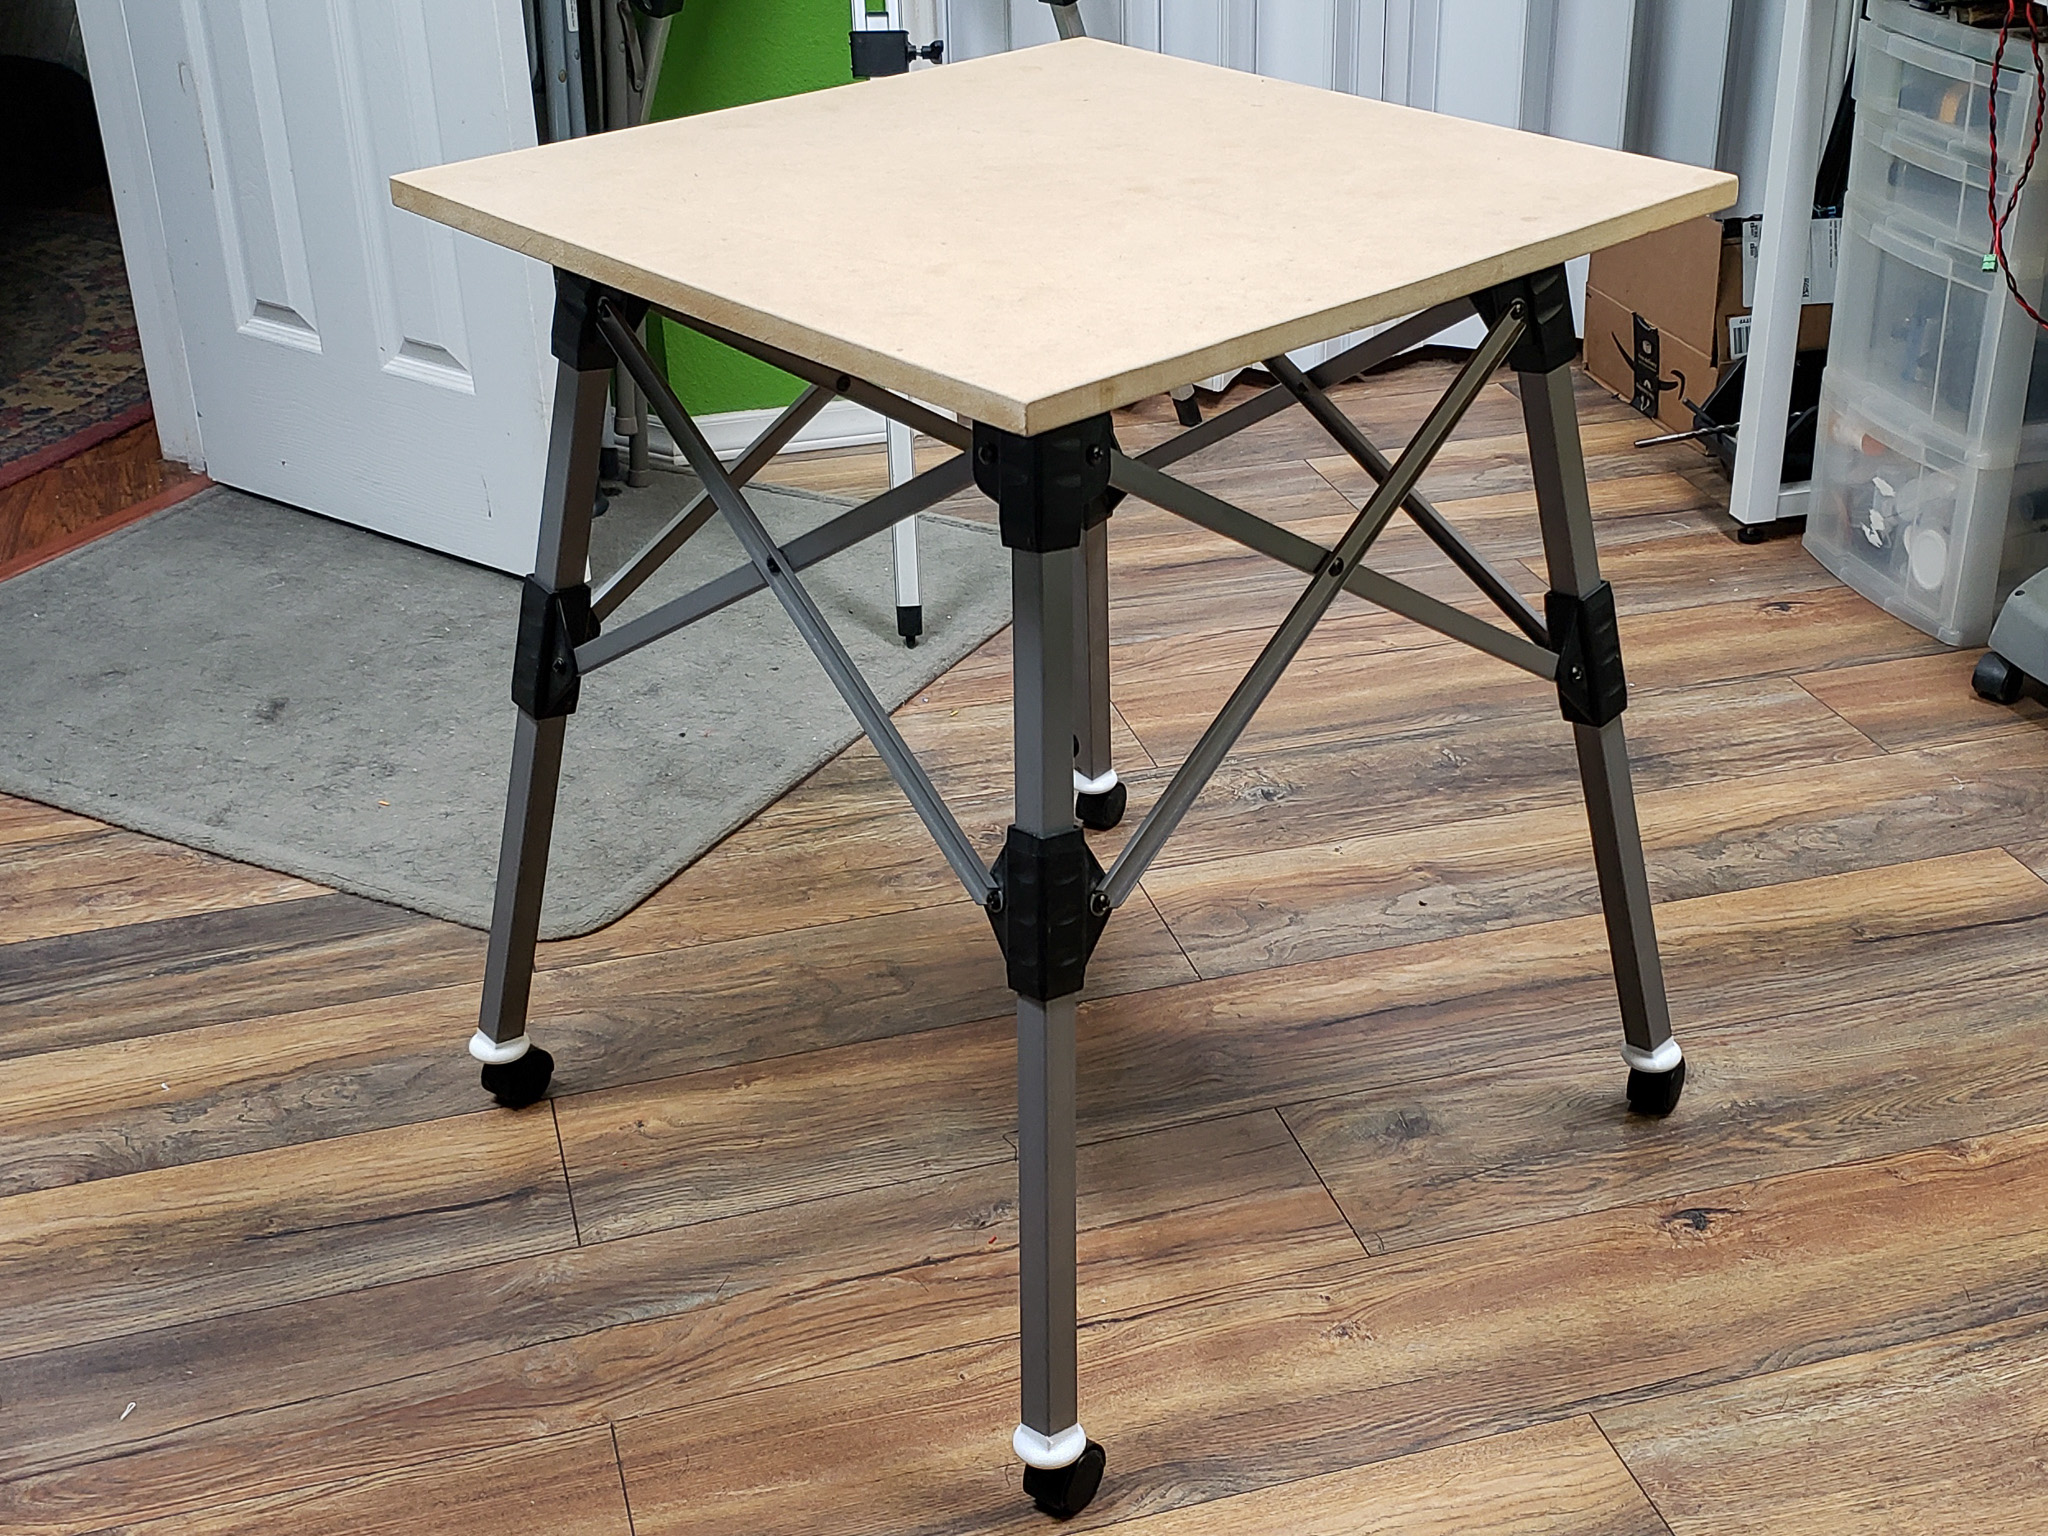
The mobility issue was resolved in the most obvious way — with humanity’s timeless invention: the wheel.
Not long ago, I upgraded the suspension of the chairs in my office, replacing their old wheels with ones that have rubber tires and bearings. The chairs began gliding across the floor much more smoothly and pleasantly. The old set of basic plastic wheels from one of the chairs was still in decent condition. The original rollers were of relatively good quality and hadn’t worn out much since the chair itself was practically new. So, I decided to repurpose them.
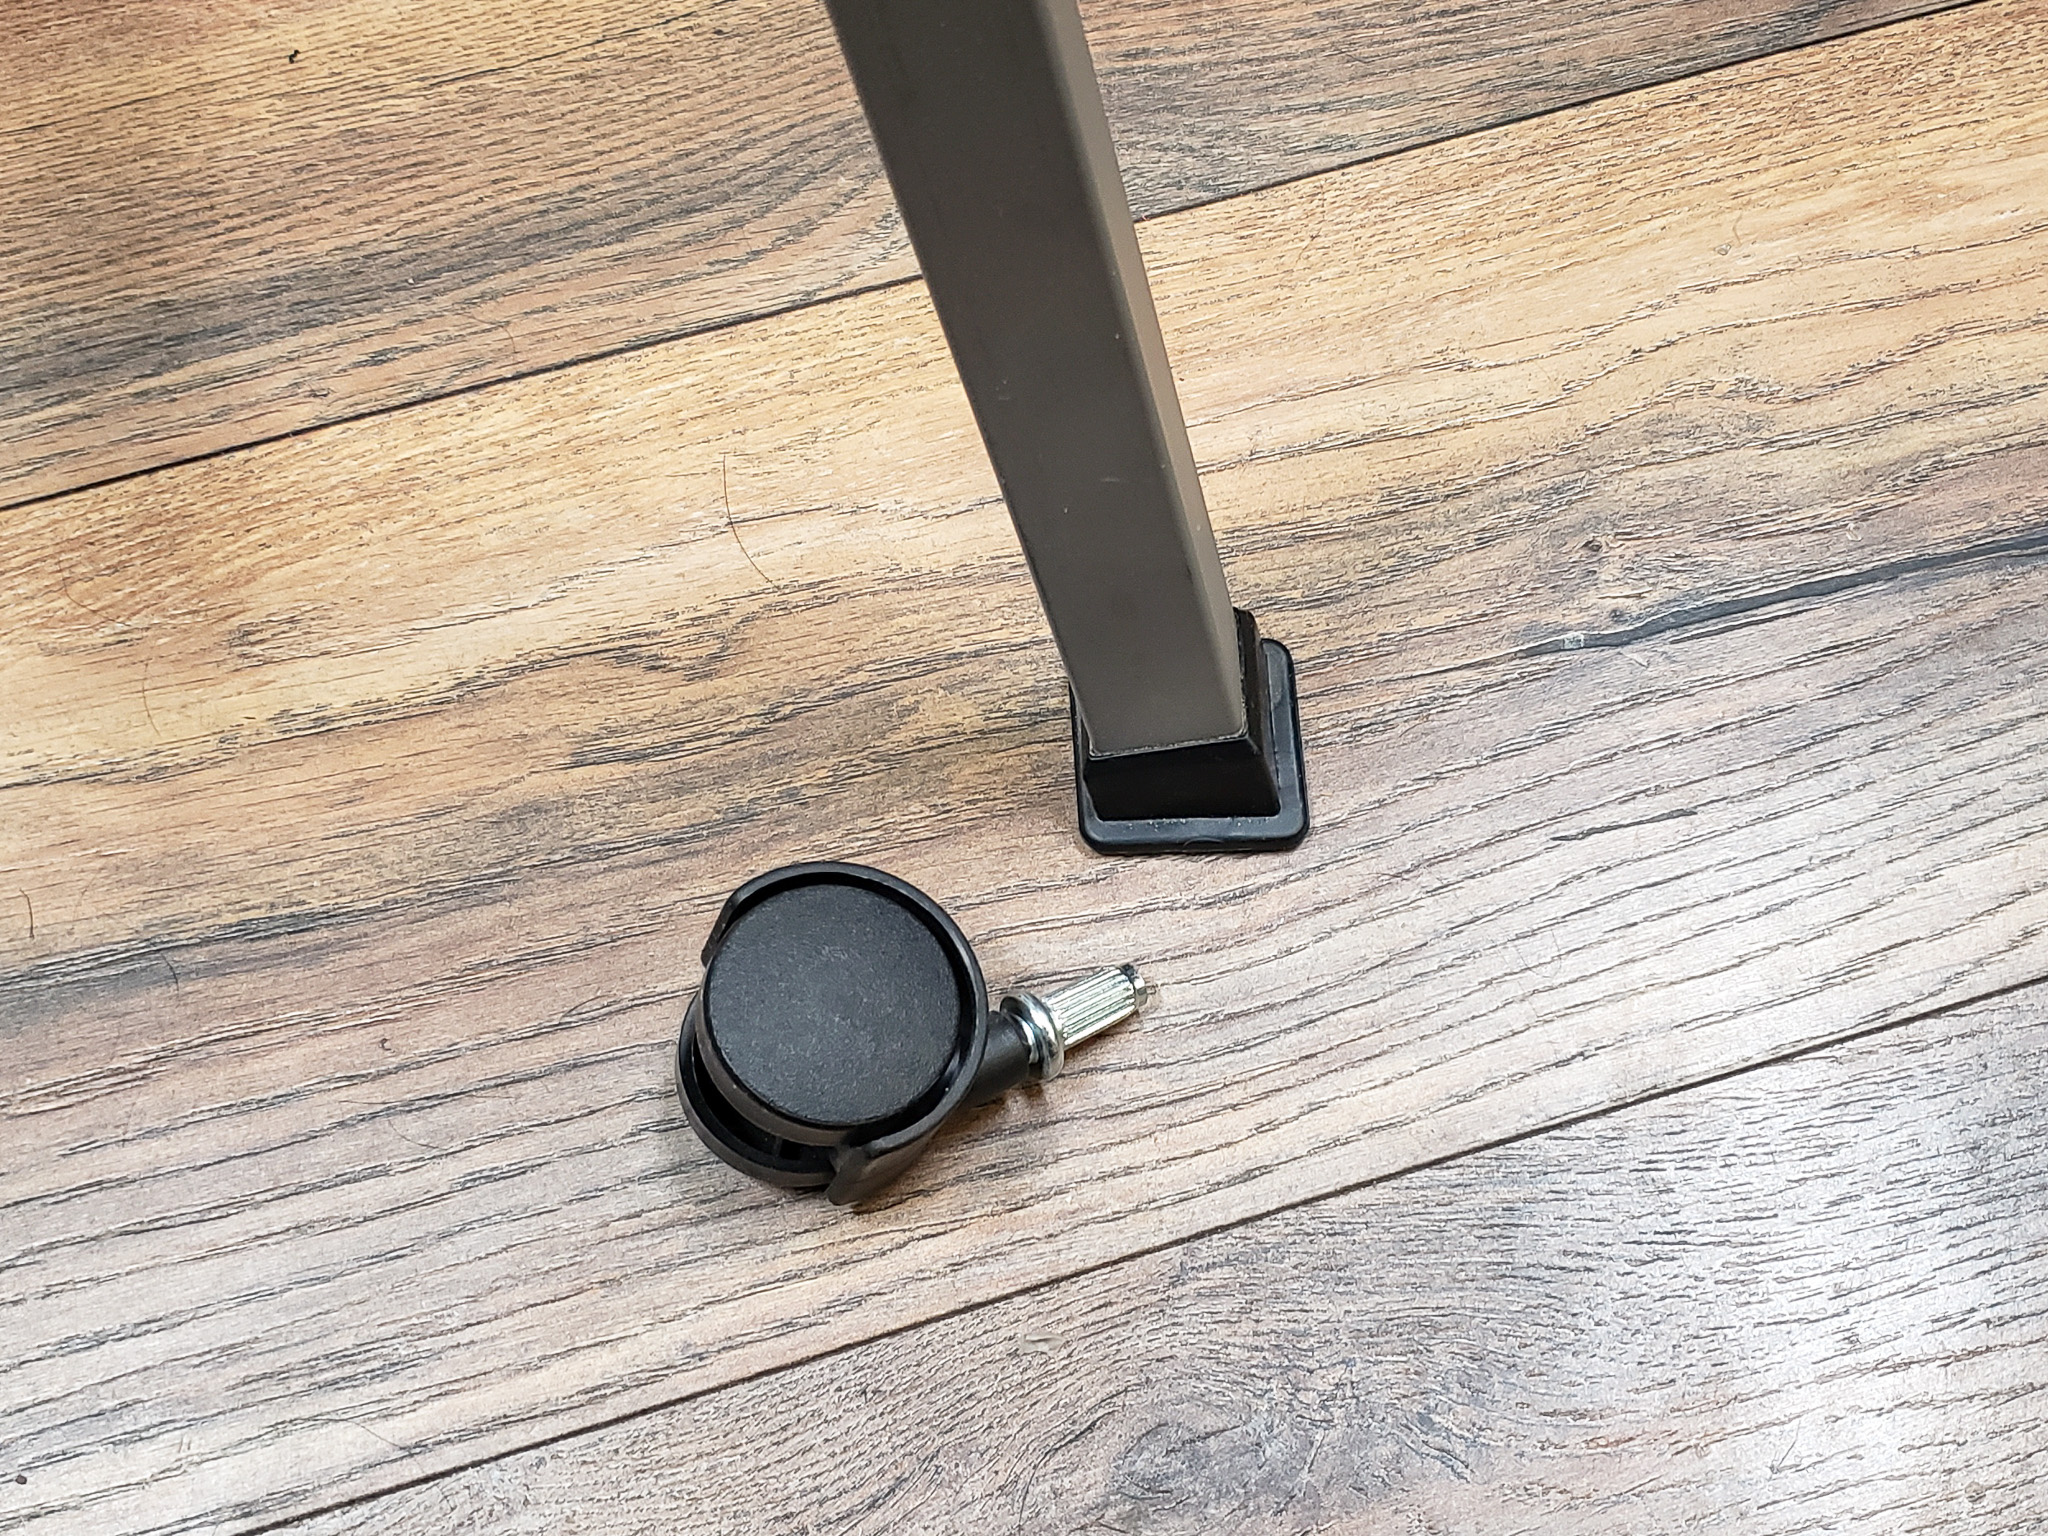
At first, I tried to take the easy route. I drilled holes in the rubber tips of the stand’s legs and inserted the wheels directly, just as they were:
Naturally, this didn’t work out. Even if the soles of the rubber tips hadn’t been as thin as cigarette paper, the elasticity of the rubber meant that the mounting pins of the wheel assemblies wouldn’t have held firmly in place. The wheels would have folded under the weight of the table’s contents. And with the actual thickness of the rubber tips, they collapsed even without the added weight. The table itself was enough to do the job.

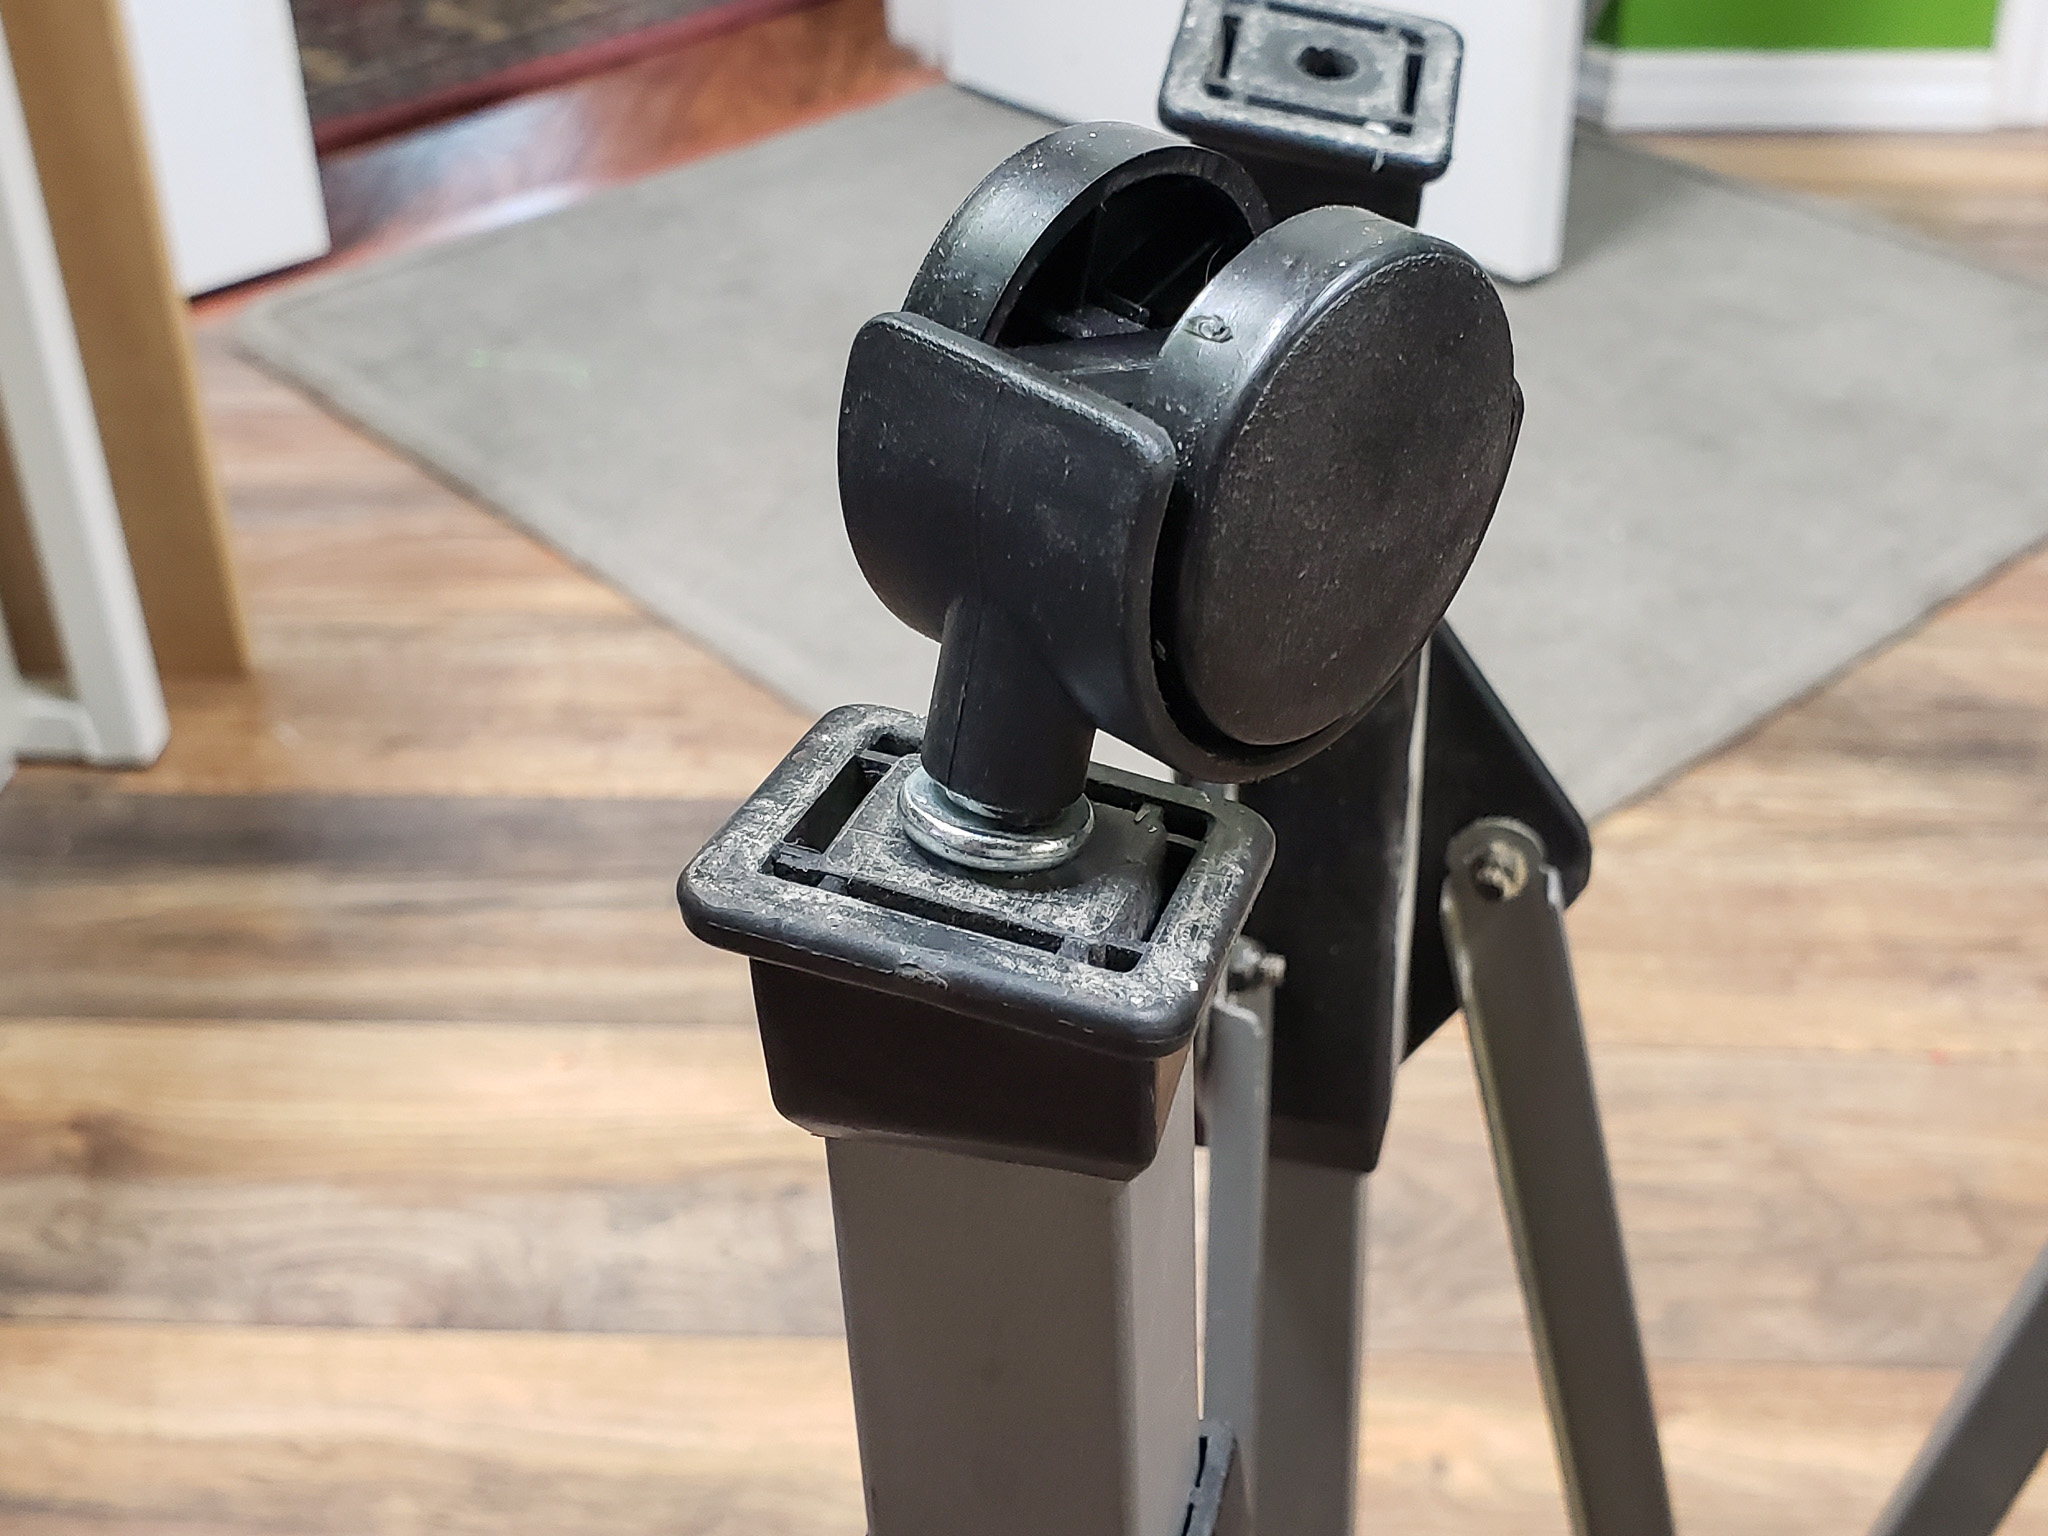
Alright, the easy route didn’t pan out. I had to print new thick, rigid tips for the legs. Essentially, these were solid plastic pieces with a 90% infill:
Now, nothing bends, deforms, or collapses. The table rolls across the floor as it should. Still, I’m considering upgrading its wheels someday, just like I did with the chairs. Later… The wheels for such an upgrade cost more than the combined value of all the metal and MDF in the table. This upgrade will have to be earned through long and grueling service on the DIY front.
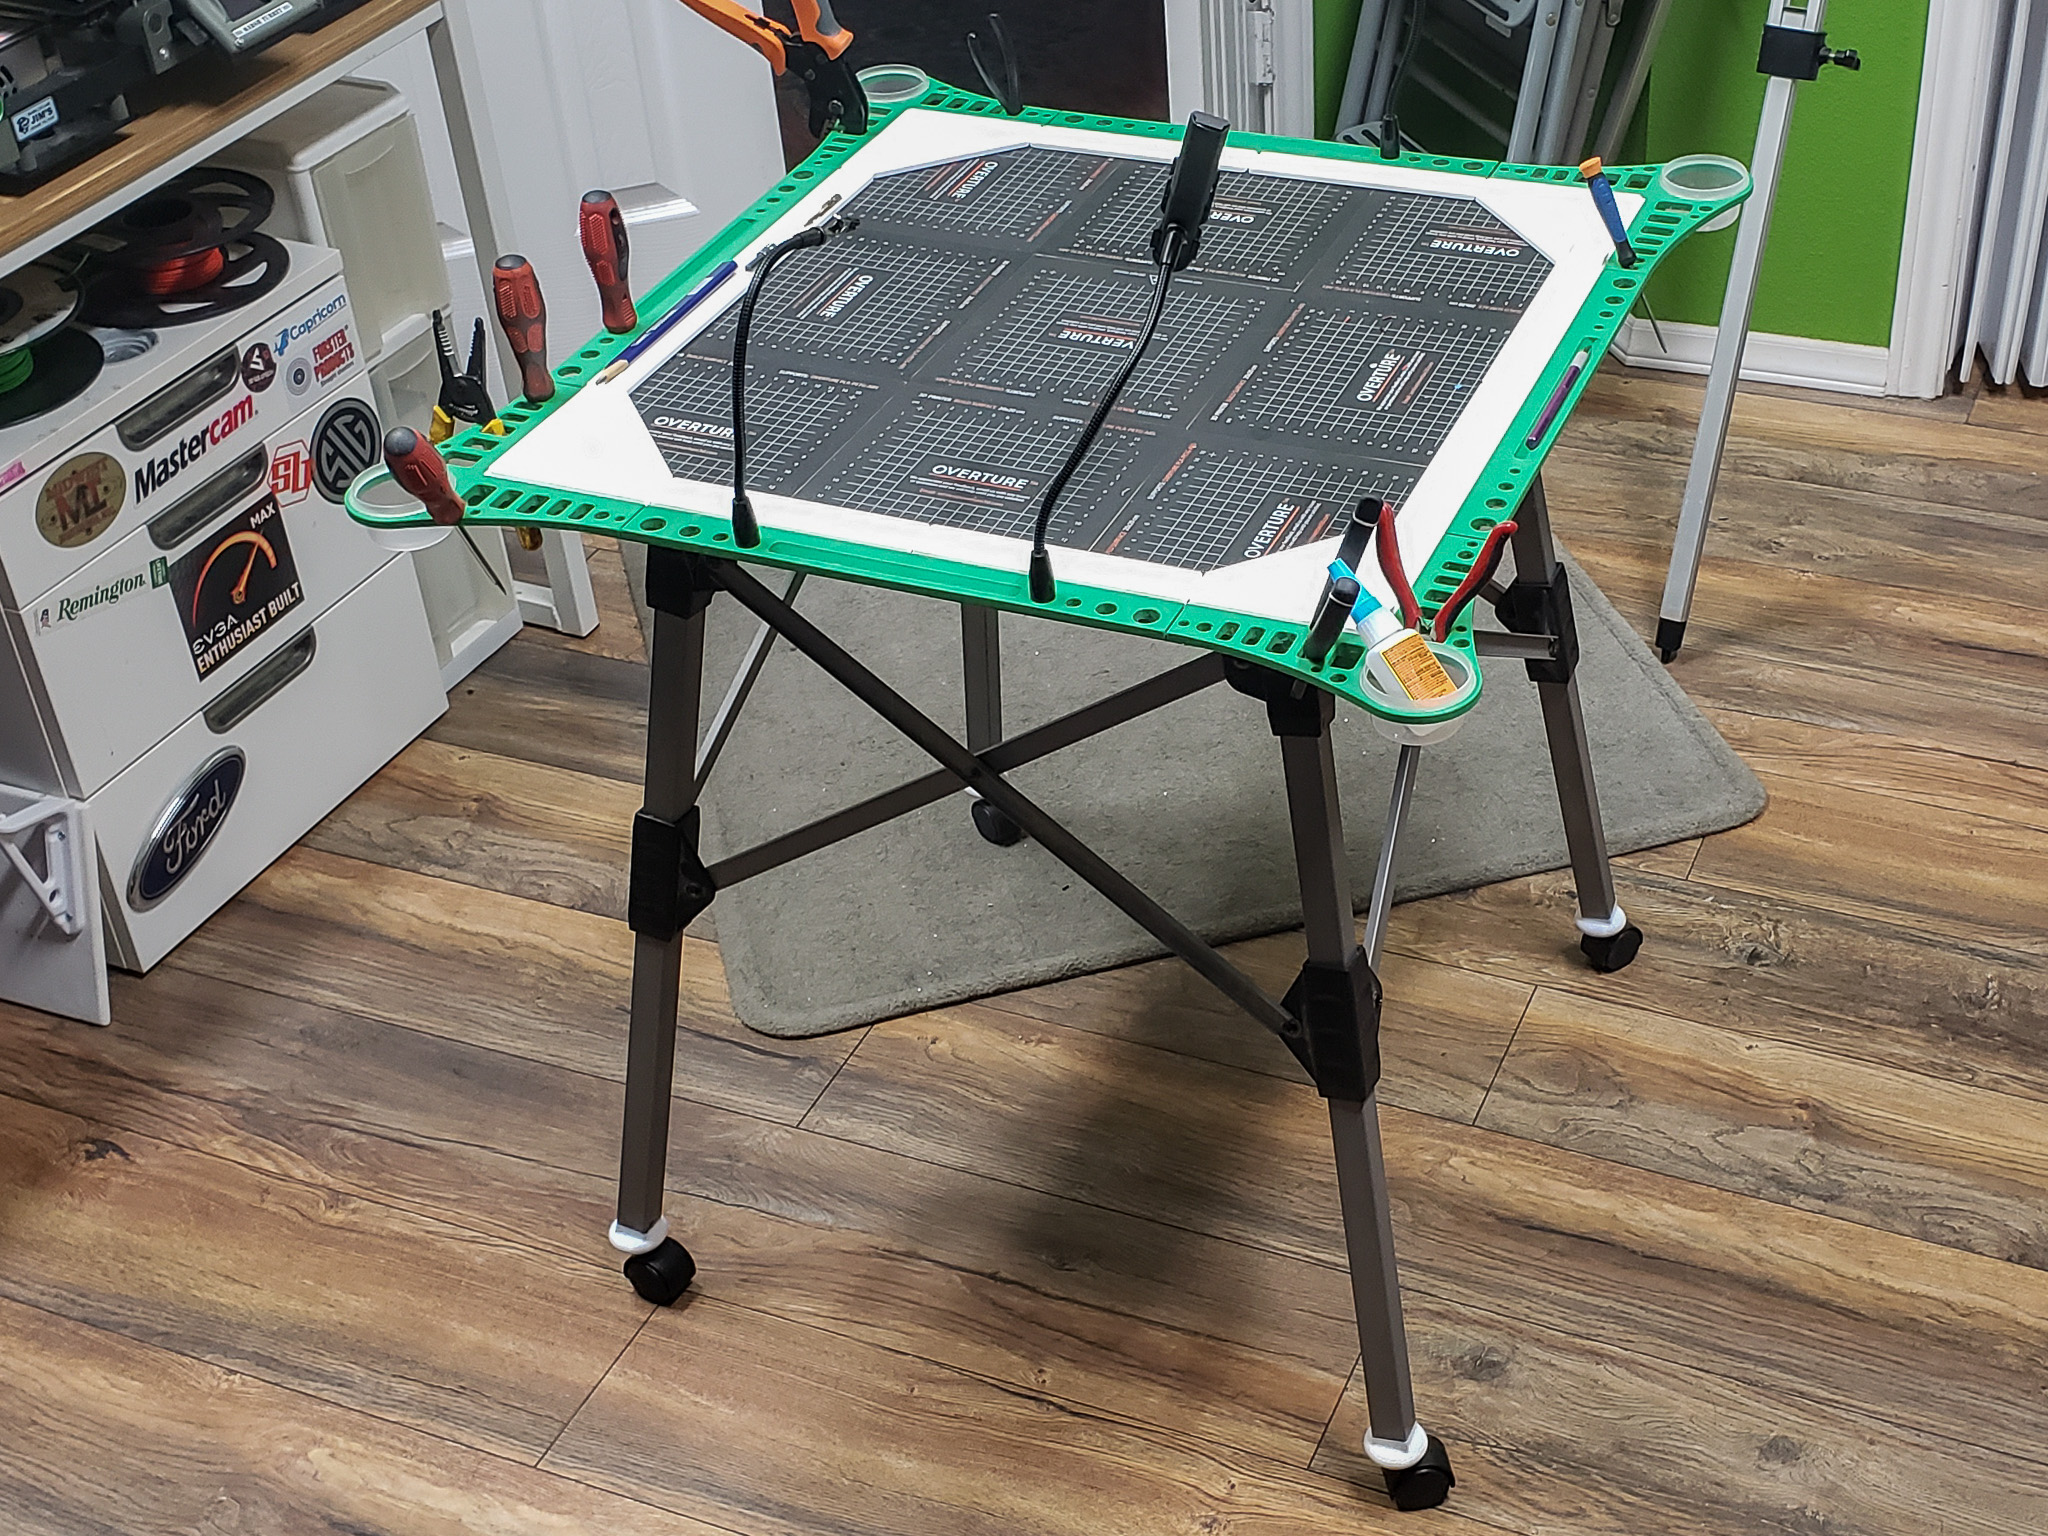
The tabletop was next. It needed to be secured to the stand, given a more suitable surface finish, and equipped with additional features for organizing tools and consumables.
First, the MDF panel had to be trimmed into a more rectangular shape. Originally, it was a randomly cut, uneven piece left over from a project so long ago that I can’t even remember which one. The circular saw made quick work of this. After trimming the uneven edges, the result was a 24×24-inch square tabletop.
Next, the stand and the panel needed to be transformed into a functional table. At the same time, I wanted to preserve the folding functionality of the stand. This could be convenient — when there’s no ongoing project requiring assembly on the table, it can be folded up and stored away in a closet, freeing up floor space in the room.
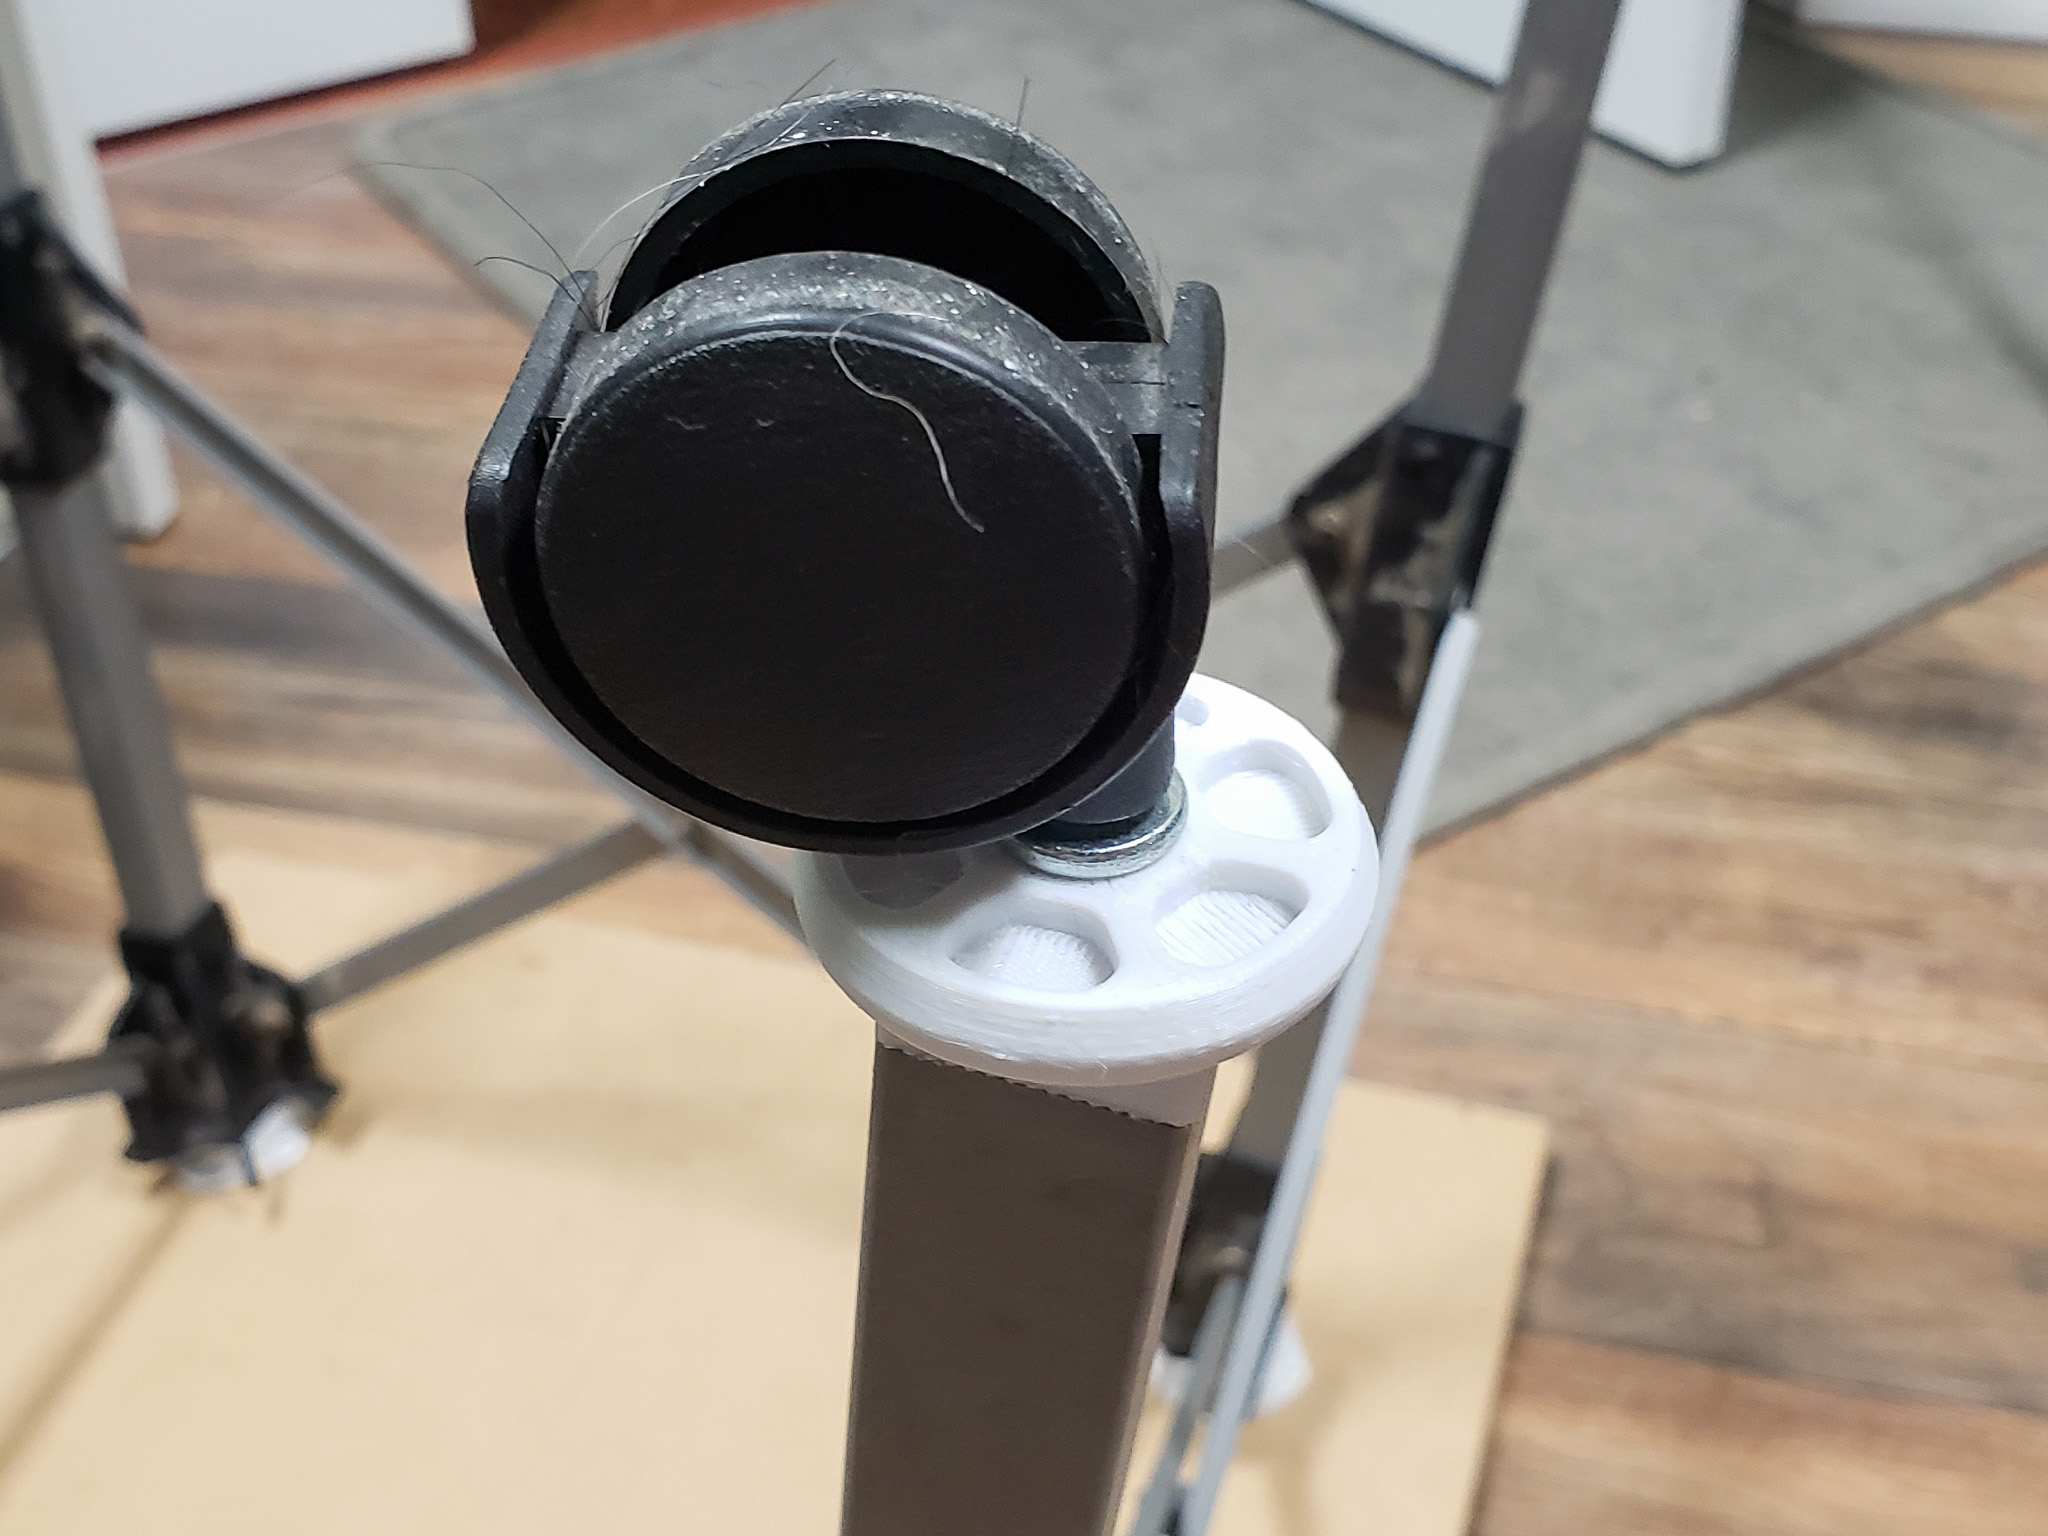
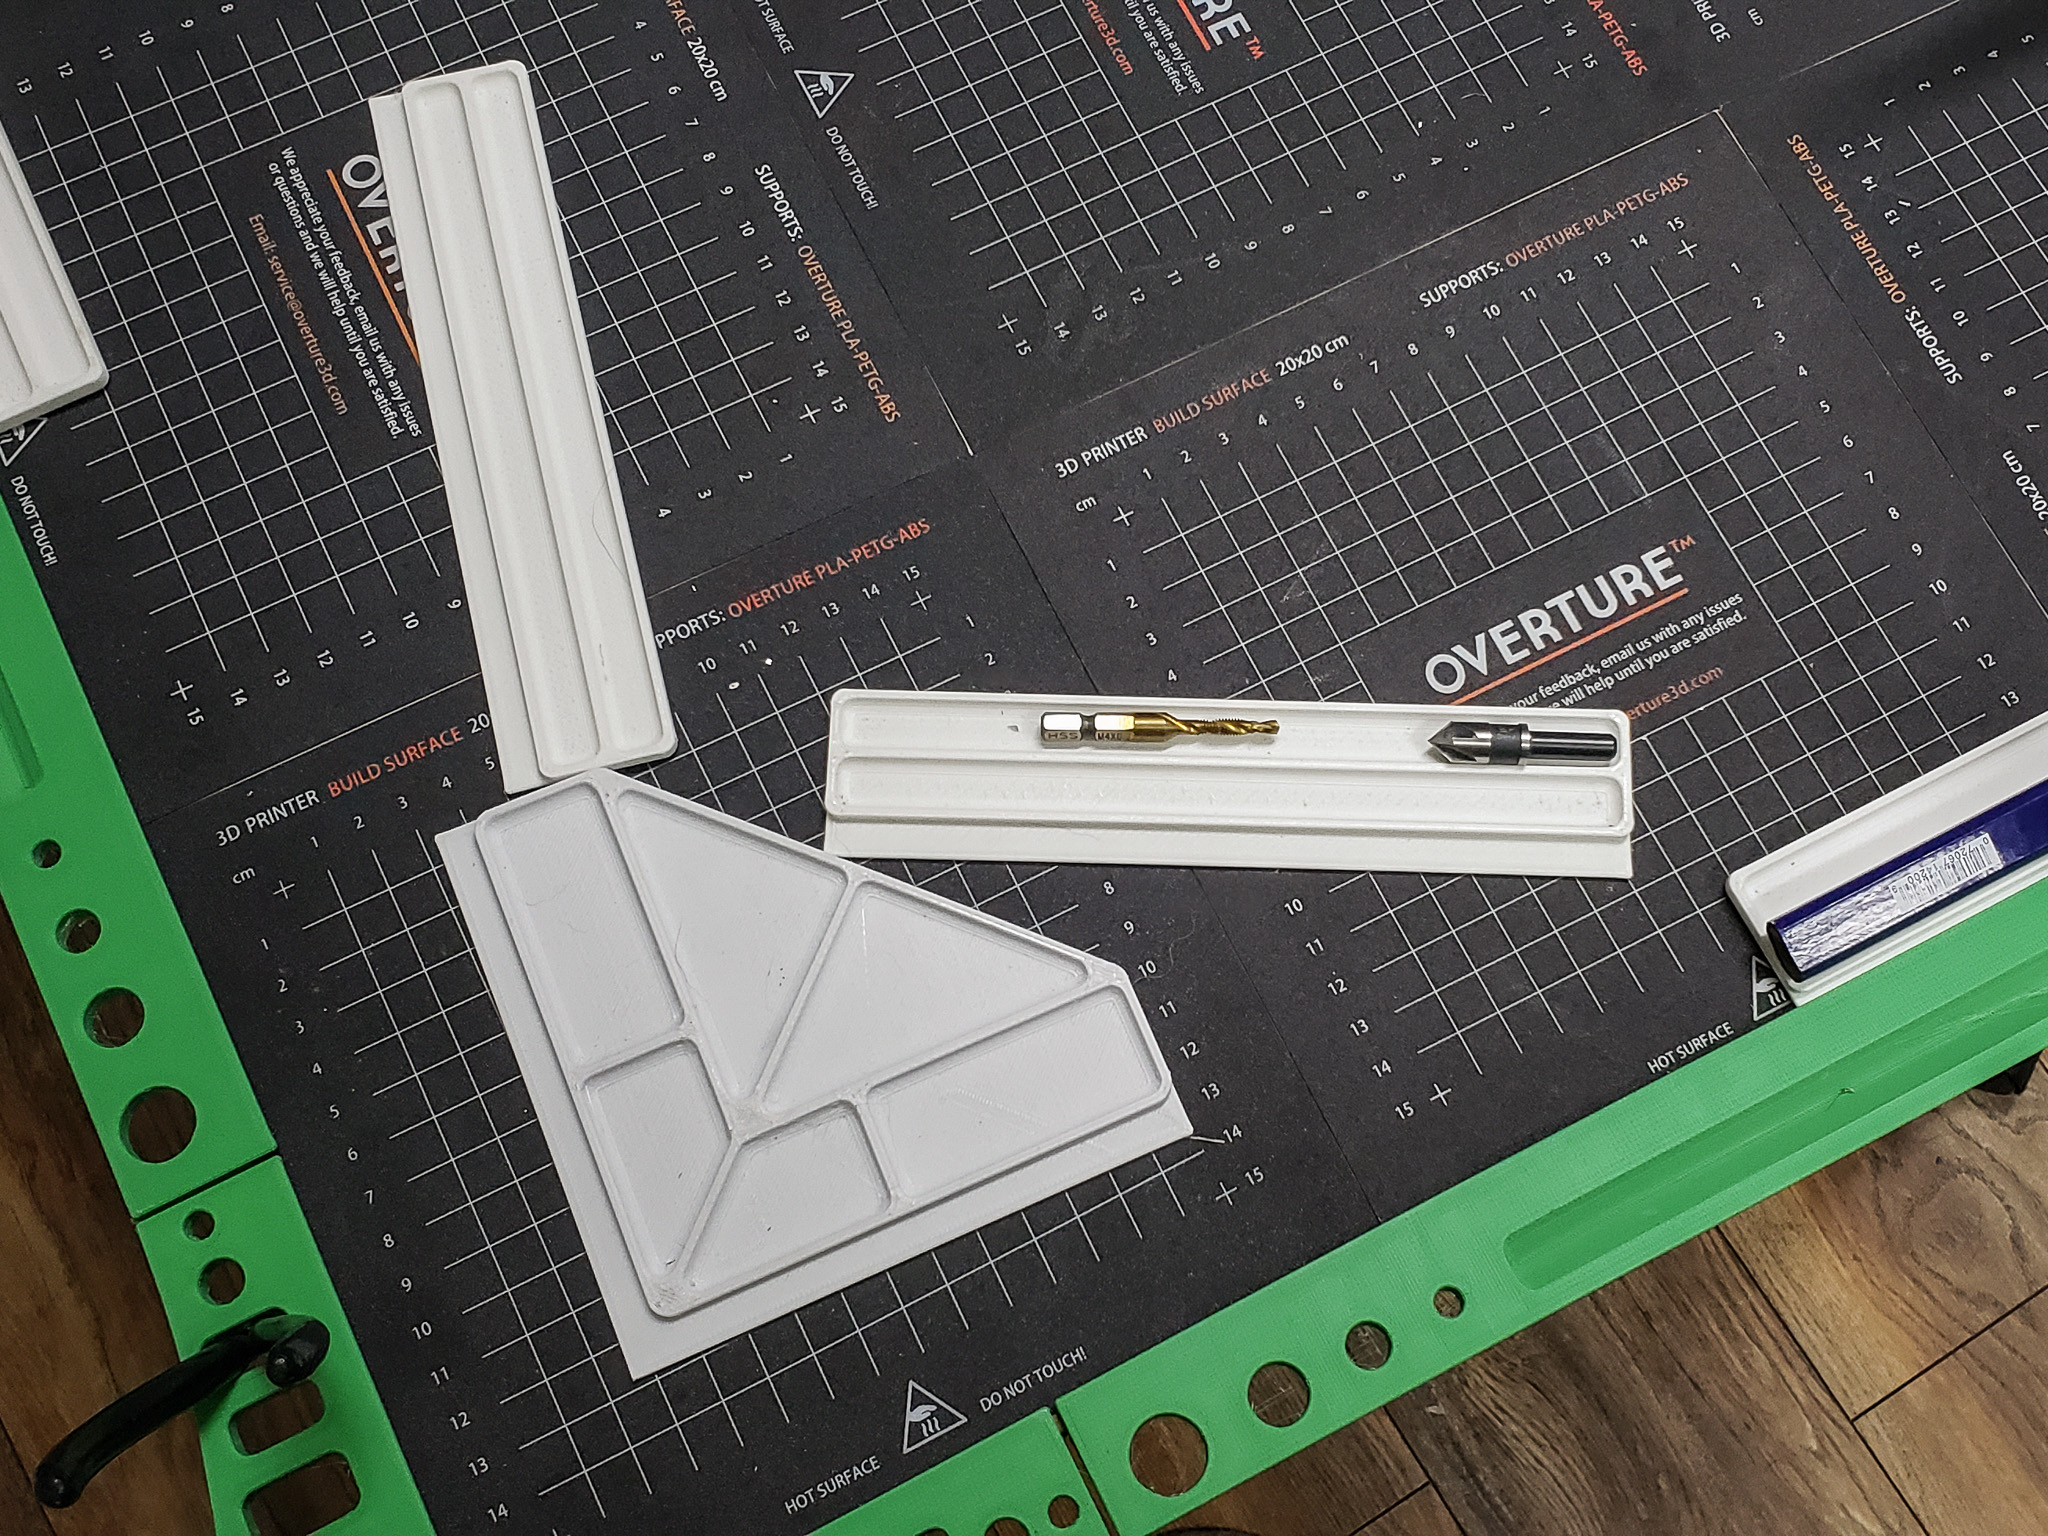
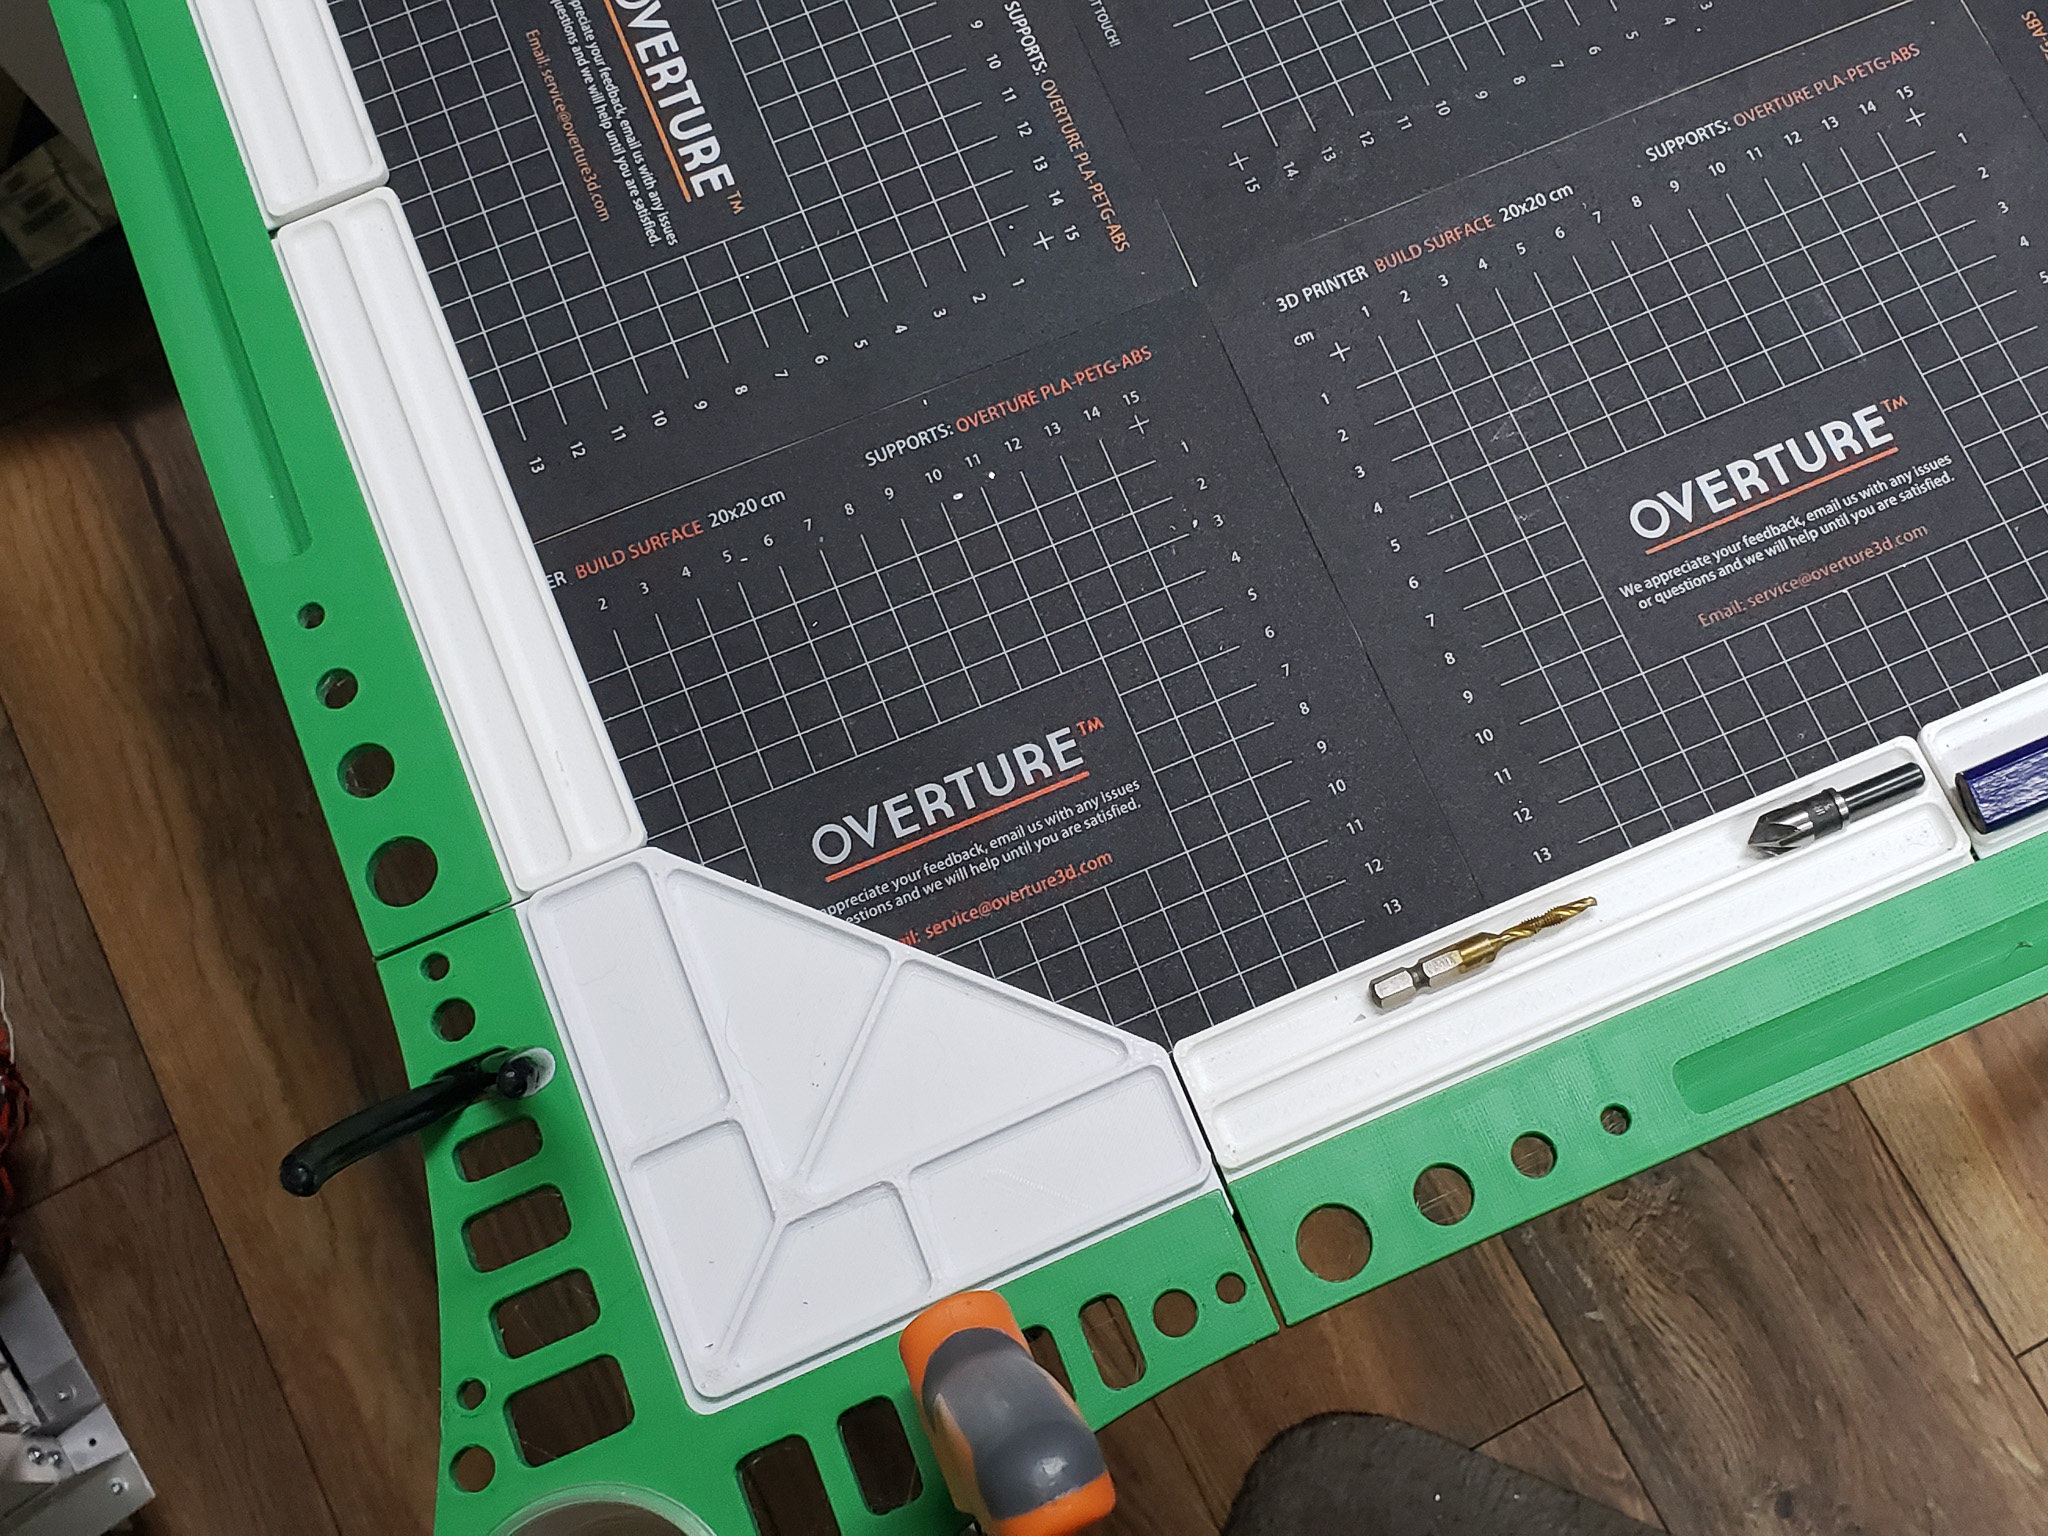
Accordingly, the most obvious solution — simply screwing the panel to the stand — was rejected. Instead, I printed these cup-like supports for the tabletop:
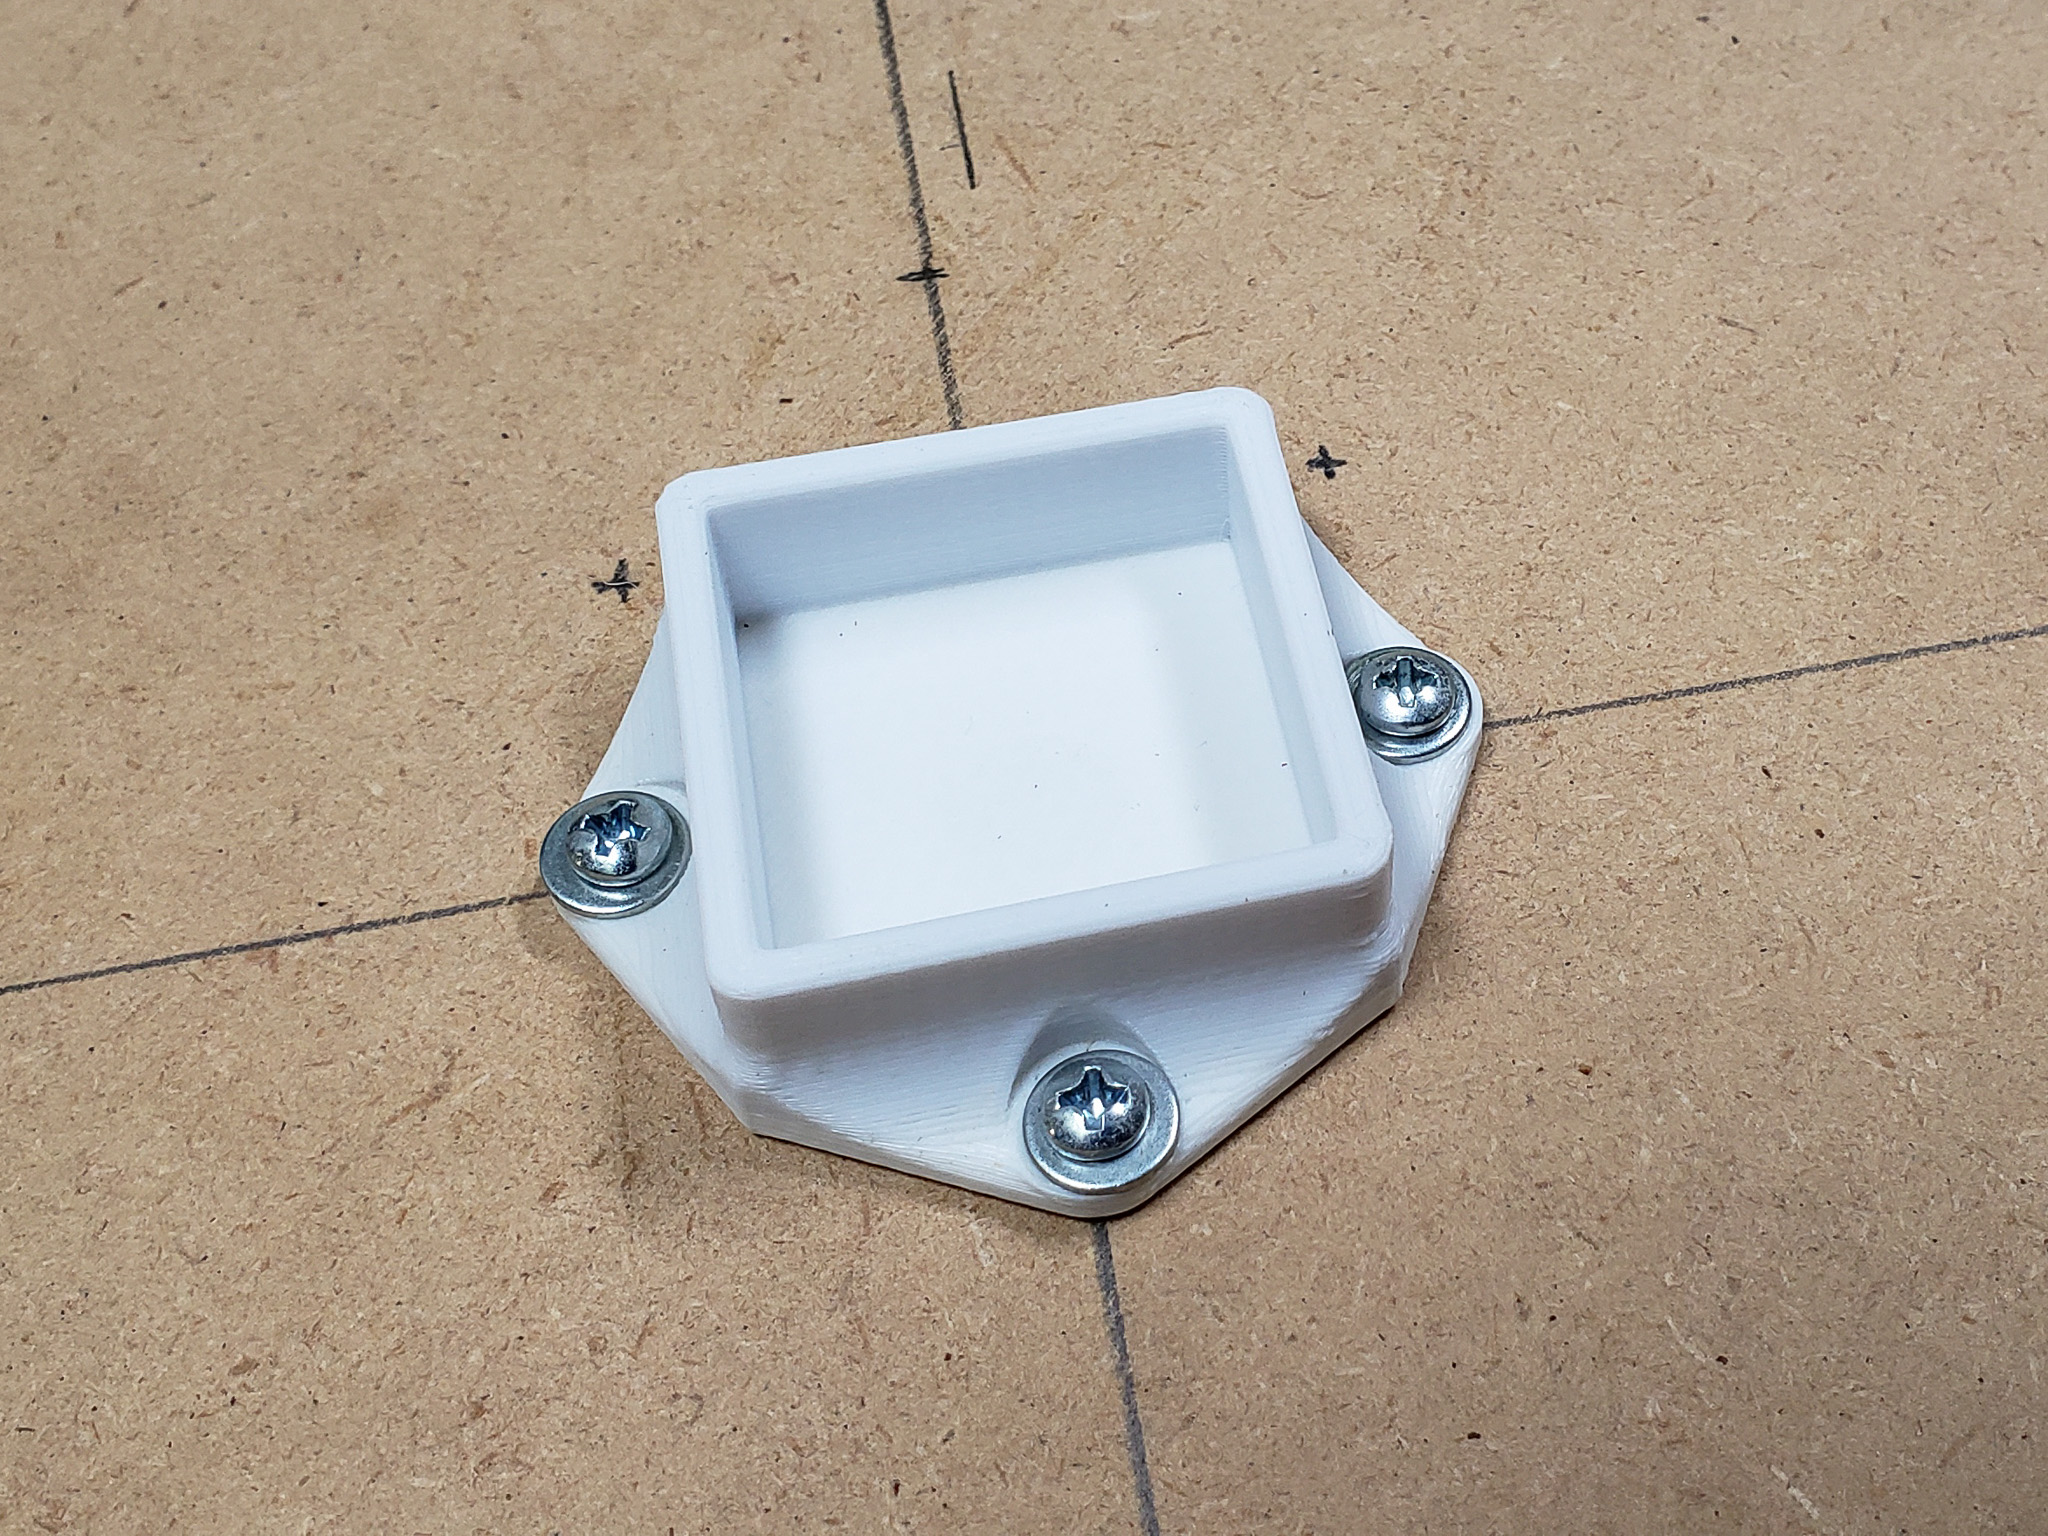
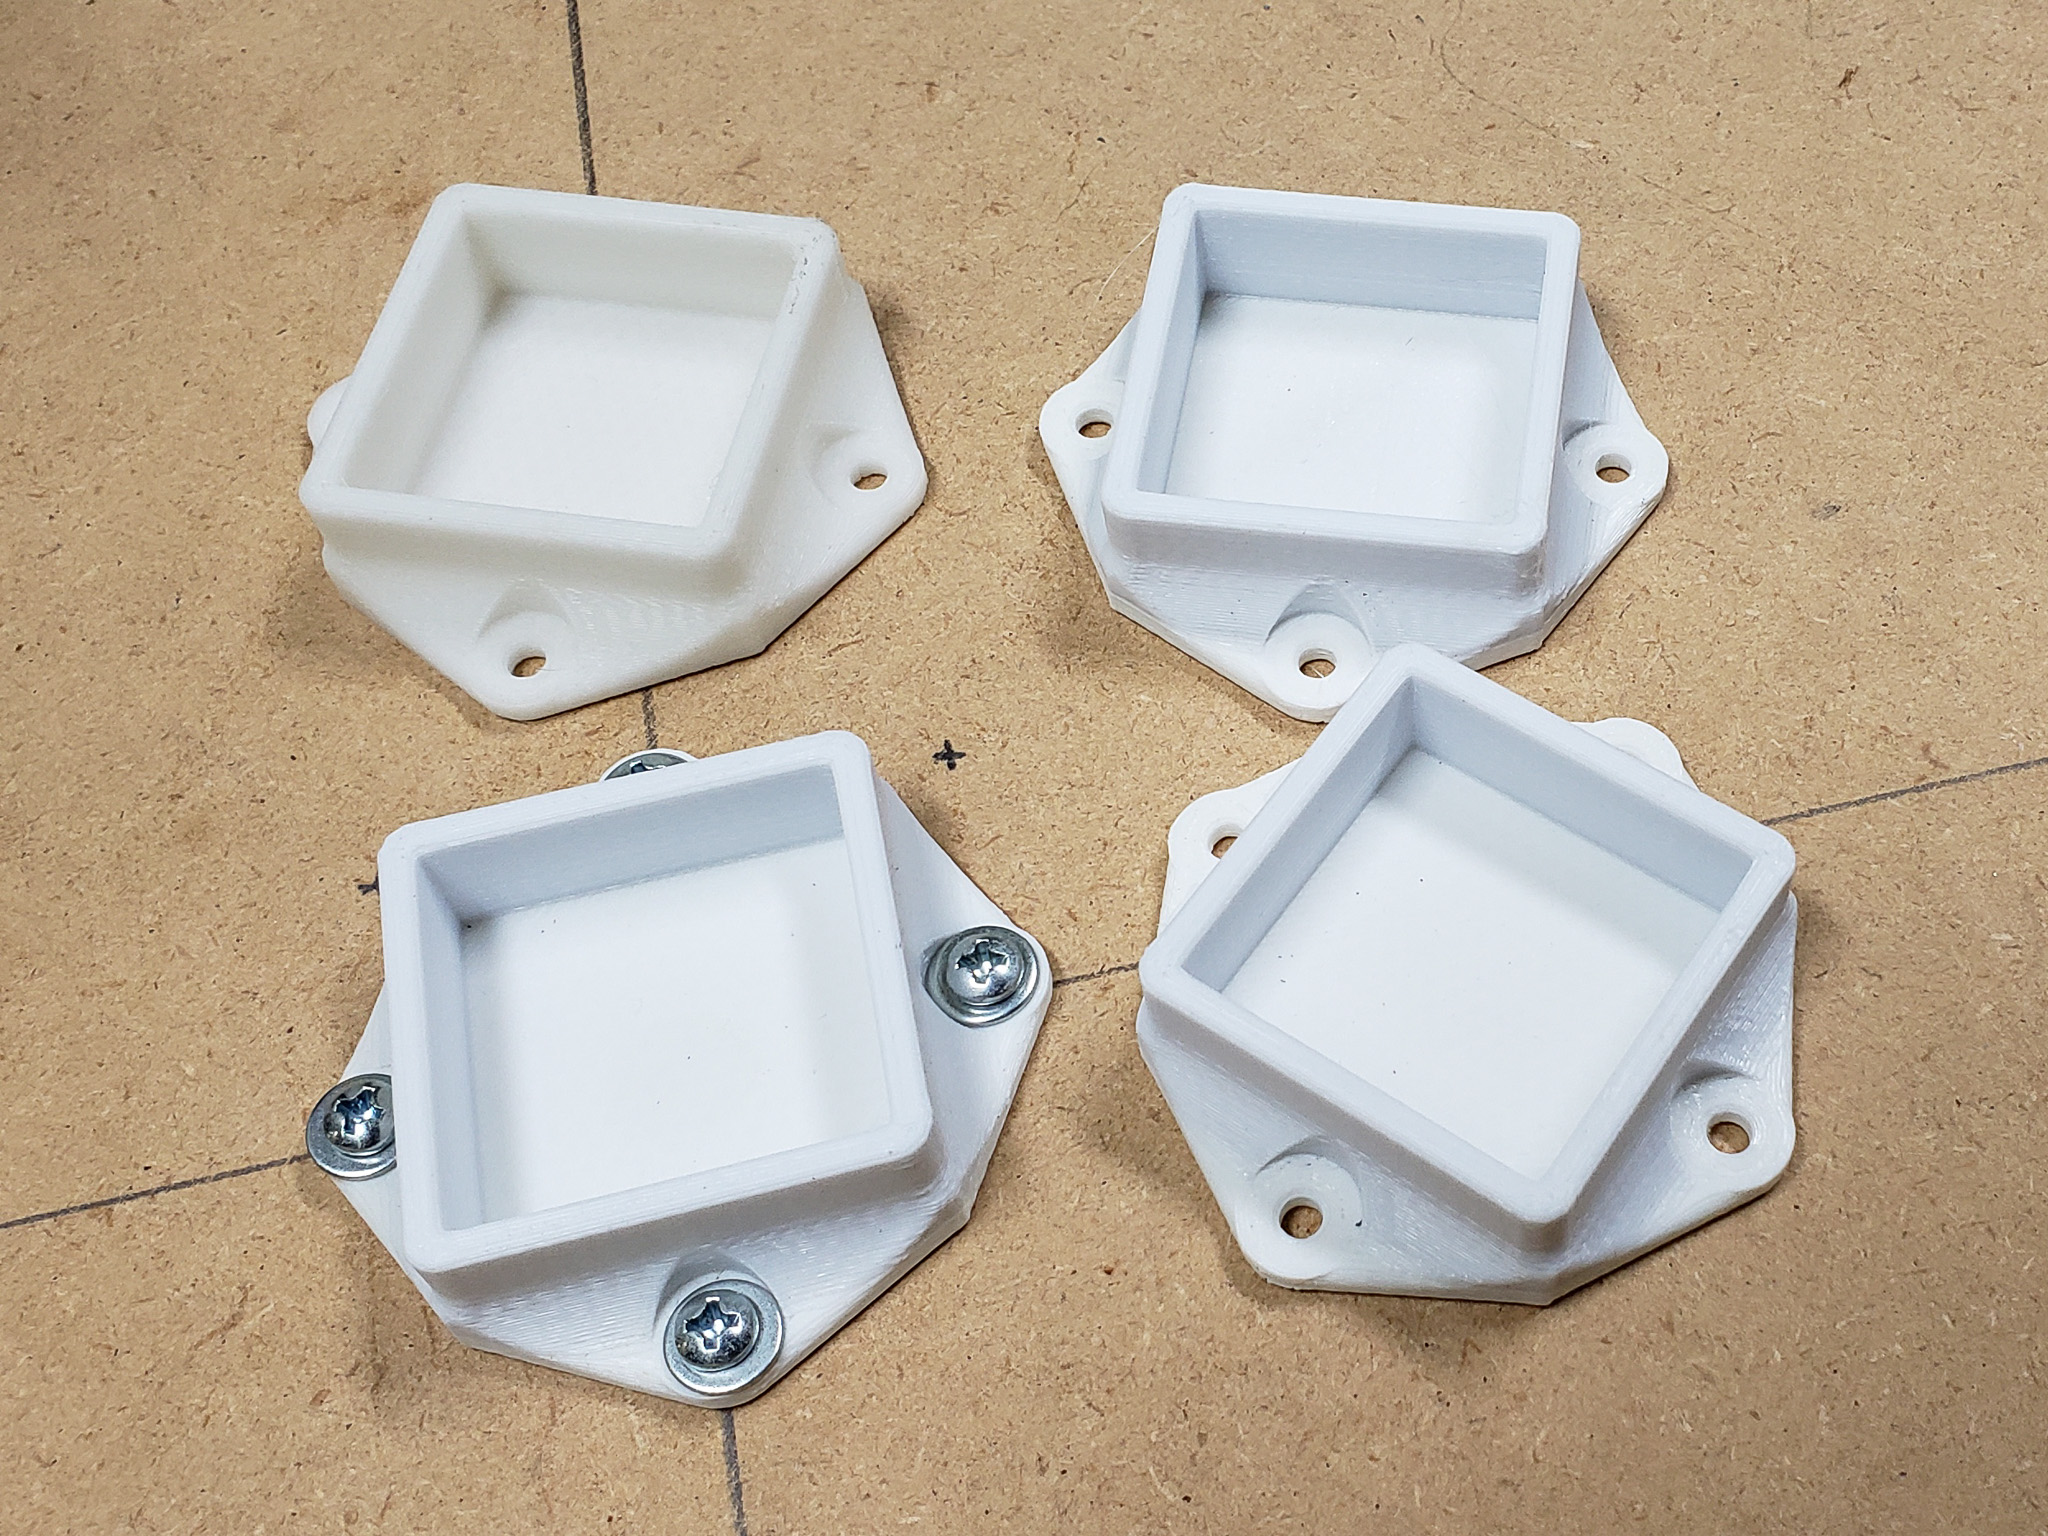
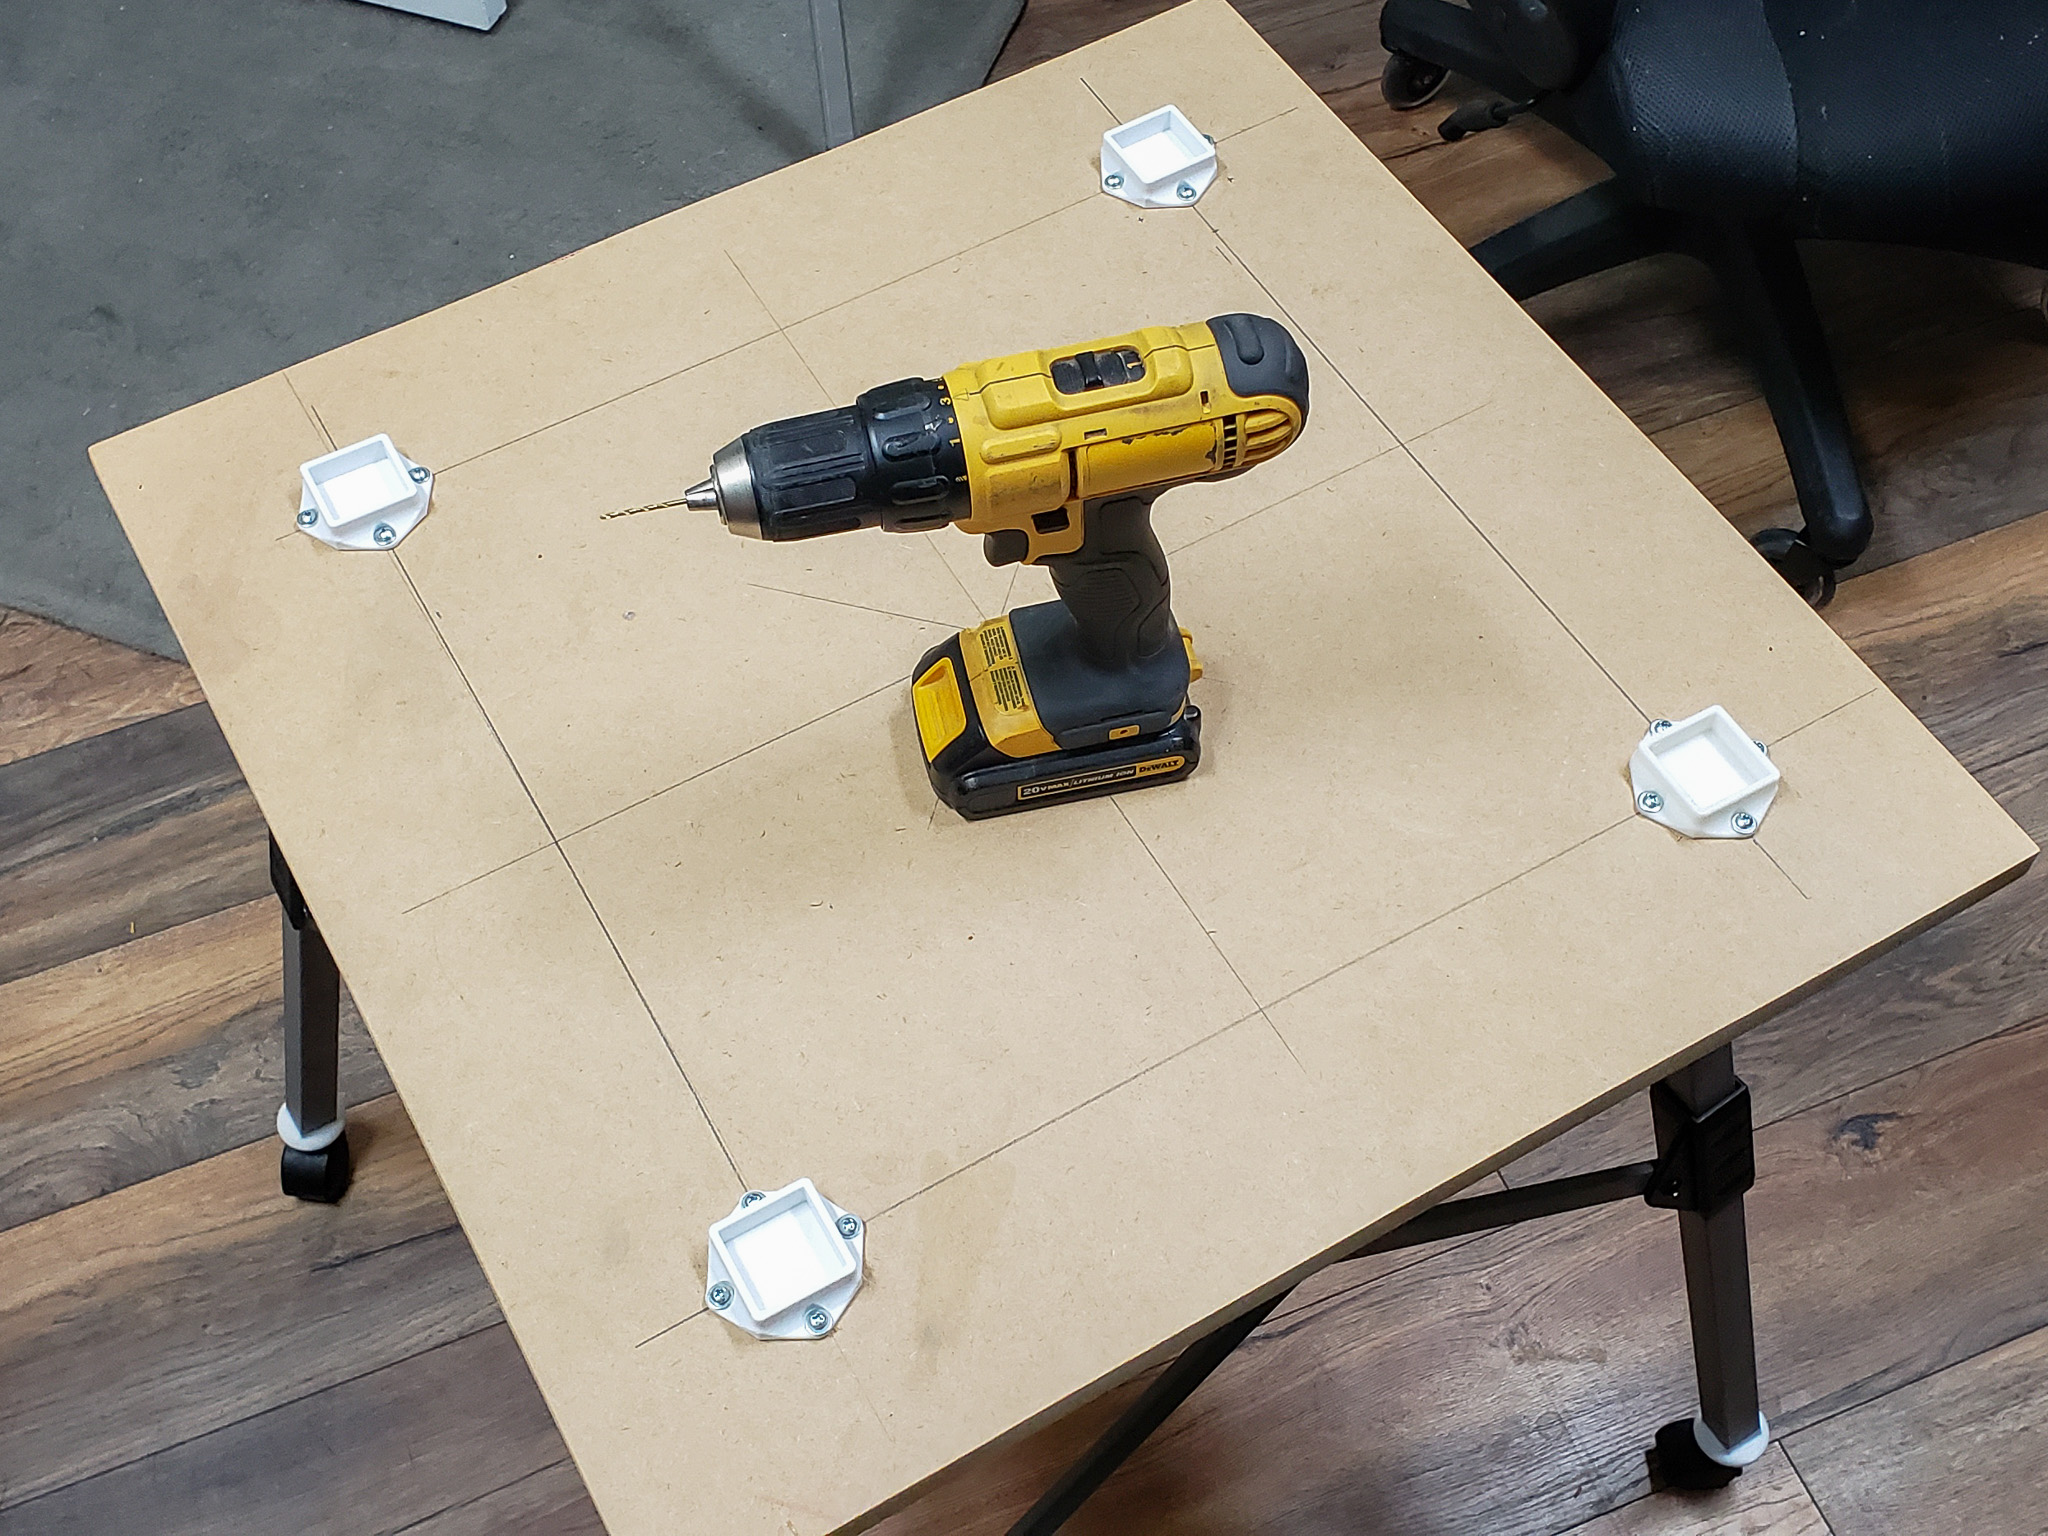
The stand itself, at the top of each leg, has a mount designed to slot into the corresponding part of the saw’s body. The cup-like supports on the tabletop became that corresponding part.


On the one hand, the tabletop isn’t rigidly fixed to the stand and can be easily removed. On the other hand, it sits quite securely in place. The supports “self-lock” onto the stand’s mounts under the weight of the tabletop and whatever might be placed on top of it.
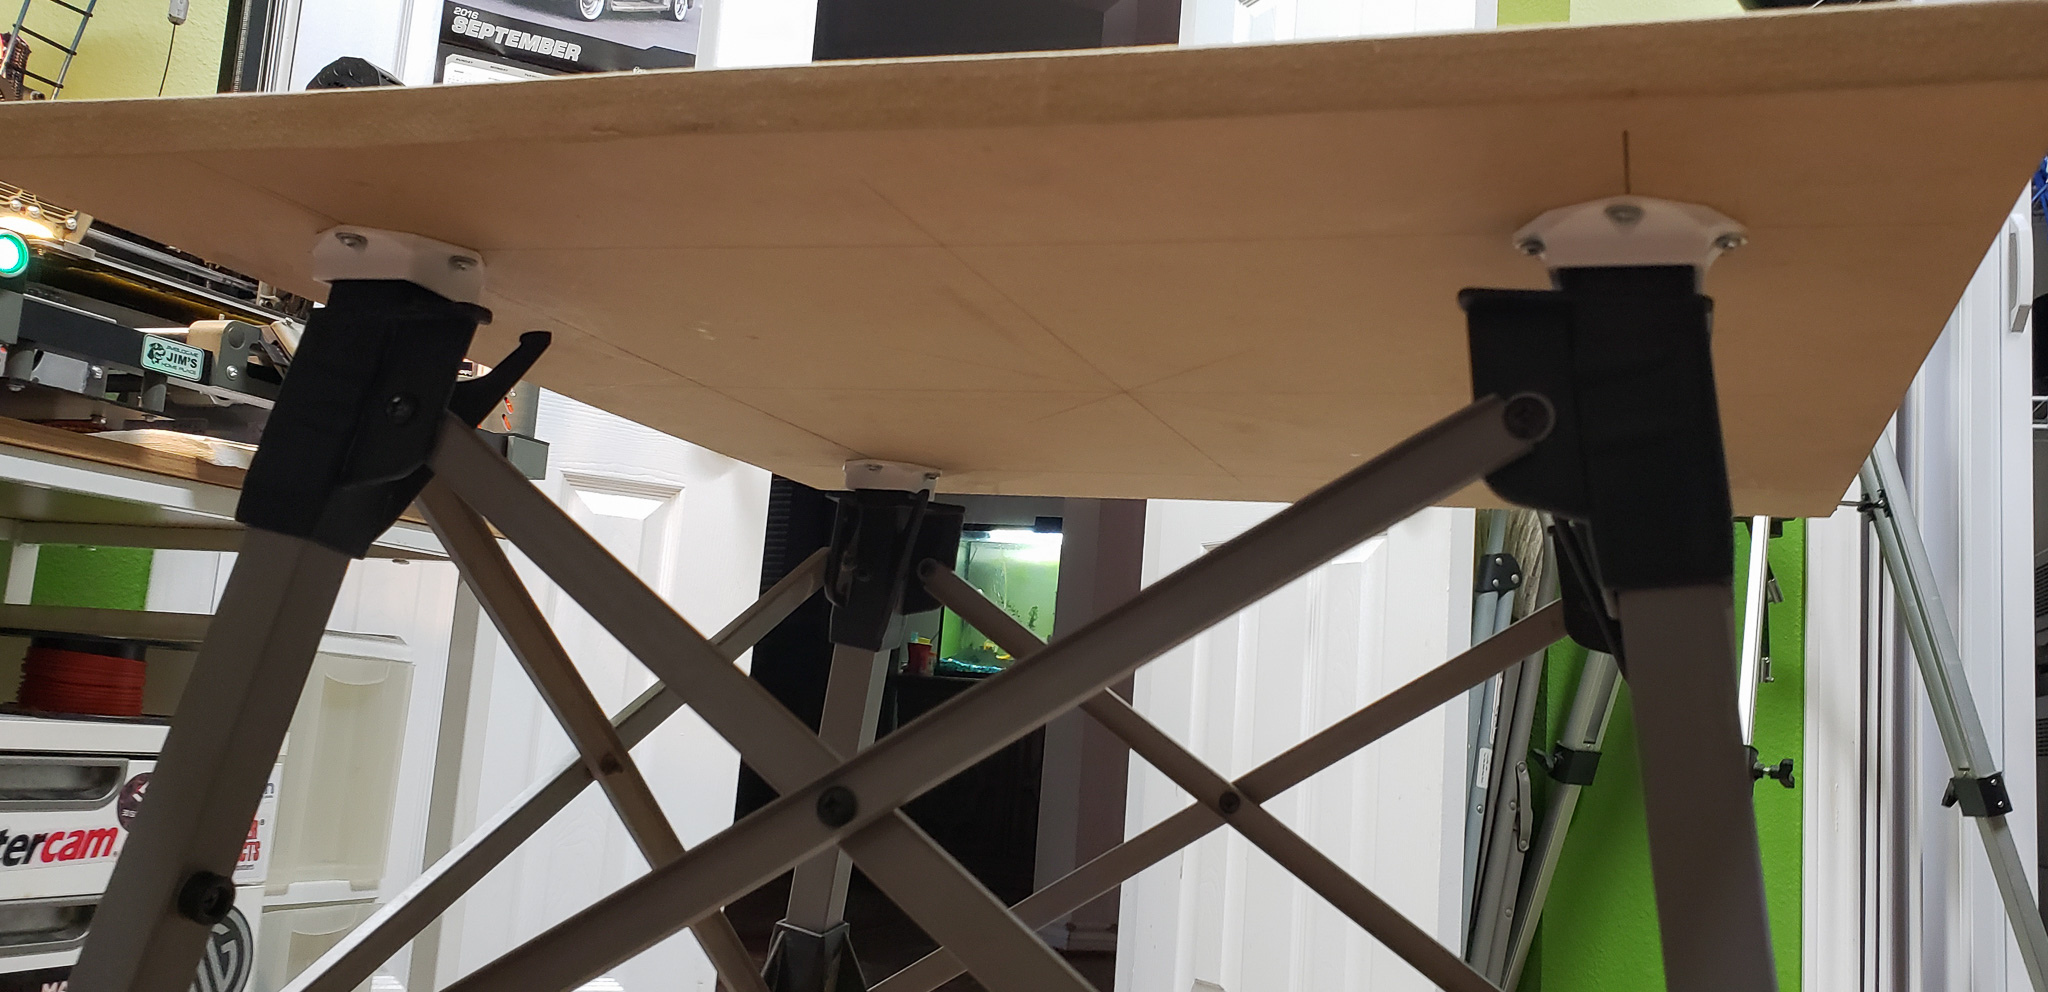
In essence, I simply replicated the same solution that was part of the original stand-saw setup. In that design, however, the cup-like supports were an integral part of the saw’s plastic body.
The surface finish for the tabletop didn’t require much thought either.
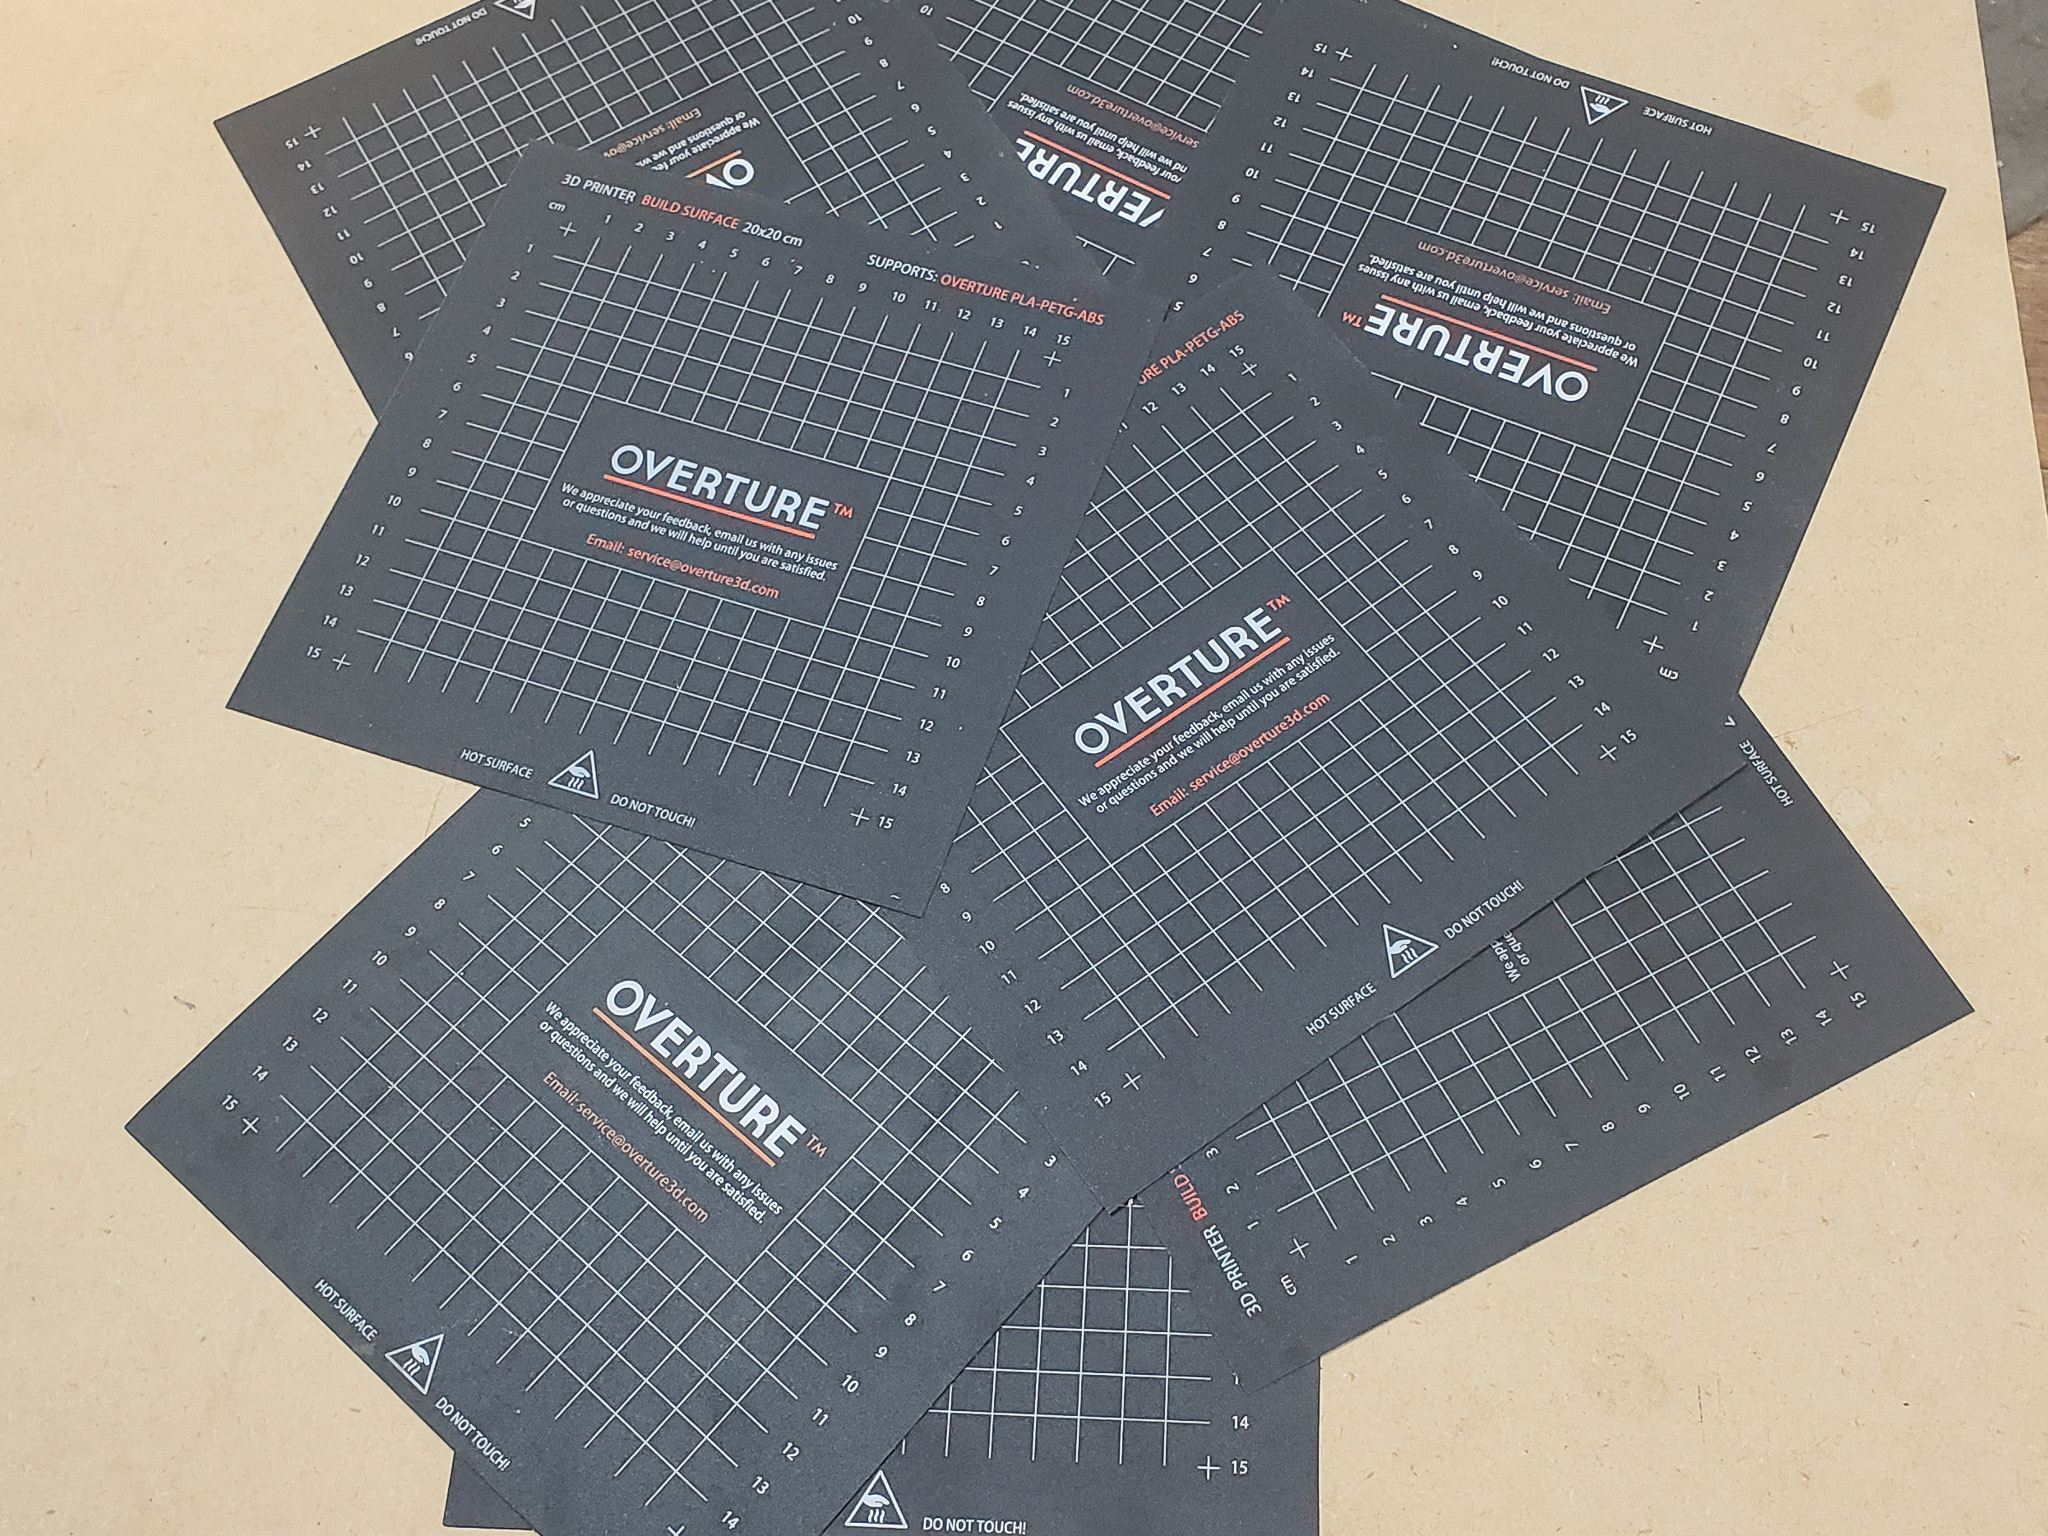
Over the years of 3D printing, I’ve accumulated quite a few brand-new “mats” from Overture, included as freebies in every box of filament I’ve purchased. These mats are probably great for printers, but the build plates on all of my printers have always been significantly larger than the sizes these mats are designed for. As a result, these “manufacturer bonuses” never found use for their intended purpose:
I tried repurposing them around the house as mouse pads. But honestly, how many mouse pads does one household need? Two or three at most. Plus, they’re not very good for that purpose — they’re too slippery. The mouse just glides over them with zero resistance, which I personally find uncomfortable.
Due to their intended use, these mats are incredibly durable, resistant not only to all kinds of mechanical wear but also to chemicals, oils, and temperatures up to 100–150 degrees Celsius.
Of course, one such mat wasn’t enough to cover the entire tabletop. But I’ve bought more than just one spool of filament in my lifetime. And with every box of filament came another mat. So, over time, a small stockpile of them accumulated:

All these mats are self-adhesive. I simply peeled off the backing and stuck them in place. Their dimensions fit perfectly to cover the table. I even considered cutting a couple of mats into strips to cover the edges of the tabletop. But in the end, I decided it would be unnecessary. After all, the edges of the tabletop would already be covered entirely by mounts for the tools and accessories.
Mounts for tools, in this case, aren’t designed for long-term storage or organization. Instead, they form a perimeter of randomly sized holes around the table, where you can quickly stash a screwdriver or pliers that you’re actively using at the moment. This keeps the tools off the work area, preventing them from getting in the way.
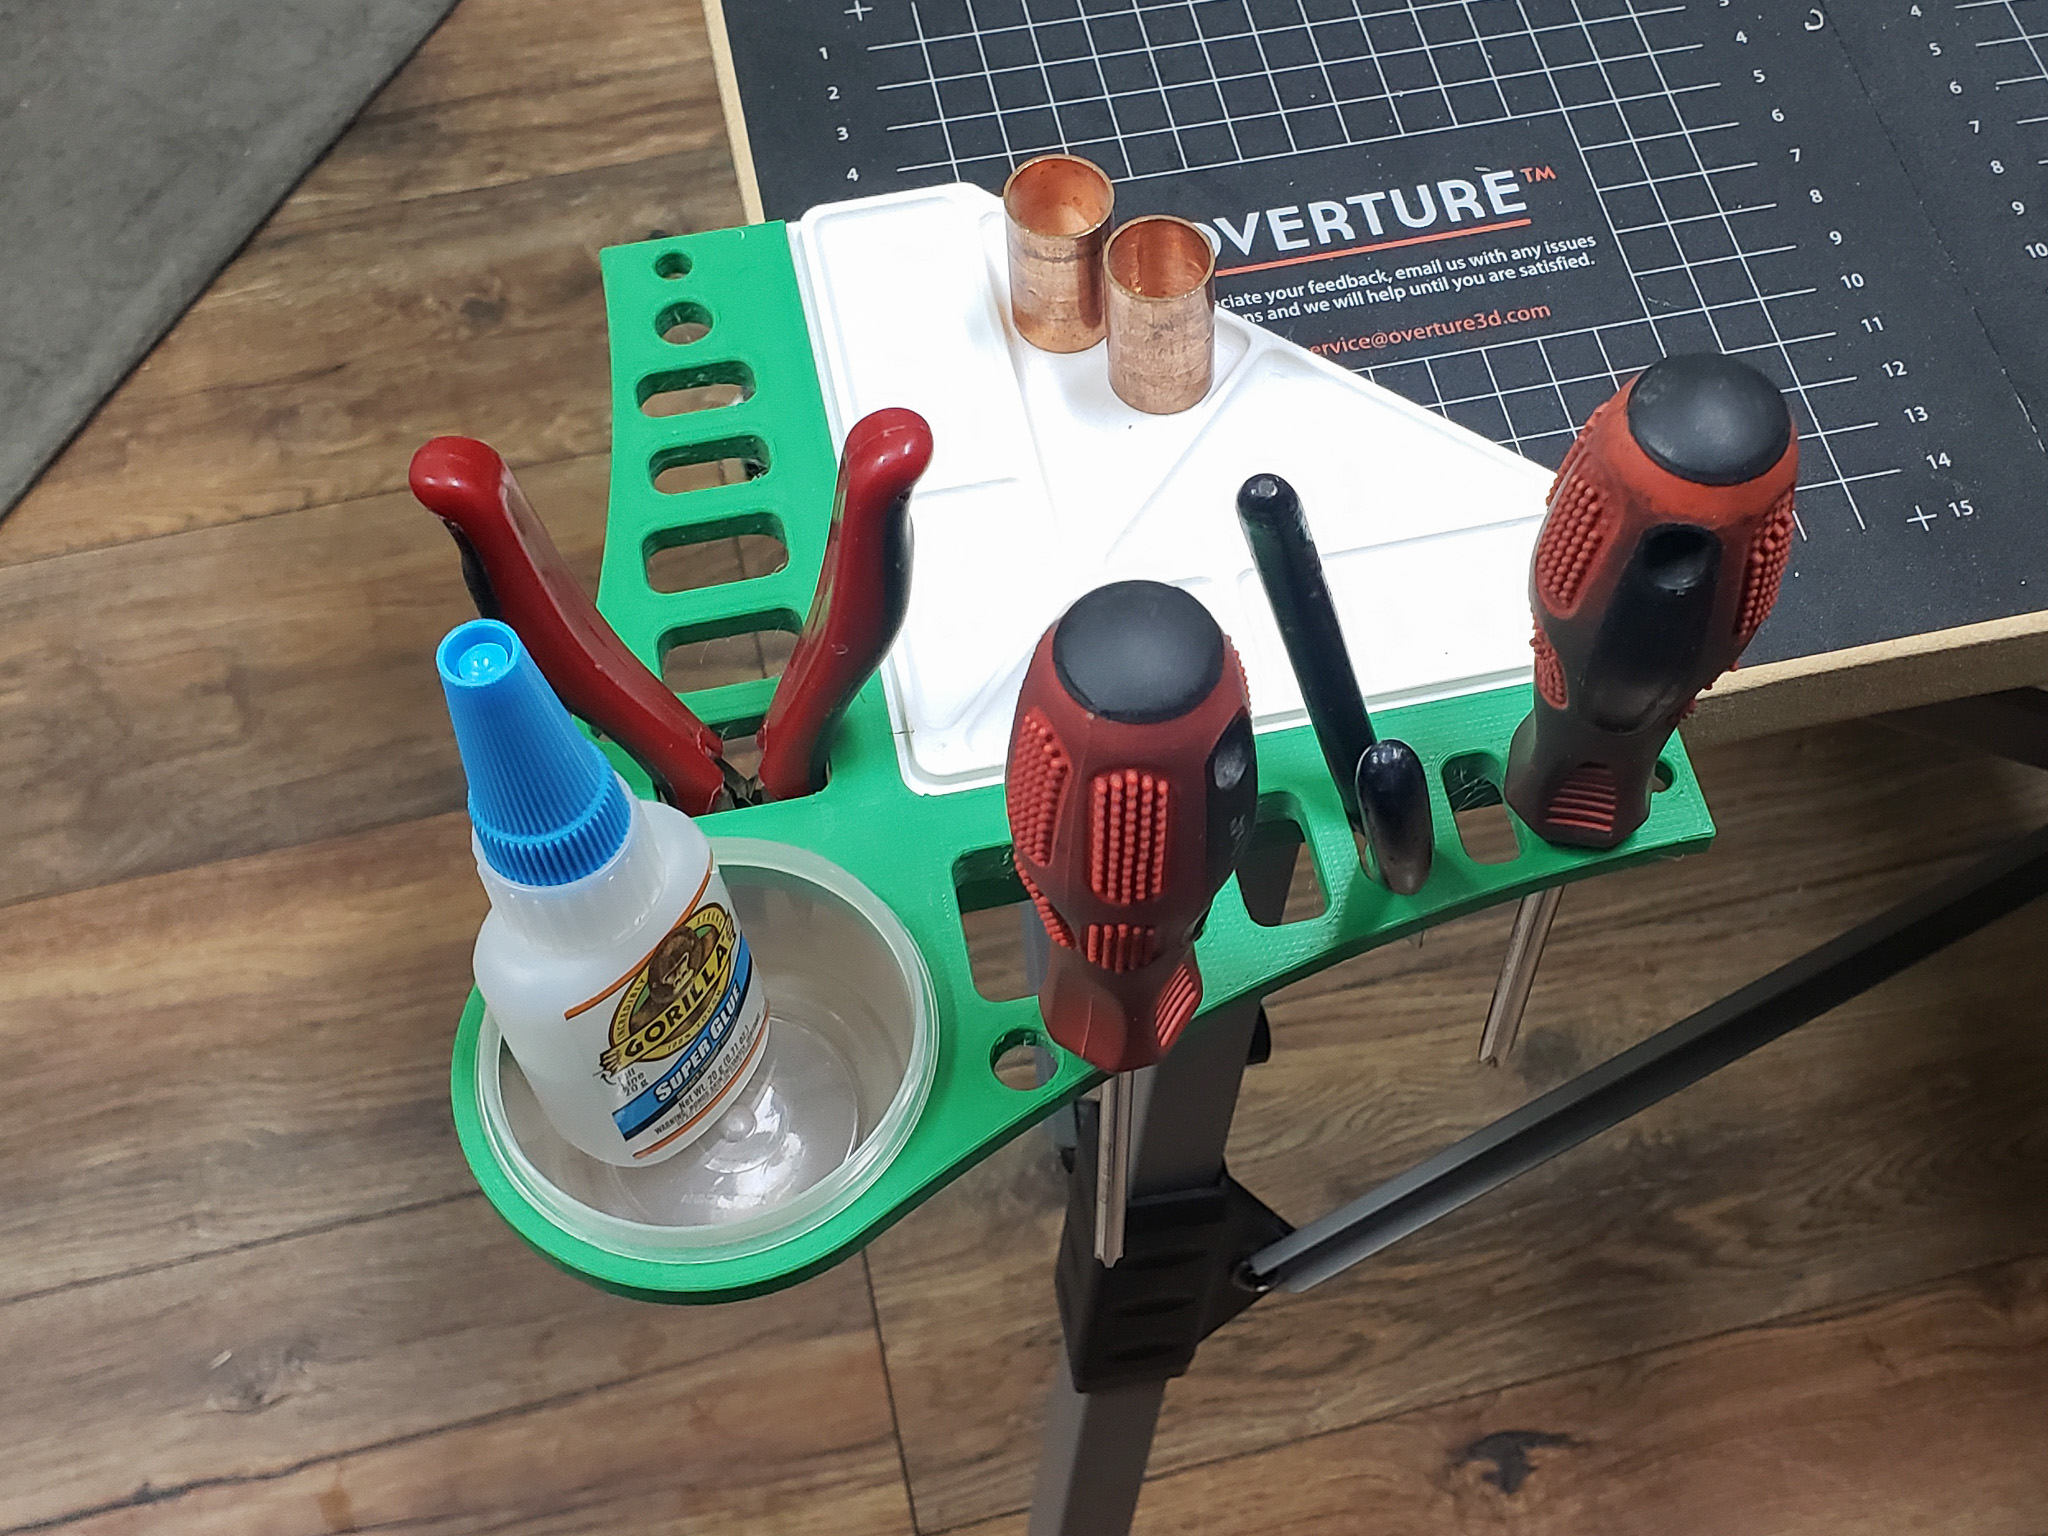
Similarly, and for the same purpose, there’s a series of compartments for small loose items around the table’s perimeter. These aren’t designated for anything specific — screws, small drill bits, heat-shrink tubes, soldering iron tips, socket wrenches, pencils, and so on. Essentially, anything you need to keep within reach at a given moment, without wasting time searching through a general pile of clutter on the table.
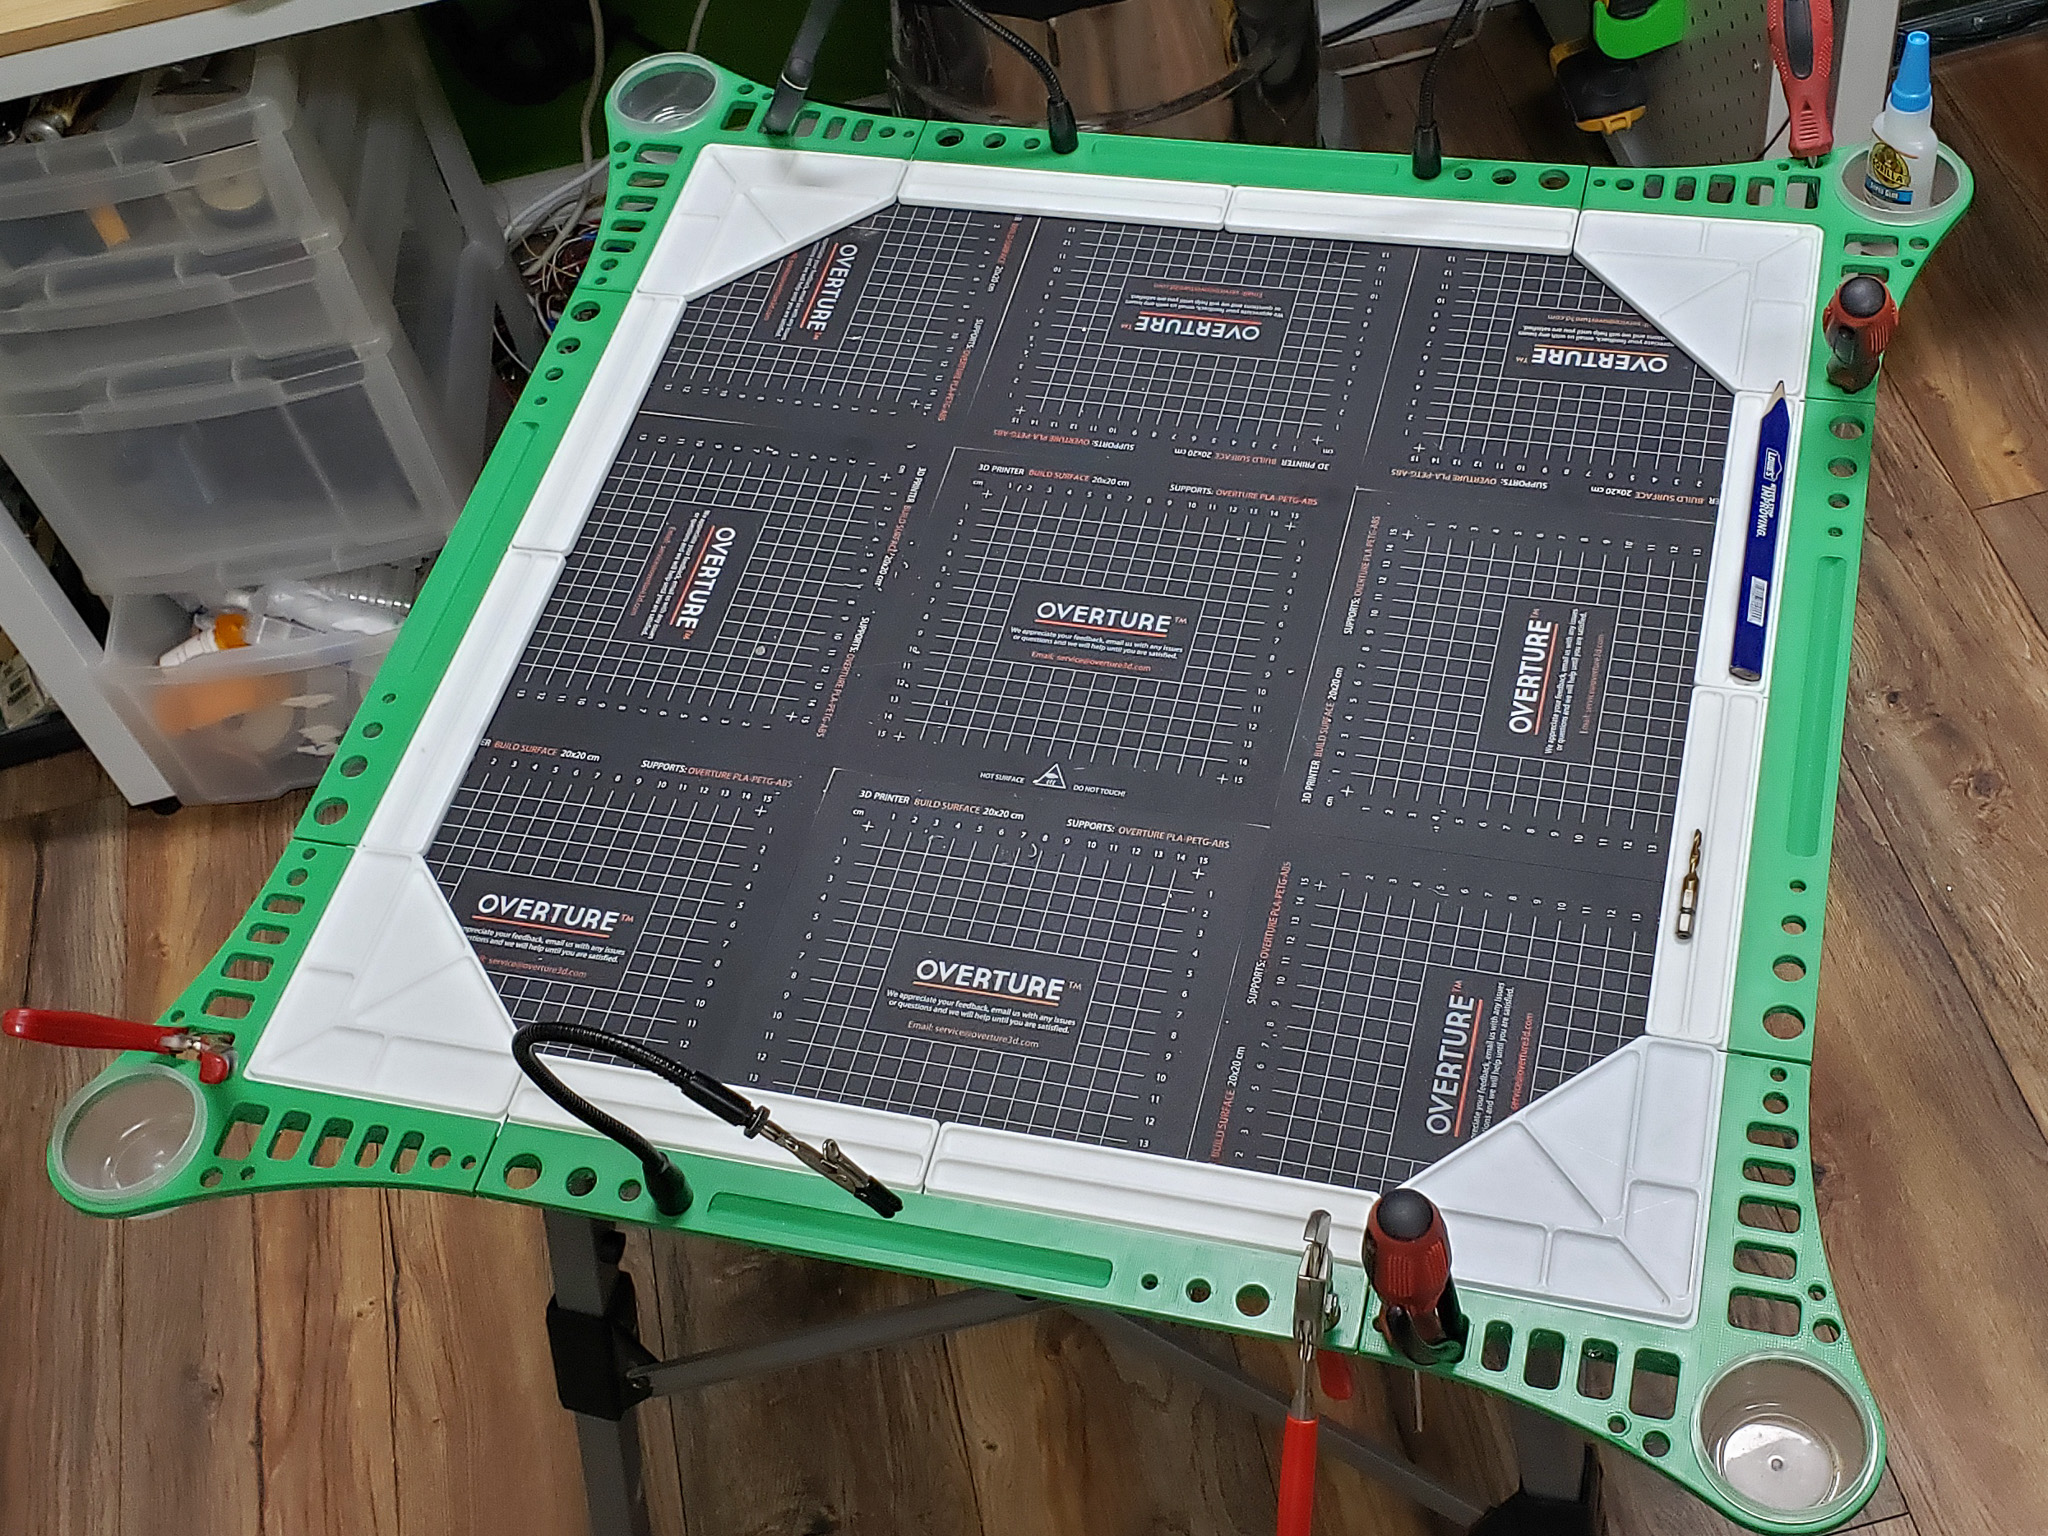
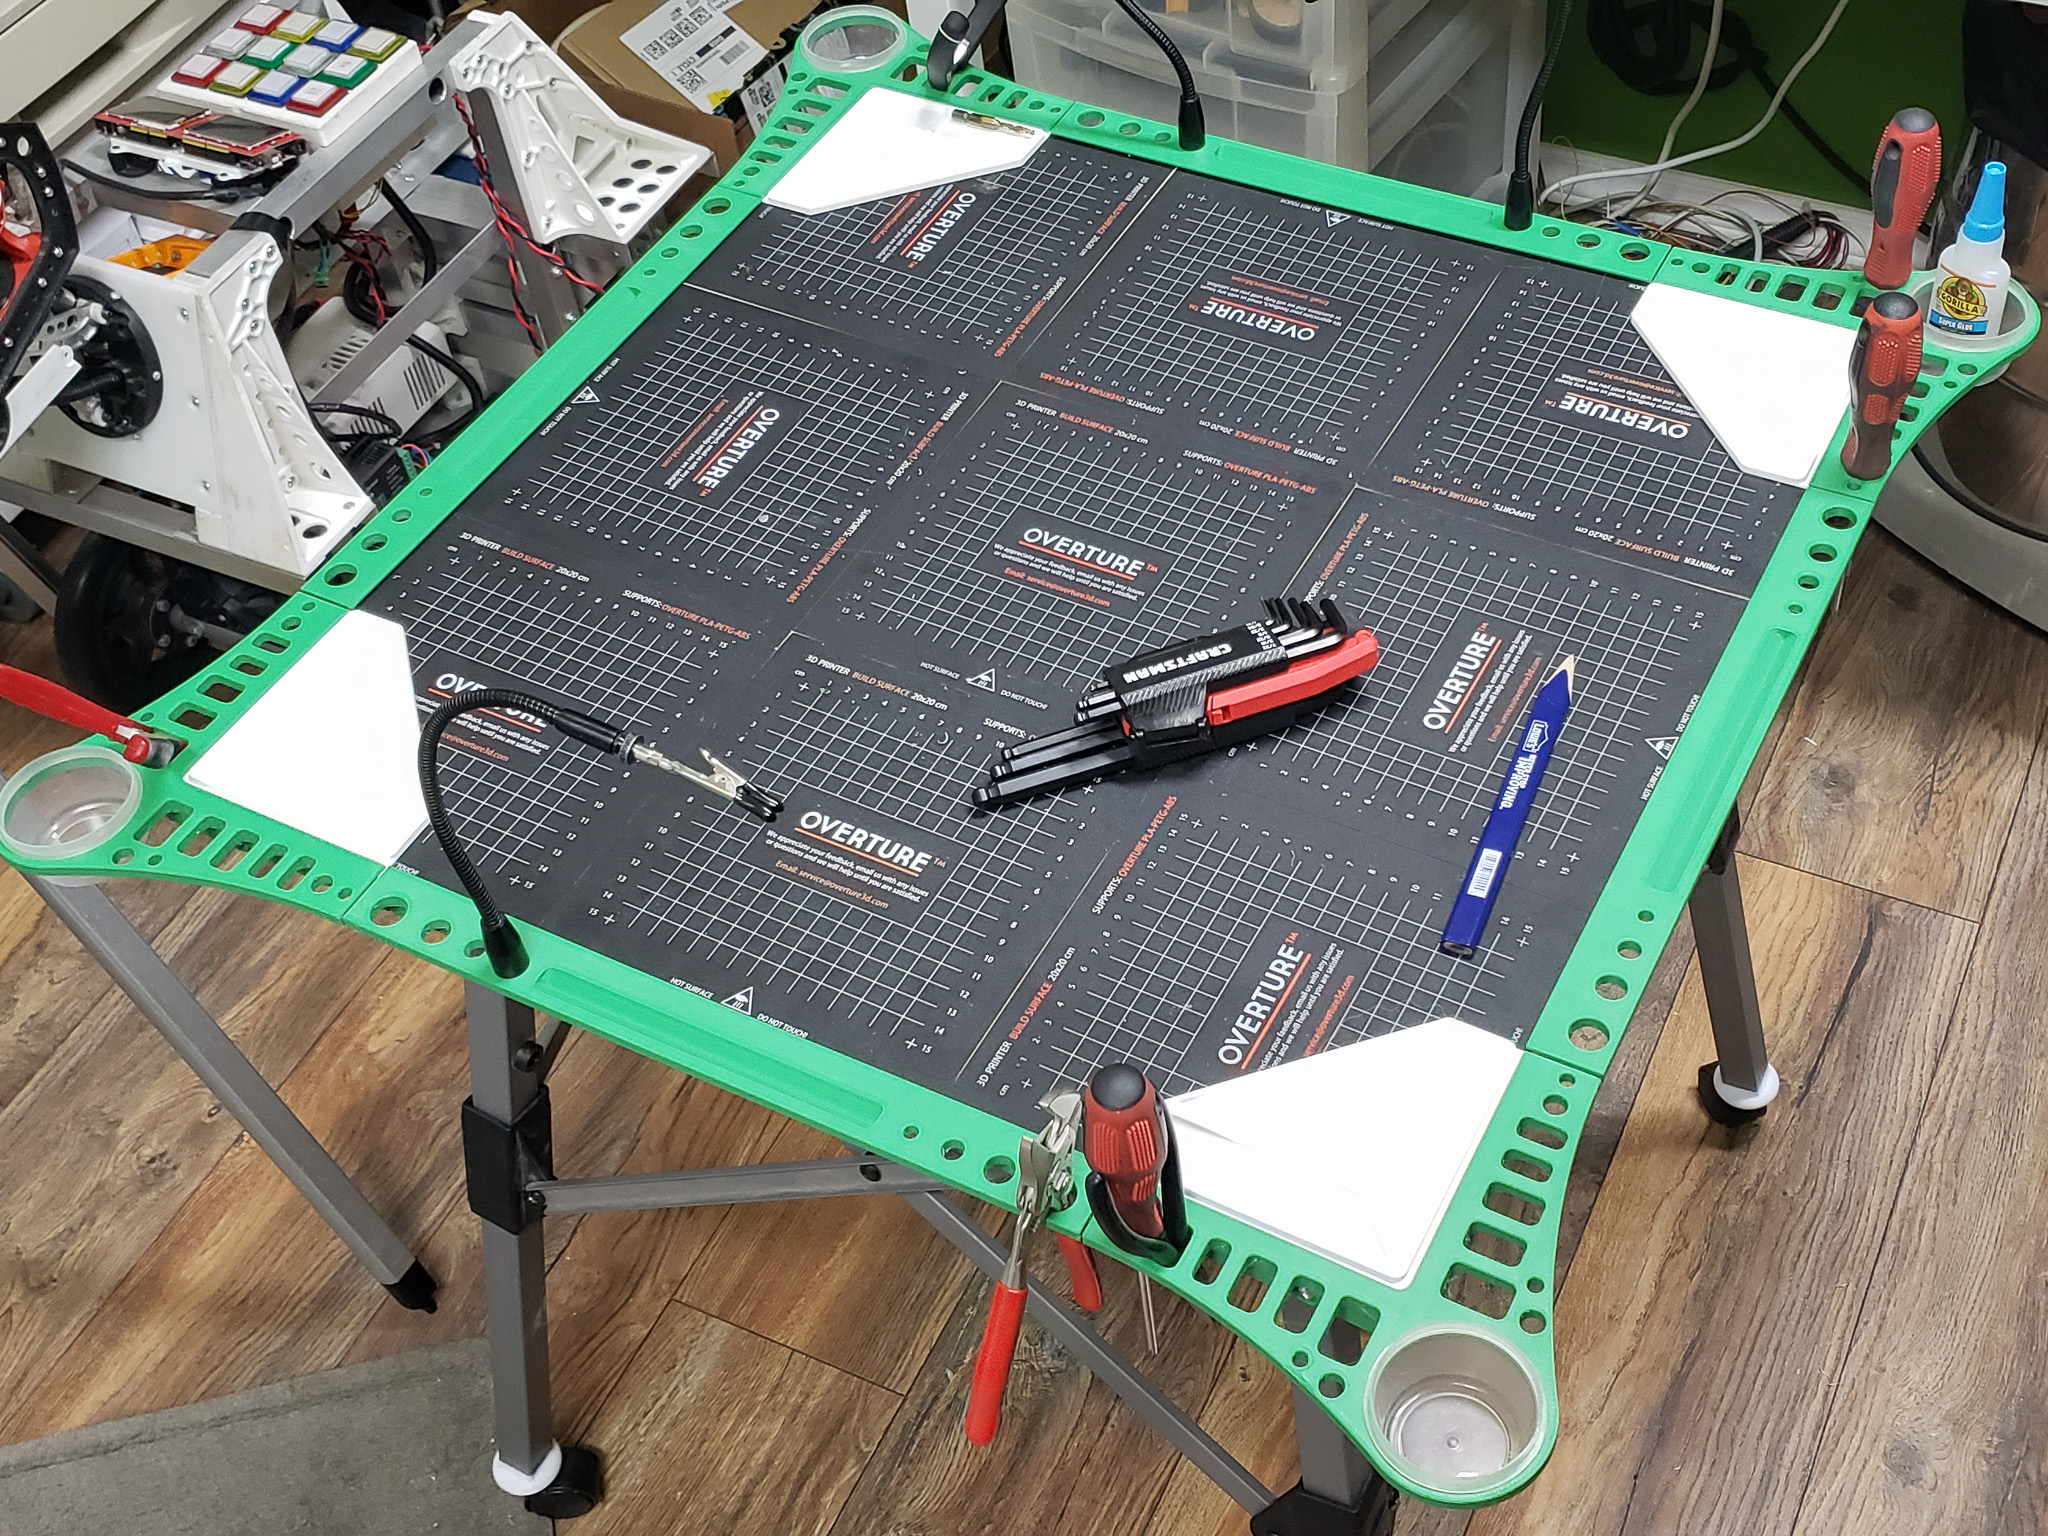
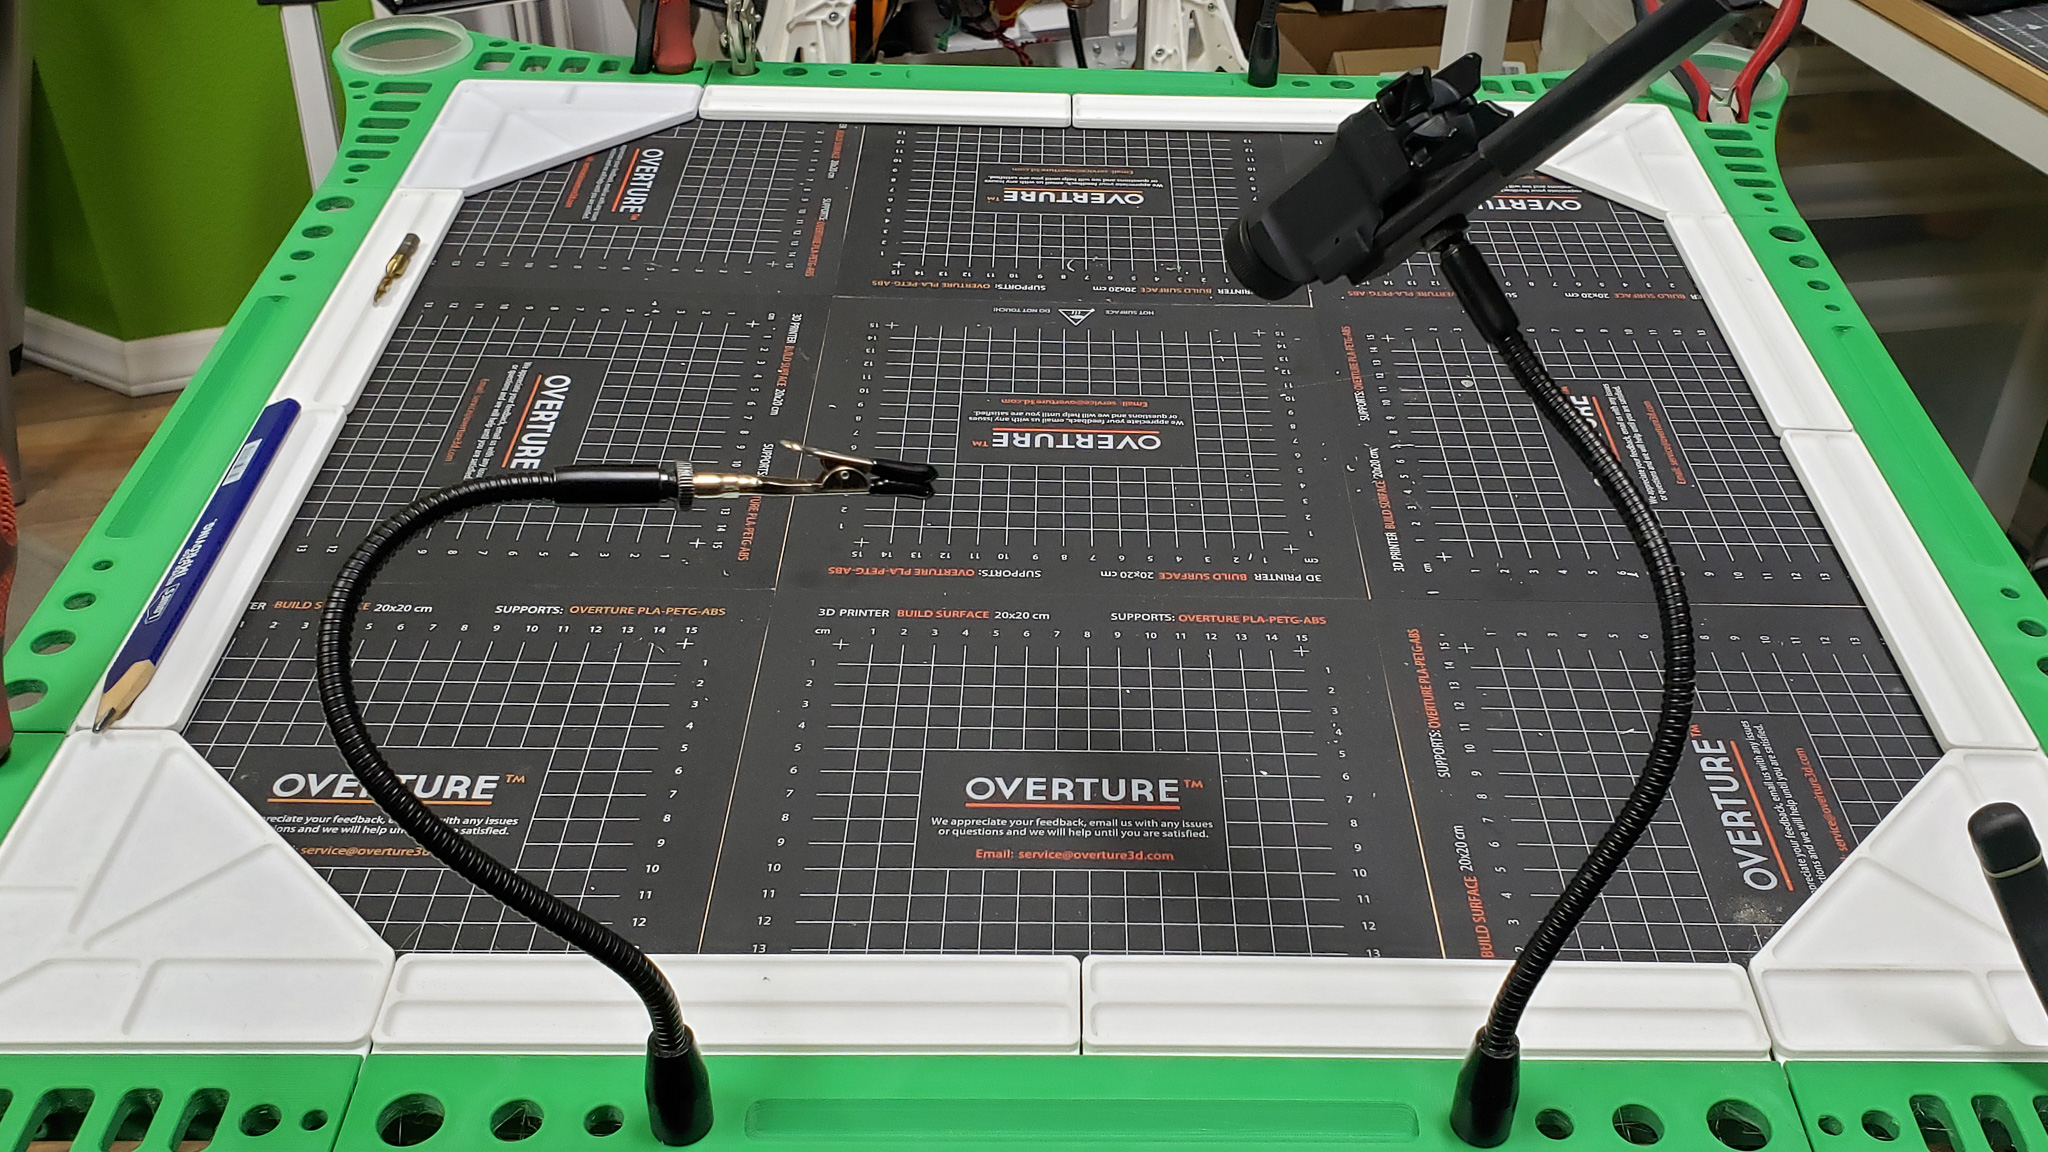
This “universal” setup also allows for mounting various auxiliary tools, like a “third hand” or a flashlight for illuminating hard-to-reach areas.
The white trays in the perimeter are not fixed in place. They simply have a kind of wide edge on one side that hooks onto the perimeter. This way, you can move a pile of screws from one side of the table to another without having to pour them into a different tray each time.
At the moment, both the fixed sections of the tabletop perimeter and the removable ones are identical clones of a single design. They are all exactly the same. However, in the future, if needed, more specialized perimeter elements could be printed — for example, mounts for a screwdriver or a Dremel. That said, I mainly use those tools at workbenches. They aren’t particularly necessary in the “clean” assembly zone since the parts that end up there have already been drilled or Dremel-ed as needed.
In any case, the potential for such customization exists and could be utilized if the need arises. For now, the plan is to use the assembly table in its current configuration for a while. Over time, it will naturally become clear what additional accessories it might require.
The Outcome of the Project:

Let me emphasize once again that this is not a workbench or a regular desk. It’s an assembly platform for large-scale projects — a sort of “sterile” zone for final assembly. All project components are cut, drilled, and processed on proper workbenches and desks. Here, they are only brought together to be assembled into a finished product.
And, it seems, the table has already proven its usefulness as a “clean” assembly area, even during its early, makeshift phase — particularly throughout the printer project. So, I have no doubt it will continue to be just as helpful now in its fully developed, final form. Whether any further modifications or transformations will follow remains to be seen.
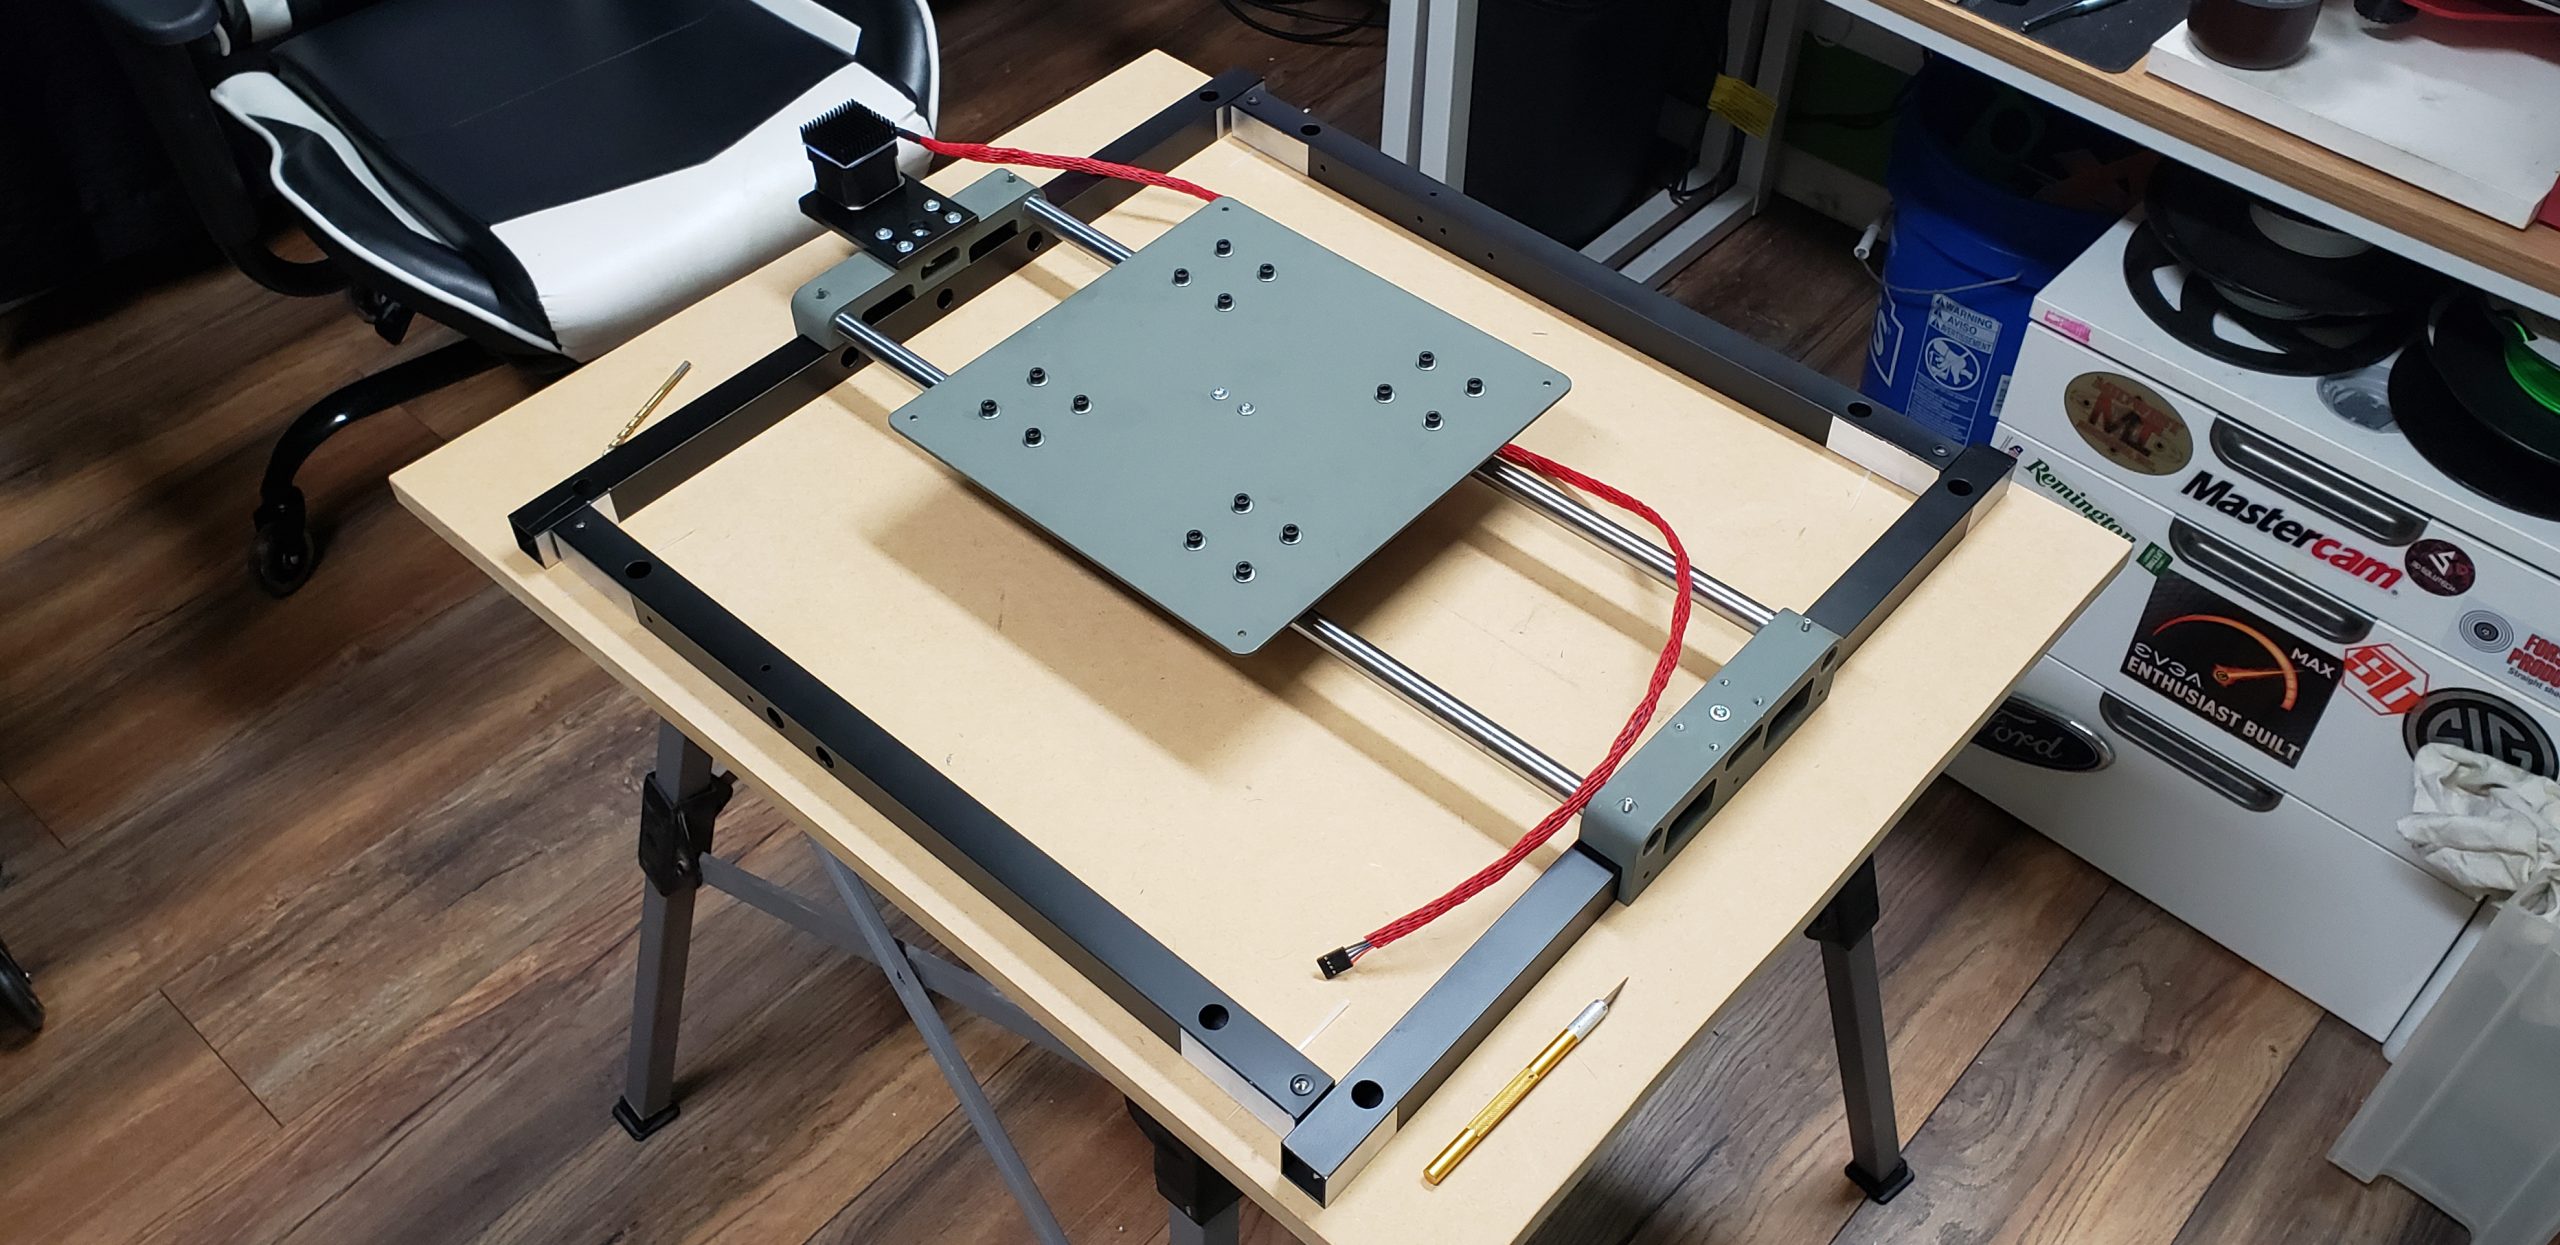
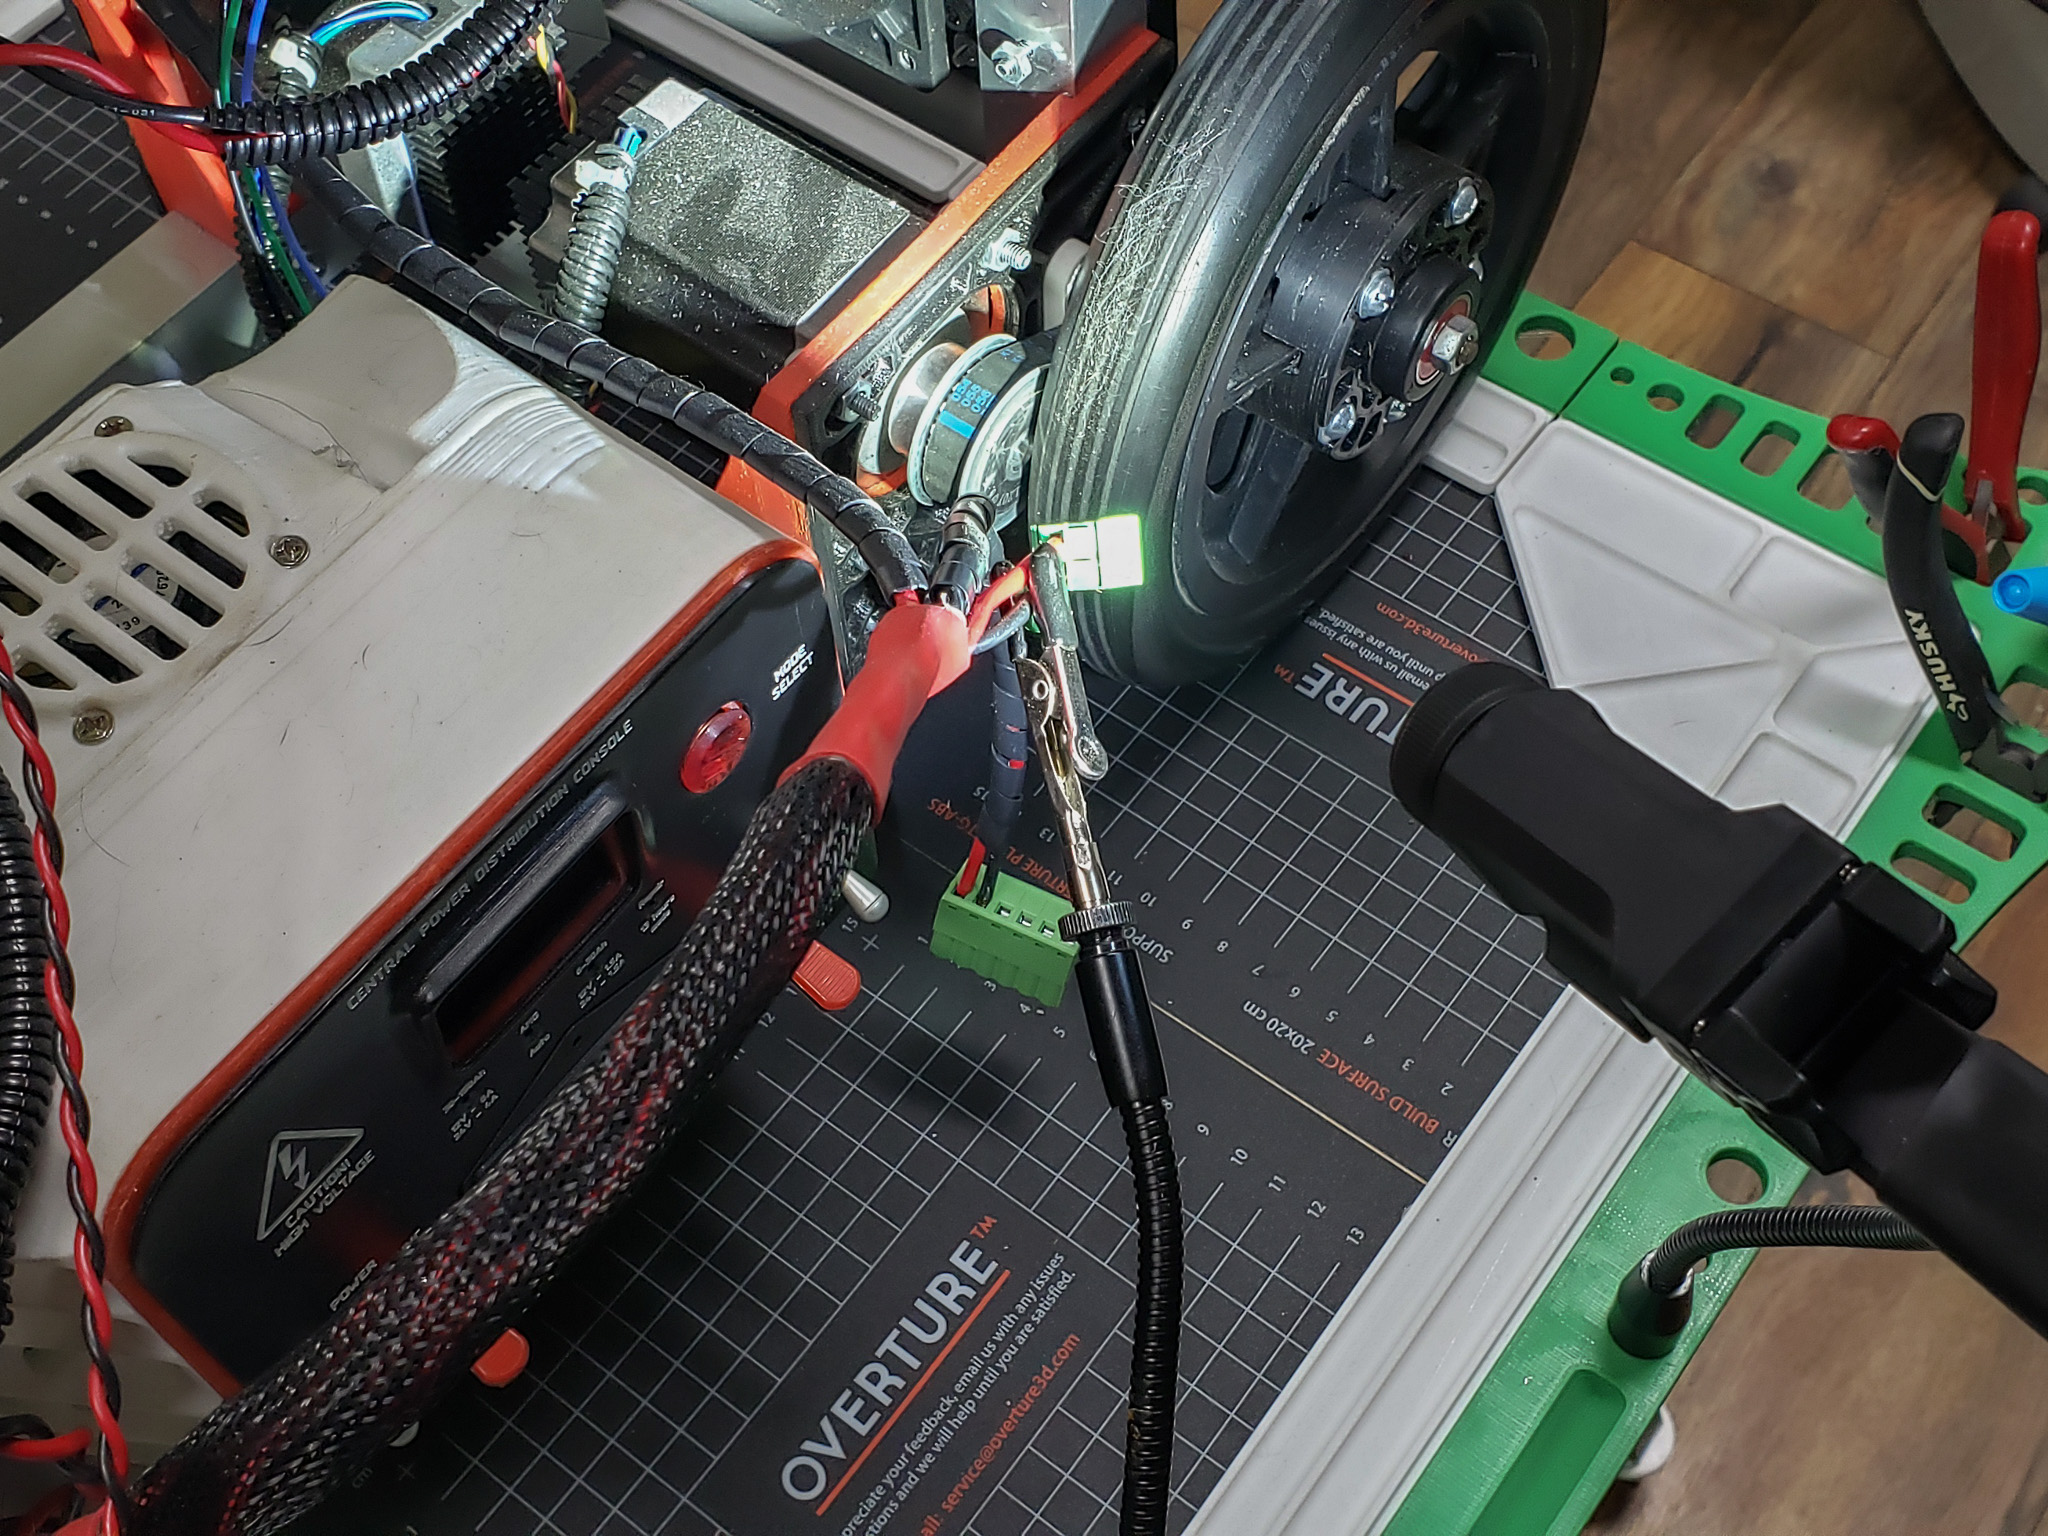
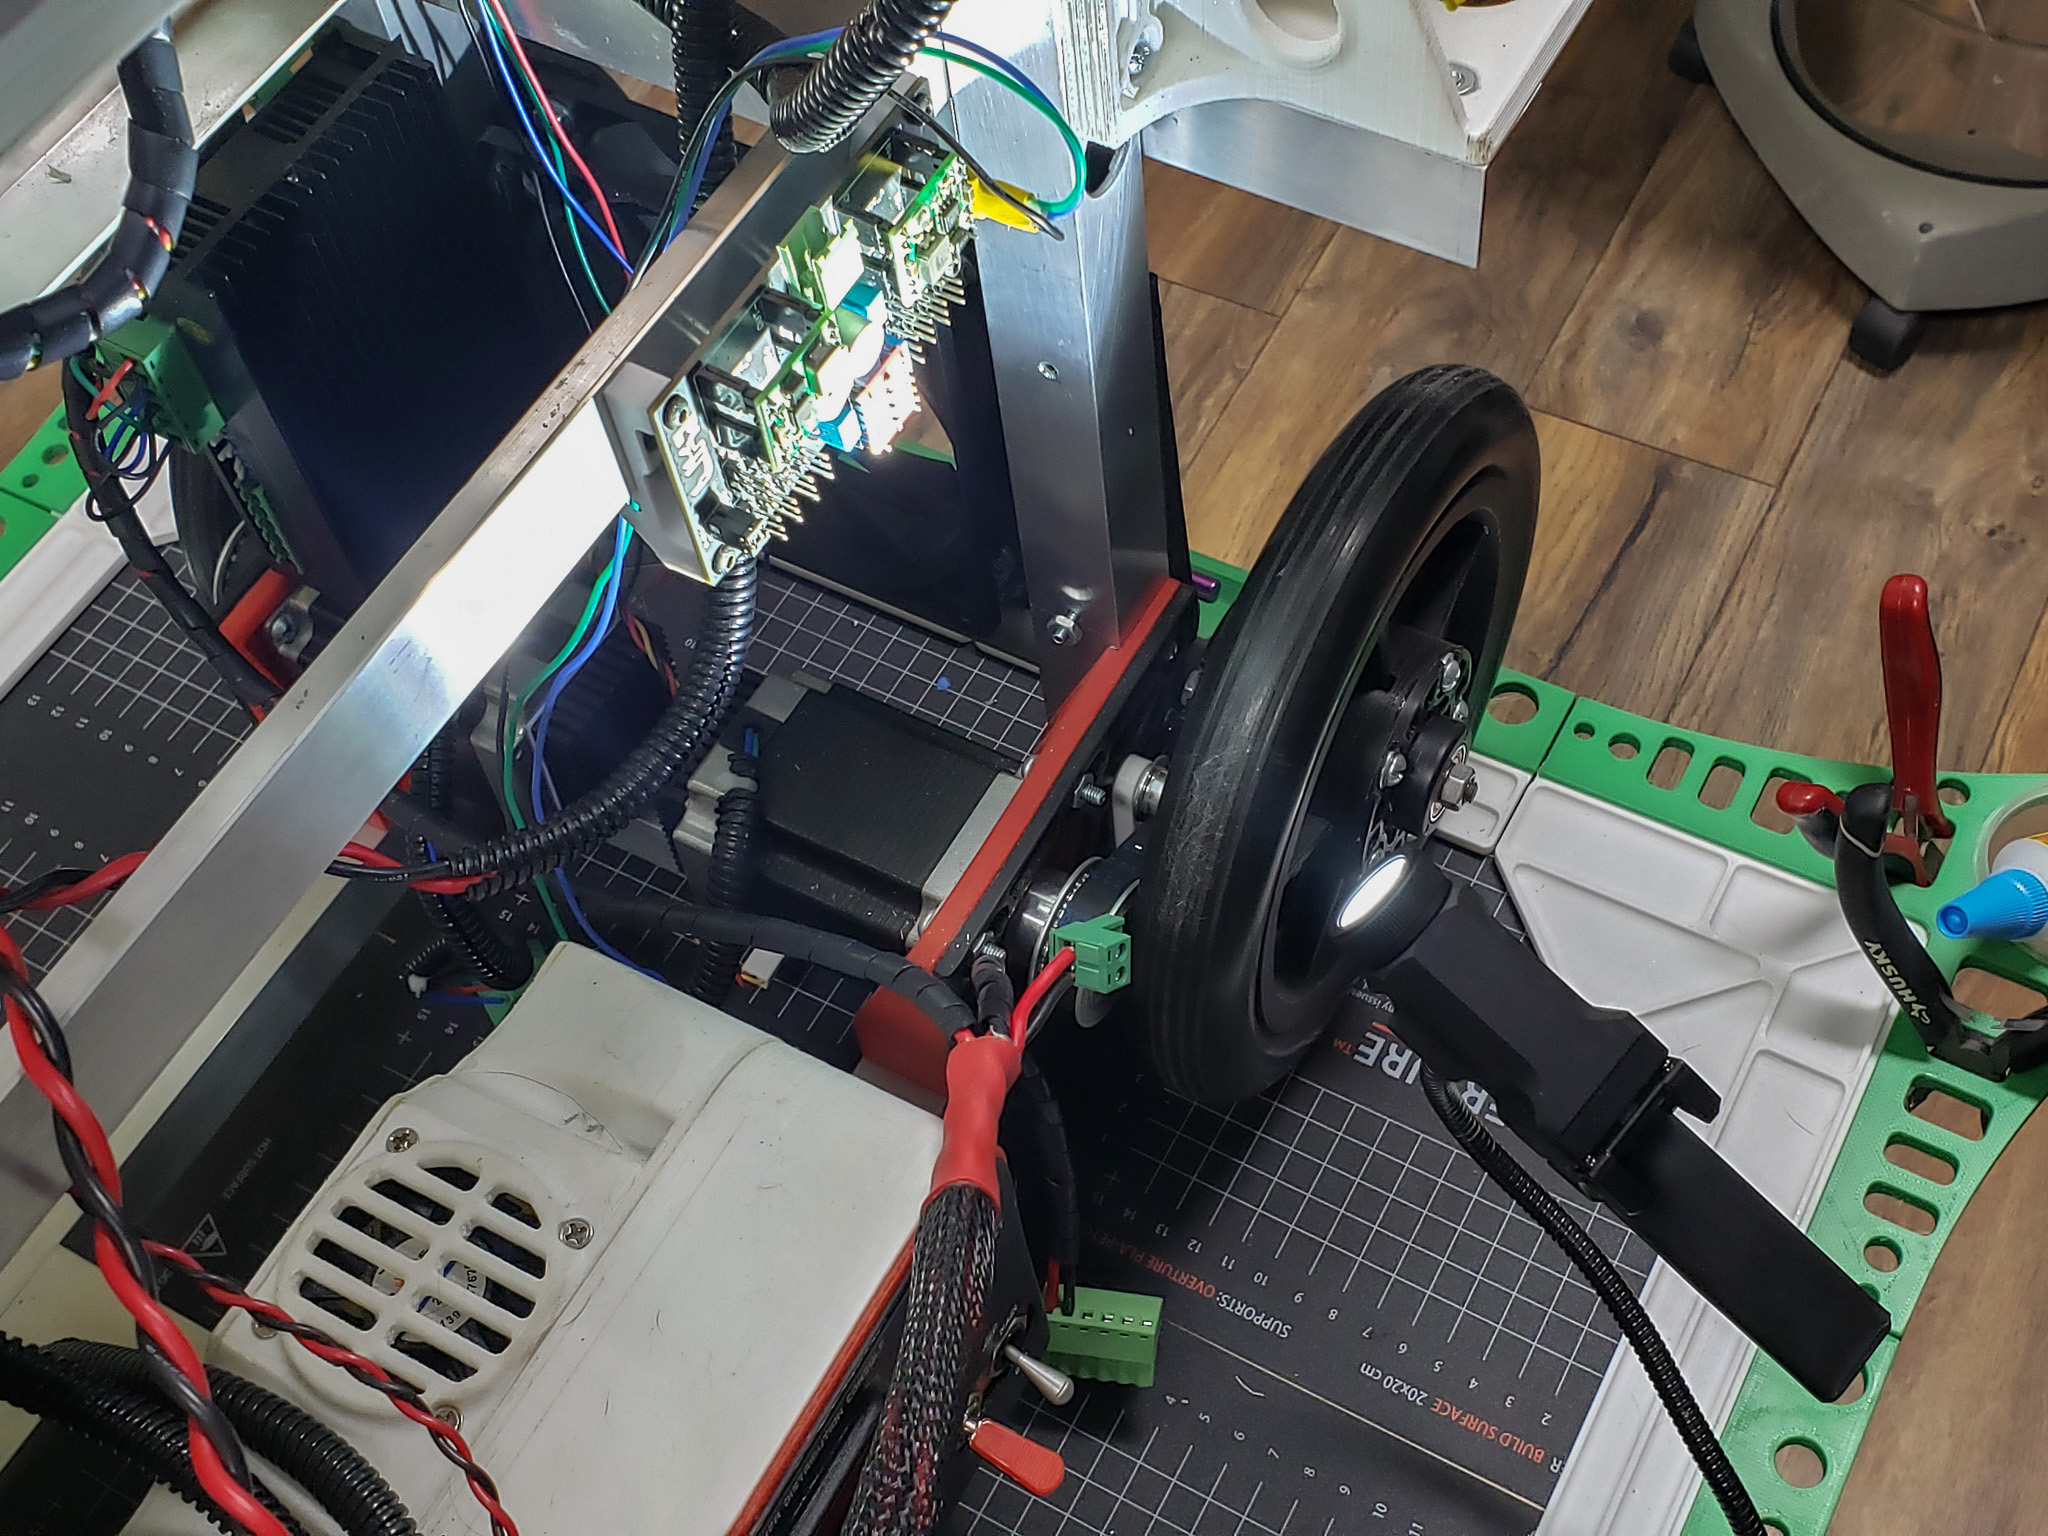
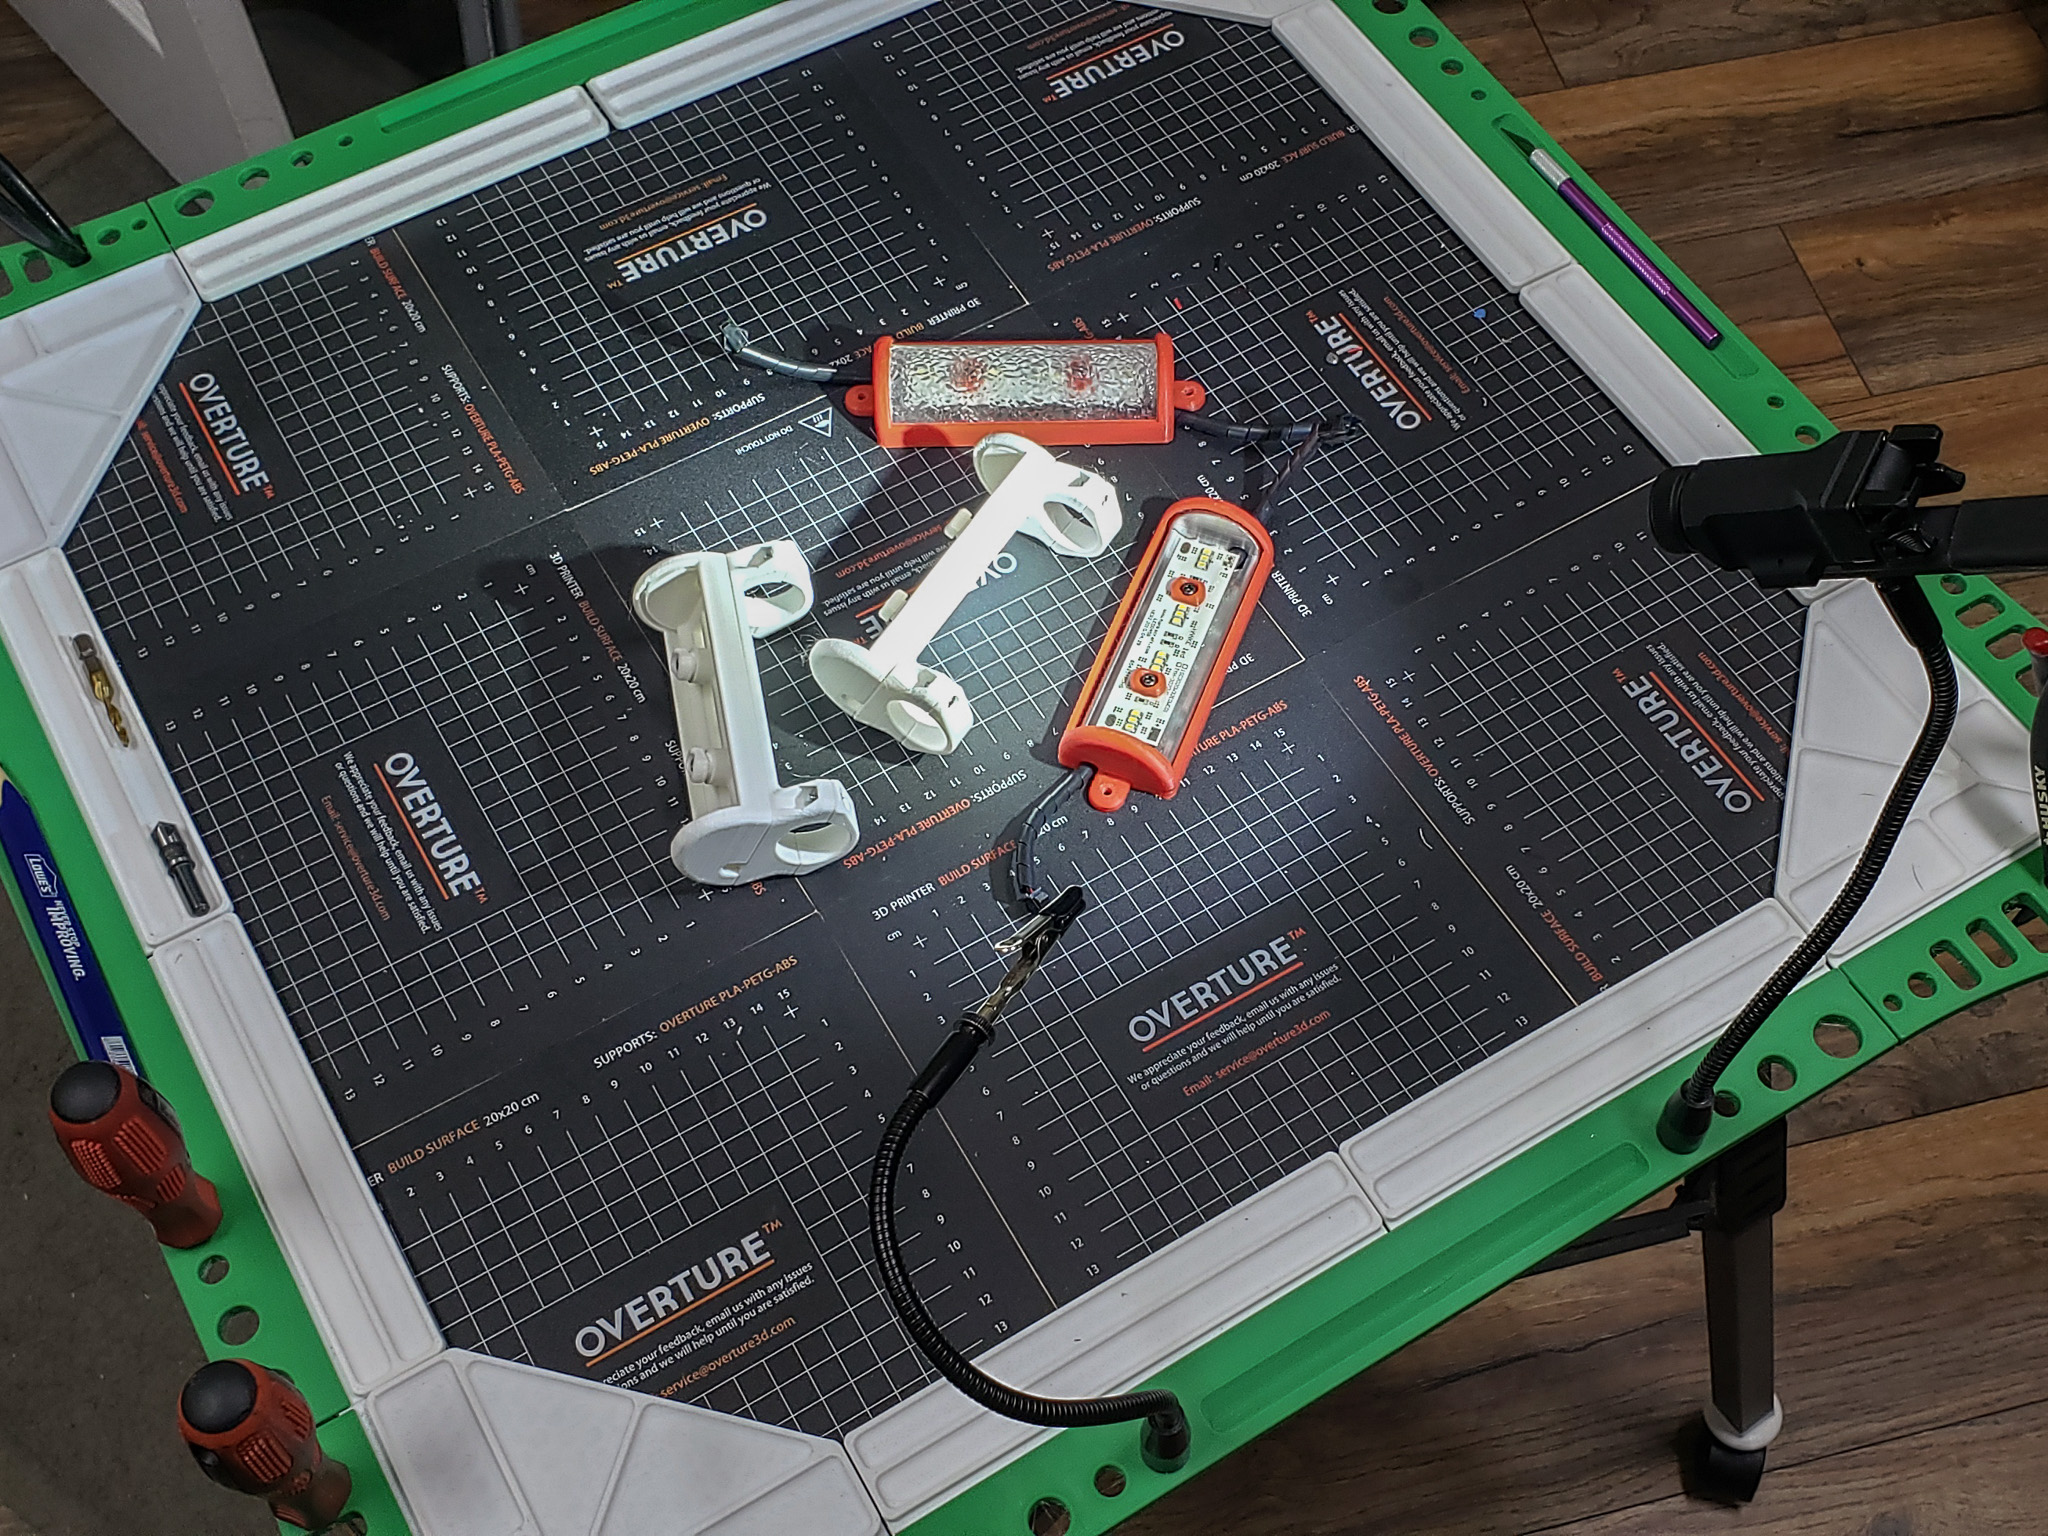
The new assembly table is already hosting old-yet-new parts for the next long-term project, which has finally come together, piece by piece, and is now ready for full assembly and completion at last:
That’s where things stand…