
Breaking tradition, this project starts with a relatively brief foreword — and an advertisement. After all, if we’re discarding traditions, why not go all in?
In essence, everything that needs to be said about this project can be summed up in a single phrase: “The Black Widow is done.” My primary workhorse printer has officially reached the end of its operational life. It’s not just the components that are worn out — motors, belts, and lead screws — it’s the very foundation, the frame itself, that’s been run into the ground. The print bed rollers have practically chewed it up.
A couple of months ago, I was ready to revisit my mechanical dog project. However, I quickly realized that without the ability to produce high-quality, complex parts, continuing with the robot was futile. At this stage of development, the project demands significant investments. And honestly, I’d rather not see expensive, precise components mounted on warped, delaminating panels with the excuse, “I’ll fix it properly… someday.”
Sure, you can repair anything — including a 3D printer. Rollers, belts, lead screws, even the entire frame—everything can be replaced. It’s not a monumental task, especially for an avid DIY enthusiast. In fact, I’ve performed all these repairs on the Widow multiple times over the years.
But there comes a time when you have to acknowledge that a piece of equipment has reached the end of its service life. Continuing to push it becomes counterproductive and, frankly, unsatisfying. At this point, it’s simpler and often cheaper to build a new printer from scratch—or, dare I say, buy one.
Buy one! Ha! Good joke… 🙂
And so begins a new project with the provisional name “Marsh Turret.” Let’s go!
The printer will be made entirely of metal. No plastic in the load-bearing parts of the structure. No T-profiles made of “Chinese foil.” No “standard mounts” or “modular assembly designs.” And absolutely no rubber wheels or rollers! Let the device be heavier than Cannibal Corpse in their prime — I’ll manage. What matters is that it will be a “heavy duty” printer. A true workhorse. Not a frivolous English racehorse for show, but a reliable draft Percheron built for long and grueling tasks.
Allow me to introduce the concept of a premium-class 3D printer, the “Marsh Turret,” designed and built from scratch by the lead (and sole) engineer of Texas Shooters Supply (and yes, that was the promised advertisement):
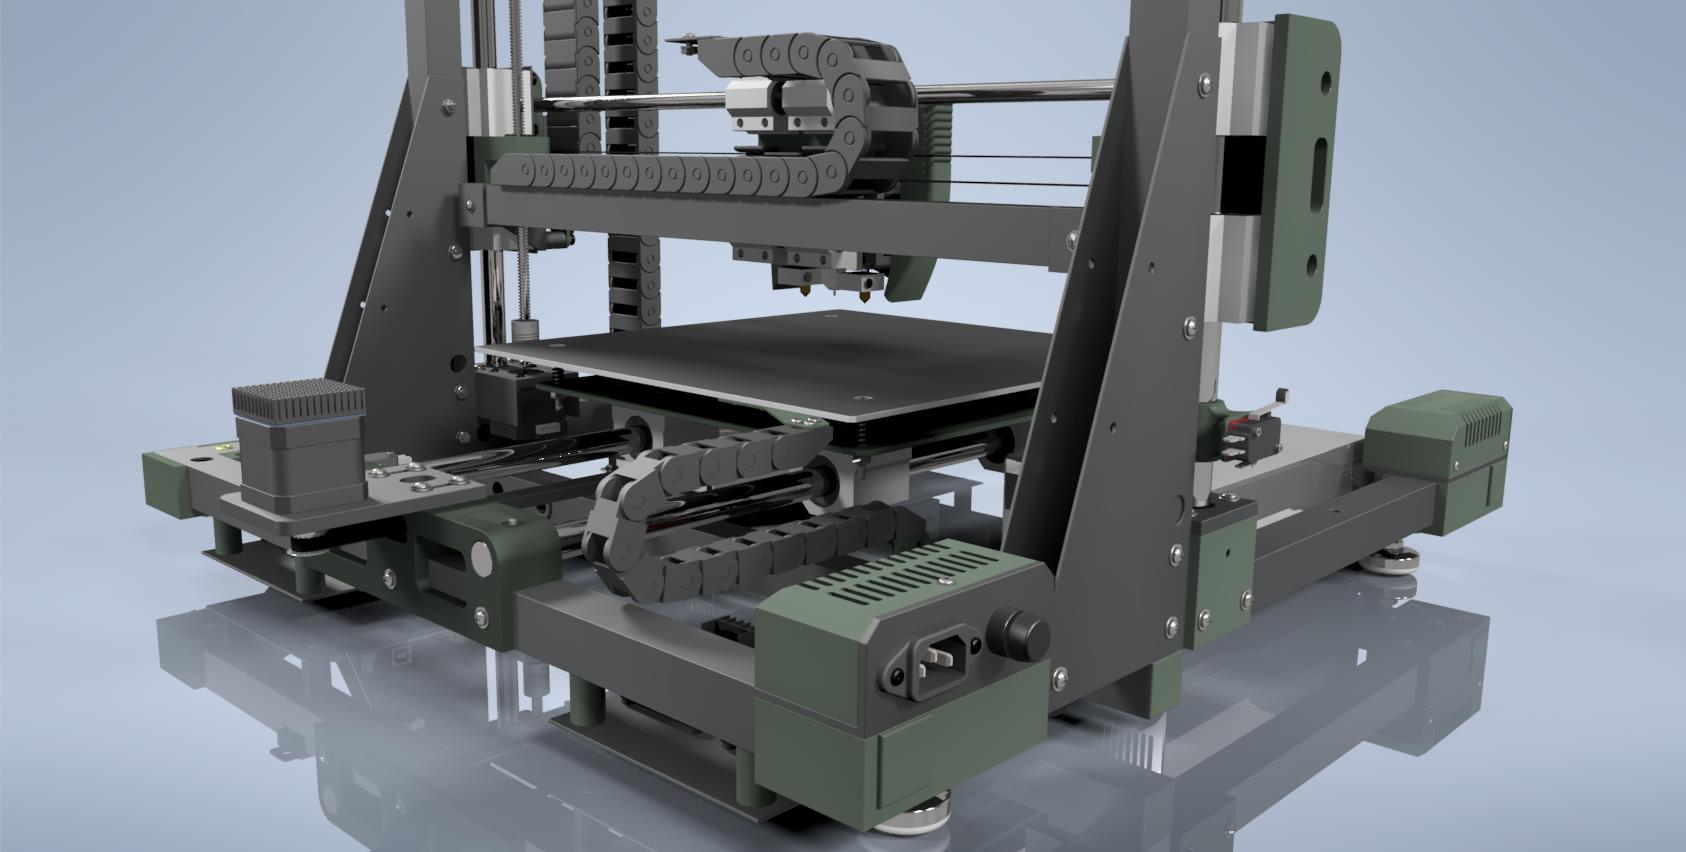
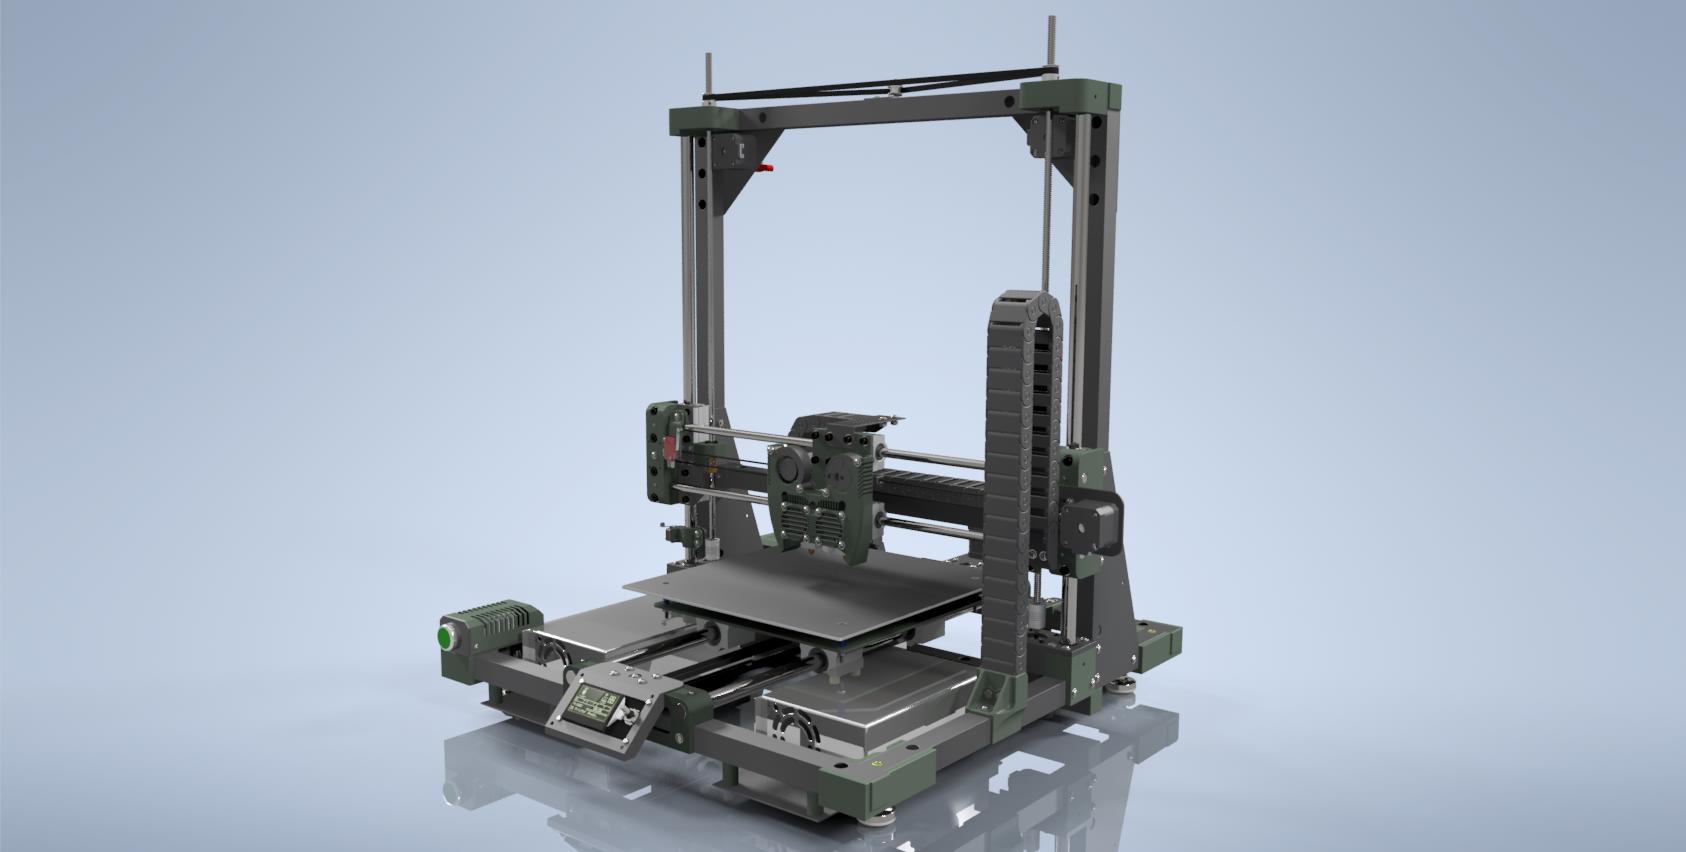
In fact, it’s no longer just a concept. The printer is 99% complete in metal and already capable of producing parts of quite decent quality. It’s just that part of this article was written back when it really was nothing more than a bare concept and some computer graphics.
Key Features of the Marsh Turret:
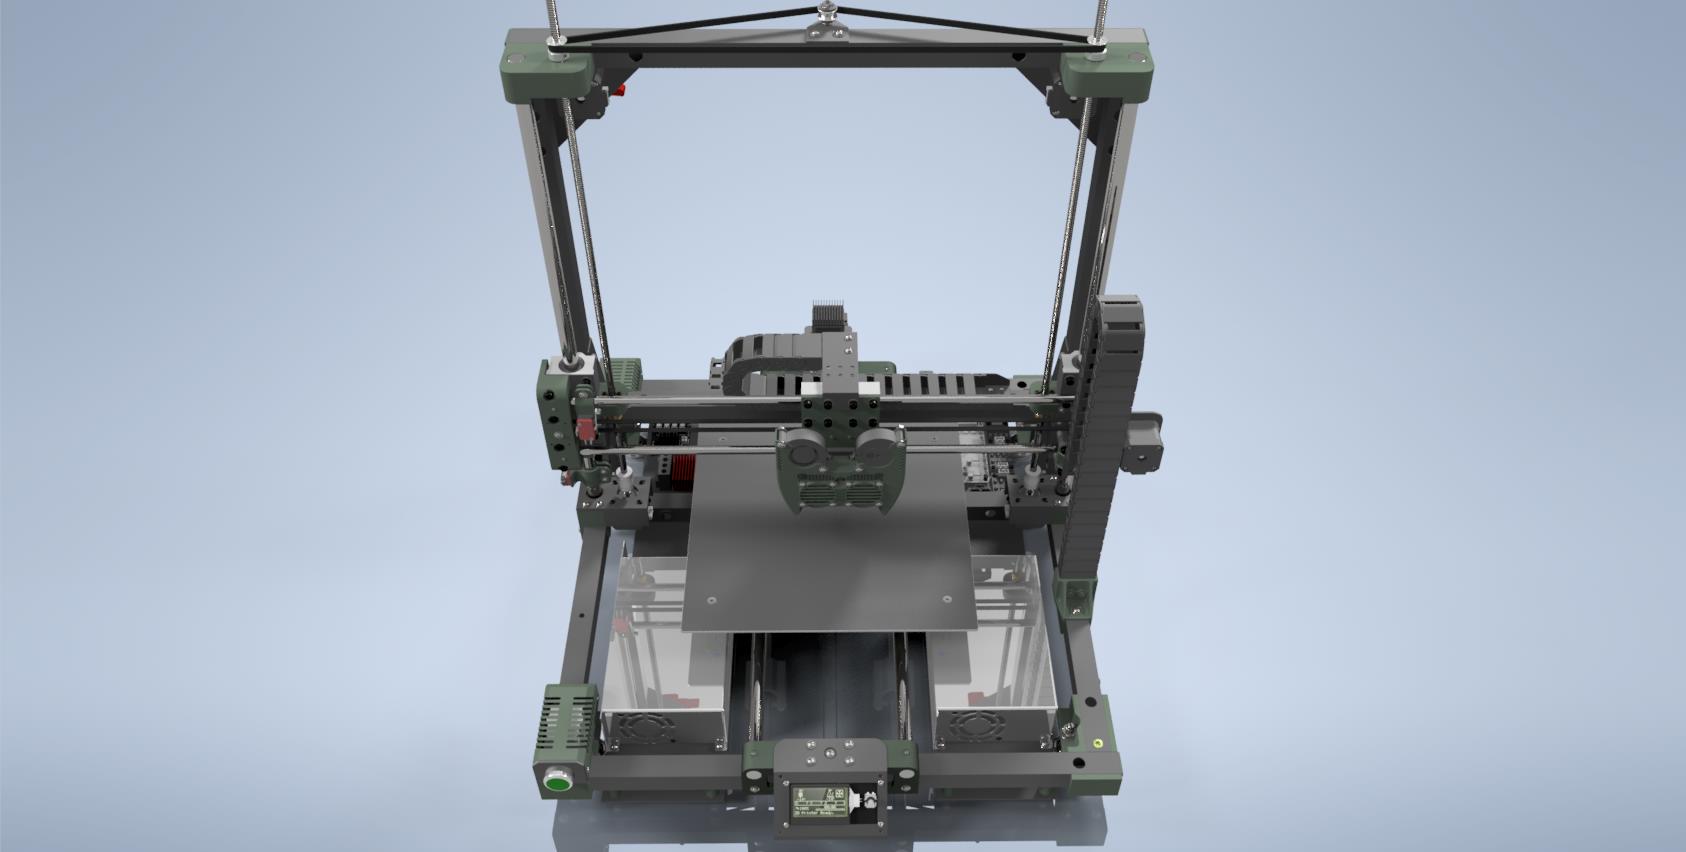
- Like the Widow, this printer will follow the classic Cartesian design. I remain somewhat skeptical and wary of “delta,” “SCARA,” and other unconventional setups. If I had several printers to play with, sure, I could experiment. But under the current circumstances, I need something that works, not something flashy. That’s why the more intuitive and extensively tested “moving bed” design, with a wealth of information available on every possible pitfall, is the clear choice.
- A solid aluminum frame made of 6061 alloy — just on principle! I considered 7075, but it’s ridiculously expensive and hard to source. However, I refuse to touch the flimsy 2024 alloy. Let the YouTube tinkerers have fun with that soft, pliable material—it’s not for me.
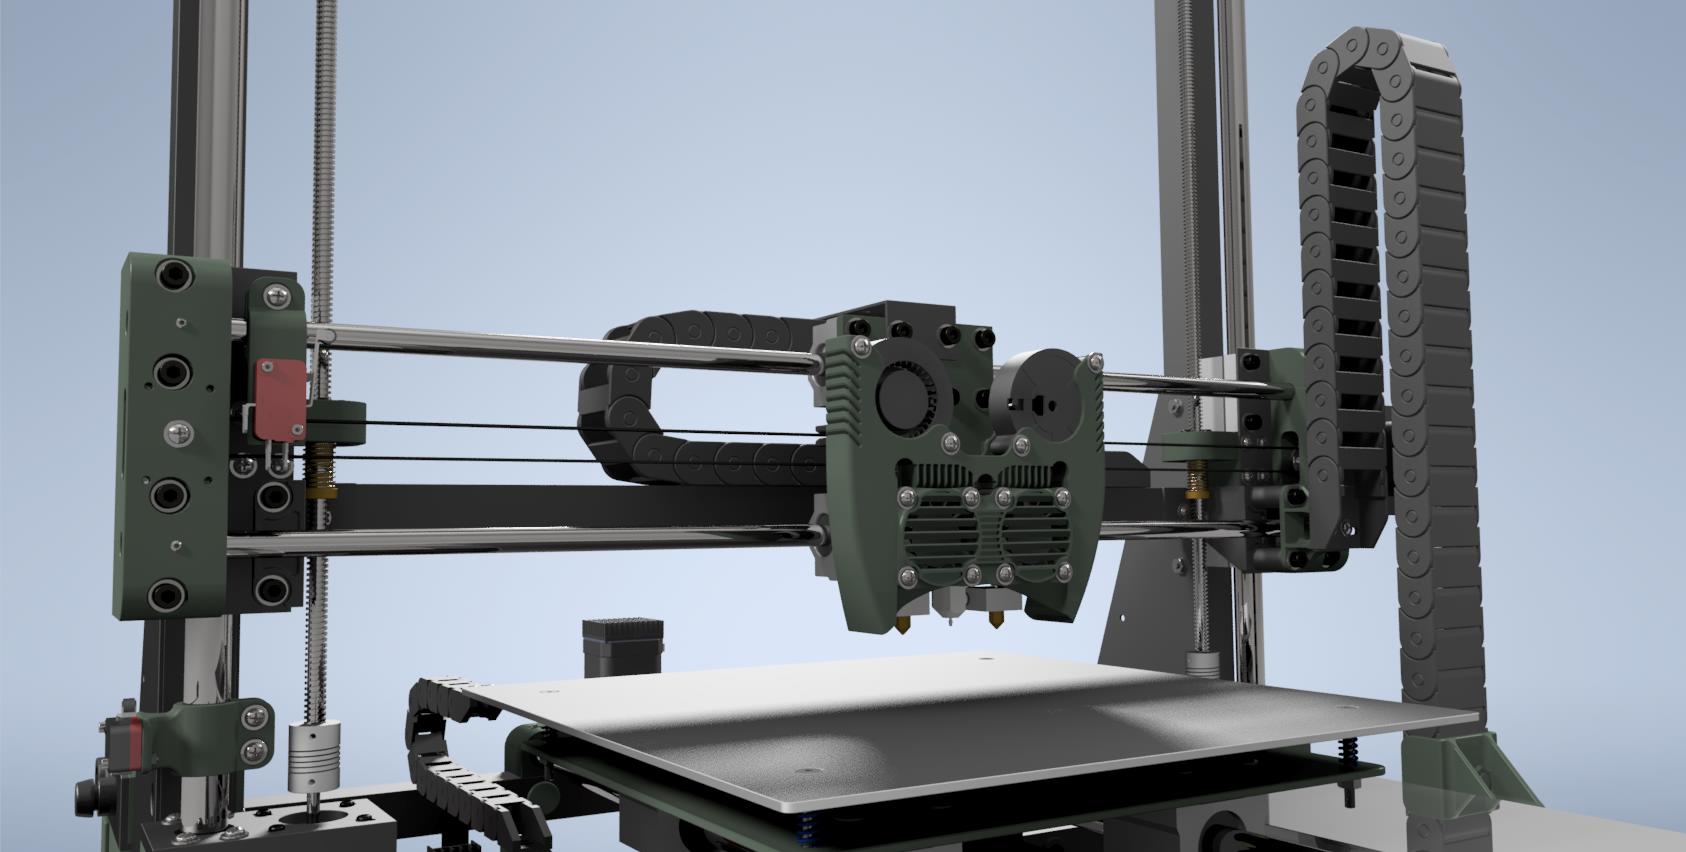
- Steel guide rails with cylindrical sliding bearings: 16mm for the Y and Z axes, and 10mm for the X axis. The bearing blocks are CS16UU and CS10UU, so this thing will be built like a tank! I’d even use a 16mm rod for the X axis, but I doubt even two motors could move it at any reasonable speed.
- Nema 17 motors: full-sized 17HS4401S models (0.46 Nm/65 oz-in torque). One each for the X and Y axes, two for the Z axis, and two more for the extruders—six motors in total. Each axis motor (X, Y, Z) has its own dedicated TL-smoother between the motor and the driver.
- Reinforced drive belts. Not the cheap rubber-nylon GT2 belts you can find anywhere for a dollar per 10 meters, but special composite ones with fiberglass reinforcement and neoprene backing under the teeth. These grip the pulleys like hungry dogs and could even handle a CNC router without stretching — let alone a 3D printer.
- Heated bed: 310×310mm, 24V, 220W. Every square millimeter of it is usable for printing. This is slightly larger than the late Black Widow’s bed, which was officially 370×250mm. However, due to design limitations, the Widow could only print within an area of about 300×200mm. My printer will have no such design flaw — the entire bed, edge to edge, will be accessible for printing, even with two independent printheads (see below).
- Two independent printheads, 24V, 40W each. Truly independent — not a single “dual” nozzle with a shared hotend. This setup allows printing with two different materials simultaneously. For instance, you could print a robot wheel with a rigid plastic hub and a soft “rubber” tire in one piece. A single-nozzle “dual” system can’t do this, as mixing plastics with different properties and temperature requirements in a shared hotend mid-print is a recipe for disaster. Hence, two autonomous printheads, each with its own unique settings.
- Separate power supplies for electronics and heating elements. Two independent 600W units (with a 50% power reserve, according to calculations).
- High-power MOSFETs for all heating elements — not just the bed heater, as is common. This fully isolates the electronics from the heating power supply, preventing unfortunate incidents like, “Hey, let’s draw ten amps directly from the controller board and see how it likes that!”
- BLTouch for bed leveling: something I always meant to add to the Widow but never got around to. It’s been sitting in its original packaging for years. Installing it on the Widow would have required flashing the controller firmware, which I kept putting off. But here, I’m configuring everything from scratch anyway…
- Bowden-style extruders mounted on the frame rather than the X carriage, with filament fed to the printheads through PTFE tubes. Yes, this approach has its downsides — significant ones. But it also has plenty of upsides. On the Widow, I used a direct-drive setup, and let me tell you, it wasn’t perfect either. Both methods have their pros and cons. This time, I want to try the one I haven’t experimented with yet.
- MKS-Base v1.6 controller running Marlin firmware. No need to complicate things. An older MKS-Base v1.2 served the Widow faithfully for years (after I accidentally fried its original controller).
- Raspberry Pi with OctoPrint and a camera for remote control and monitoring from anywhere with internet access. For years, this was my primary means of interacting with the Widow — I never once used an SD card for file transfers and barely touched the standard printer console with its screen and knob. I’m thoroughly accustomed to managing everything through a browser window on any device (PC, phone, even an ironing board). I’m not giving up this functionality.
- Convenient access to all components for maintenance or repairs. No need to disassemble half the printer just to tighten a belt or replace a bearing.
- Plastic components are limited to purely decorative uses or as minor secondary brackets/spacers. With the Widow out of commission, this burden falls on the Photon resin printer. Resin parts are much more brittle than FDM plastic, so they can’t be used for anything critical. And that’s fine — fewer temptations.
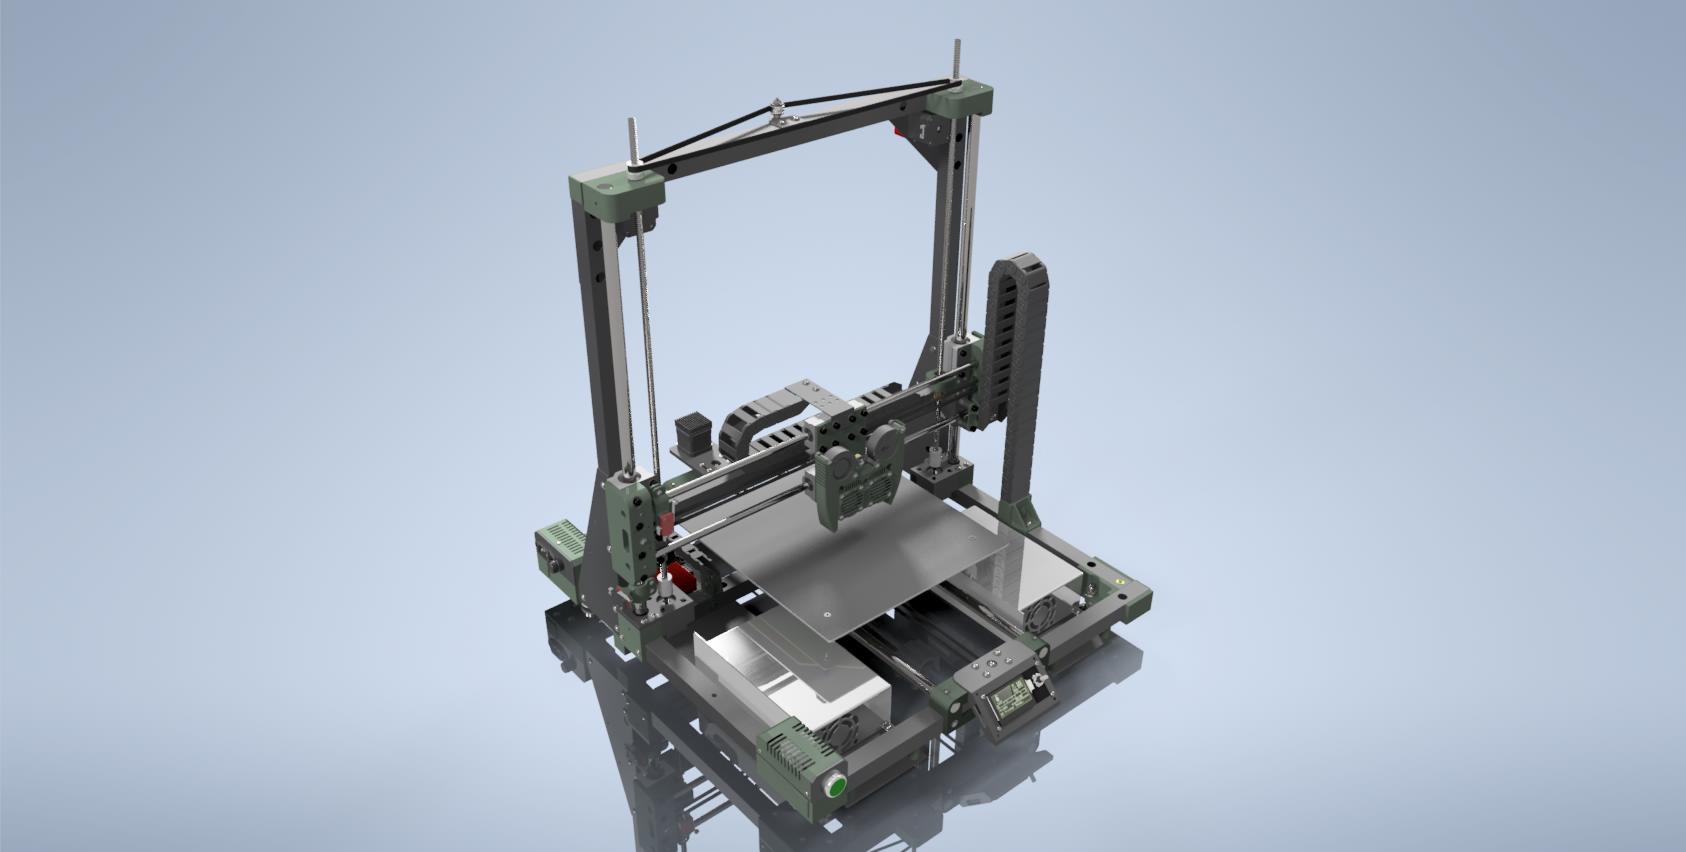
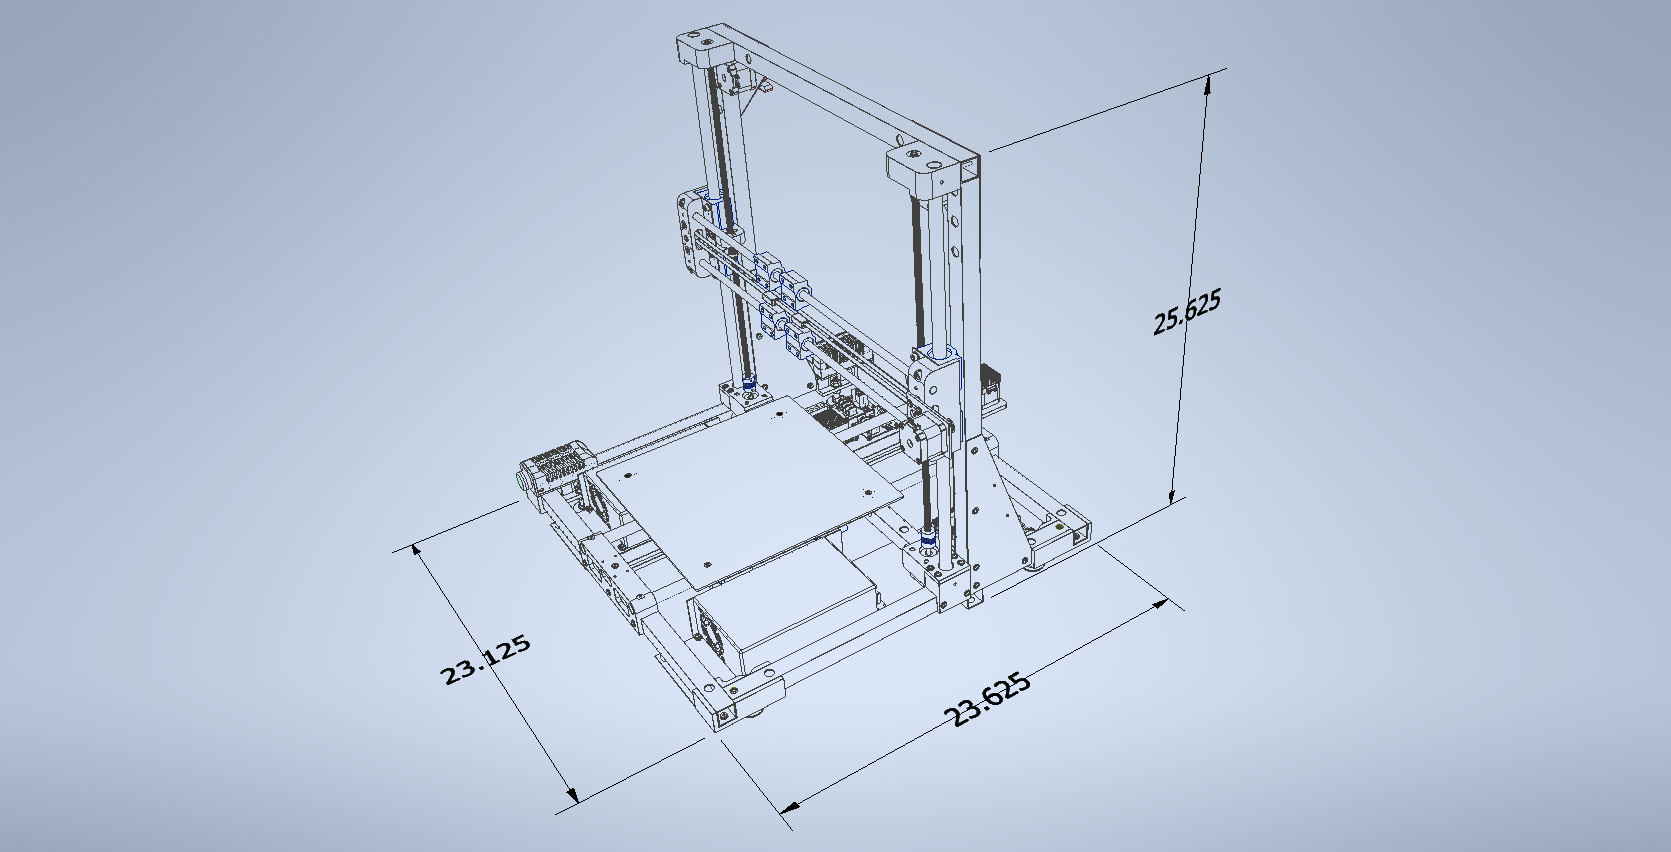
- A unified, enclosed design with no external components like power/control units or spool holders. I’m done with the mess of peripherals sprawled across the table. All components, systems, and consumables must fit within a 2x2x2-foot volume—give or take.
I’ll note separately that not a single key component for this device will come from the late Black Widow — or from my stash. Also on principle. I’m done with old parts. Everything will be brand new, ordered or custom-made specifically for this project.
That said — anyone interested in the Black Widow? I’ll strip it of all the homemade modifications, and from there it’ll only need some TLC: replace the frame profiles worn down by the wheels, swap the polymer threaded rods on the Z-axis, change all the carriage rollers, the bed springs, the idler bearing on the Y-axis, all the belts, rework the wiring (there’s a damaged heater wire in one of the channels temporarily bypassed), replace the extruder’s drive gear, fix broken connectors here and there, and get a new glass bed…
Shipping these mortal remains back to their homeland would cost a fortune — it’s not worth it. But I know some local DIYers read my posts. Winter is coming. Anyone up for a project to keep busy during the long winter evenings? Restoring it would still be easier than building a printer from scratch — I would know… We can negotiate the price.
The design of the printer came last, dictated entirely by functionality rather than aesthetics. As a result — the design is practically non-existent.
The name, as is often the case, came about by chance. It all started when I stumbled upon a great self-etching primer at the store. It’s perfect for painting aluminum, but its color was quite amusing — something from the “marsh” palette of indistinct shades. However, I found it quite appealing and decided that some parts would remain painted only with this primer, giving the printer a sort of “military style” suited for marshy conditions. Thus, the project was initially named “Marsh Kikimora” due to its color and appearance.
But then, a passing gunsmith at work happened to catch a glimpse of the project sketch. A man well advanced in years, far removed from cutting-edge technologies, and apparently old enough to remember when rifles didn’t use unitary cartridges. At the moment, we’re building custom AR-15s chambered in .50 Beowulf, and he assumed I was designing a new support stand for sighting in those beasts. This assumption ultimately led to the name being changed from “Kikimora” to “Turret.” It still sounds equally eccentric, but at least it avoids the negative connotation of the word “Kikimora.” Well…
So, that’s the entire introduction. The rest, I think, is self-explanatory — including what I’ve been busy with over the past few months.
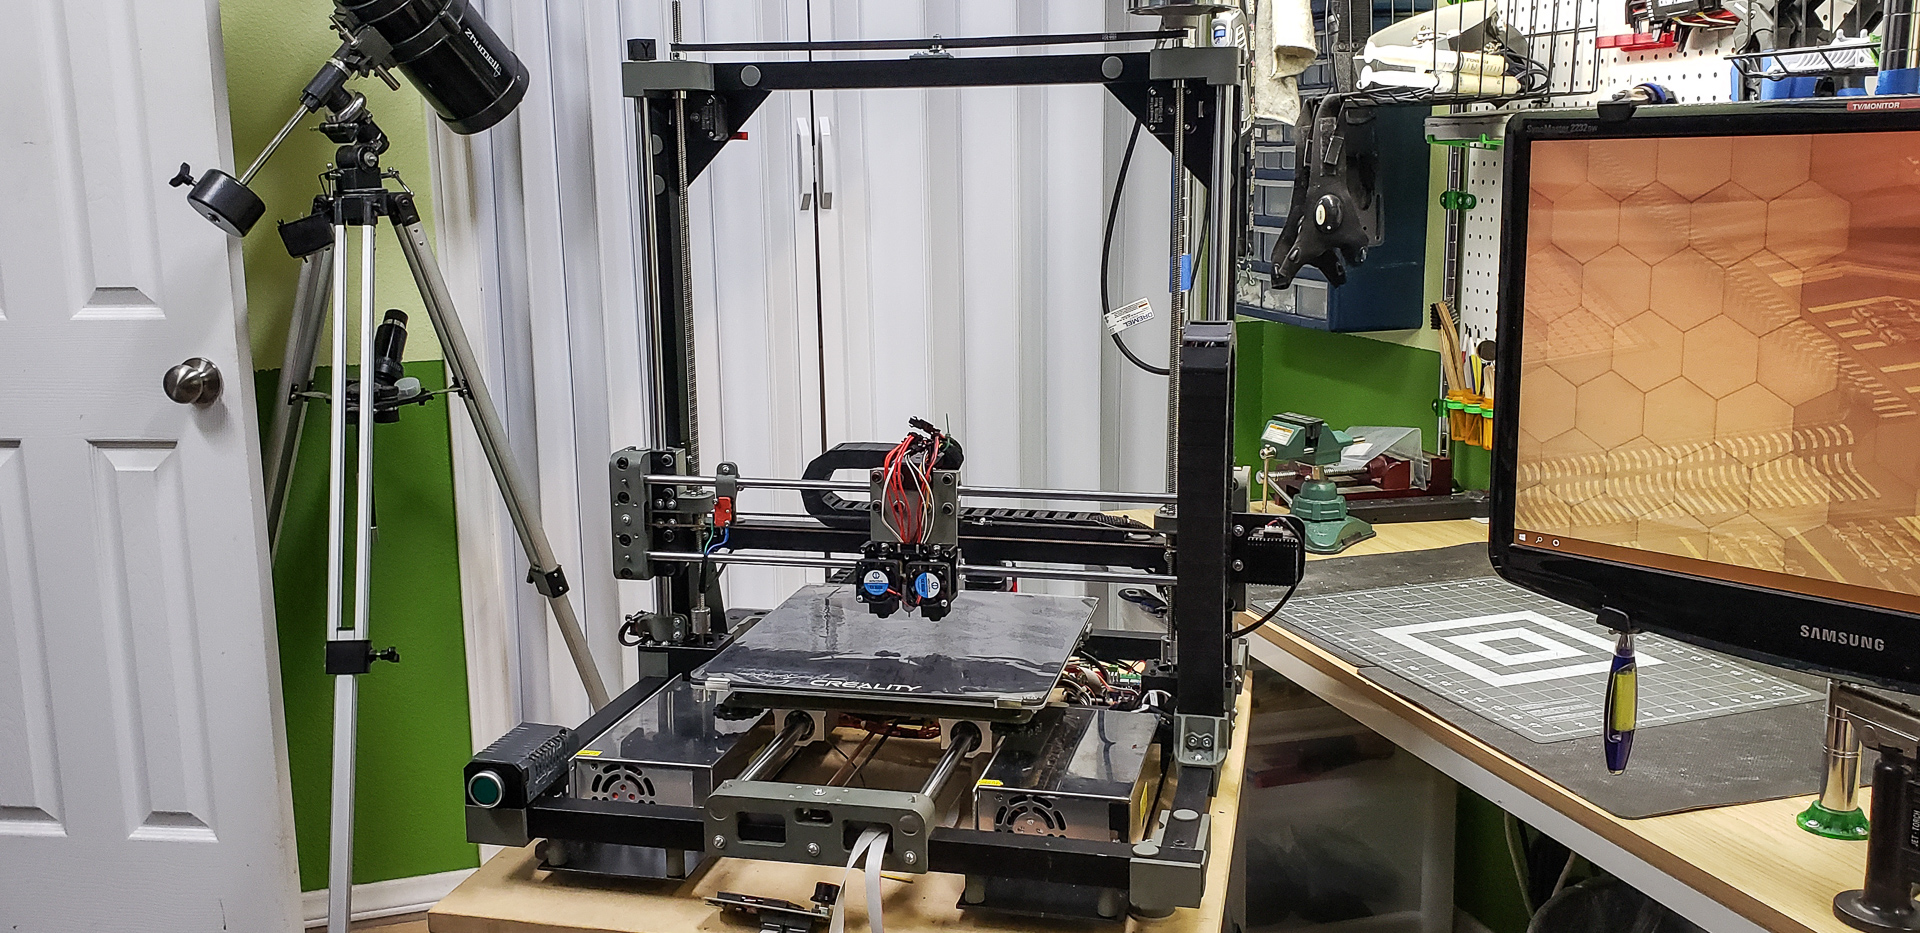
Of course, the photos show it not in its final form. Work on the last minor, but very important, details is ongoing as we speak.
And here’s another break with conventions and traditions — the conclusion (almost) of the story revealed right at the beginning of the series of posts…
Namely — the result of the very first test print.
It happened almost by accident. I wasn’t planning to run the printer at the stage of assembly it was in. But my wife and I, the other day, managed to catch that thing (no, not syphilis). After an especially miserable Friday brought on by the situation, I decided that I wanted to see how it worked. Even if just approximately. Well… Before I get reassigned to my new position at the forges of Valhalla, where all DIYers go when they pass on with a screwdriver in hand at their workbench… You get the idea.
I temporarily secured things here and there with zip ties and rubber bands where screws hadn’t been installed yet, wrapped electrical tape around anything that might send me to the halls of Valhalla sooner than expected, hastily taught Marlin where each motor was connected (leaving 90% of the settings at “default” in the “one random extruder” configuration), somehow managed to compile the firmware through sheer force of will, ignoring the flood of warnings in the console, sliced the ever-popular Benchy model in the slicer program using the settings I’d used for the Widow… And — here it is:
I’d say it’s not bad for an almost completely unconfigured firmware with printing parameters entirely unsuitable for this printer:
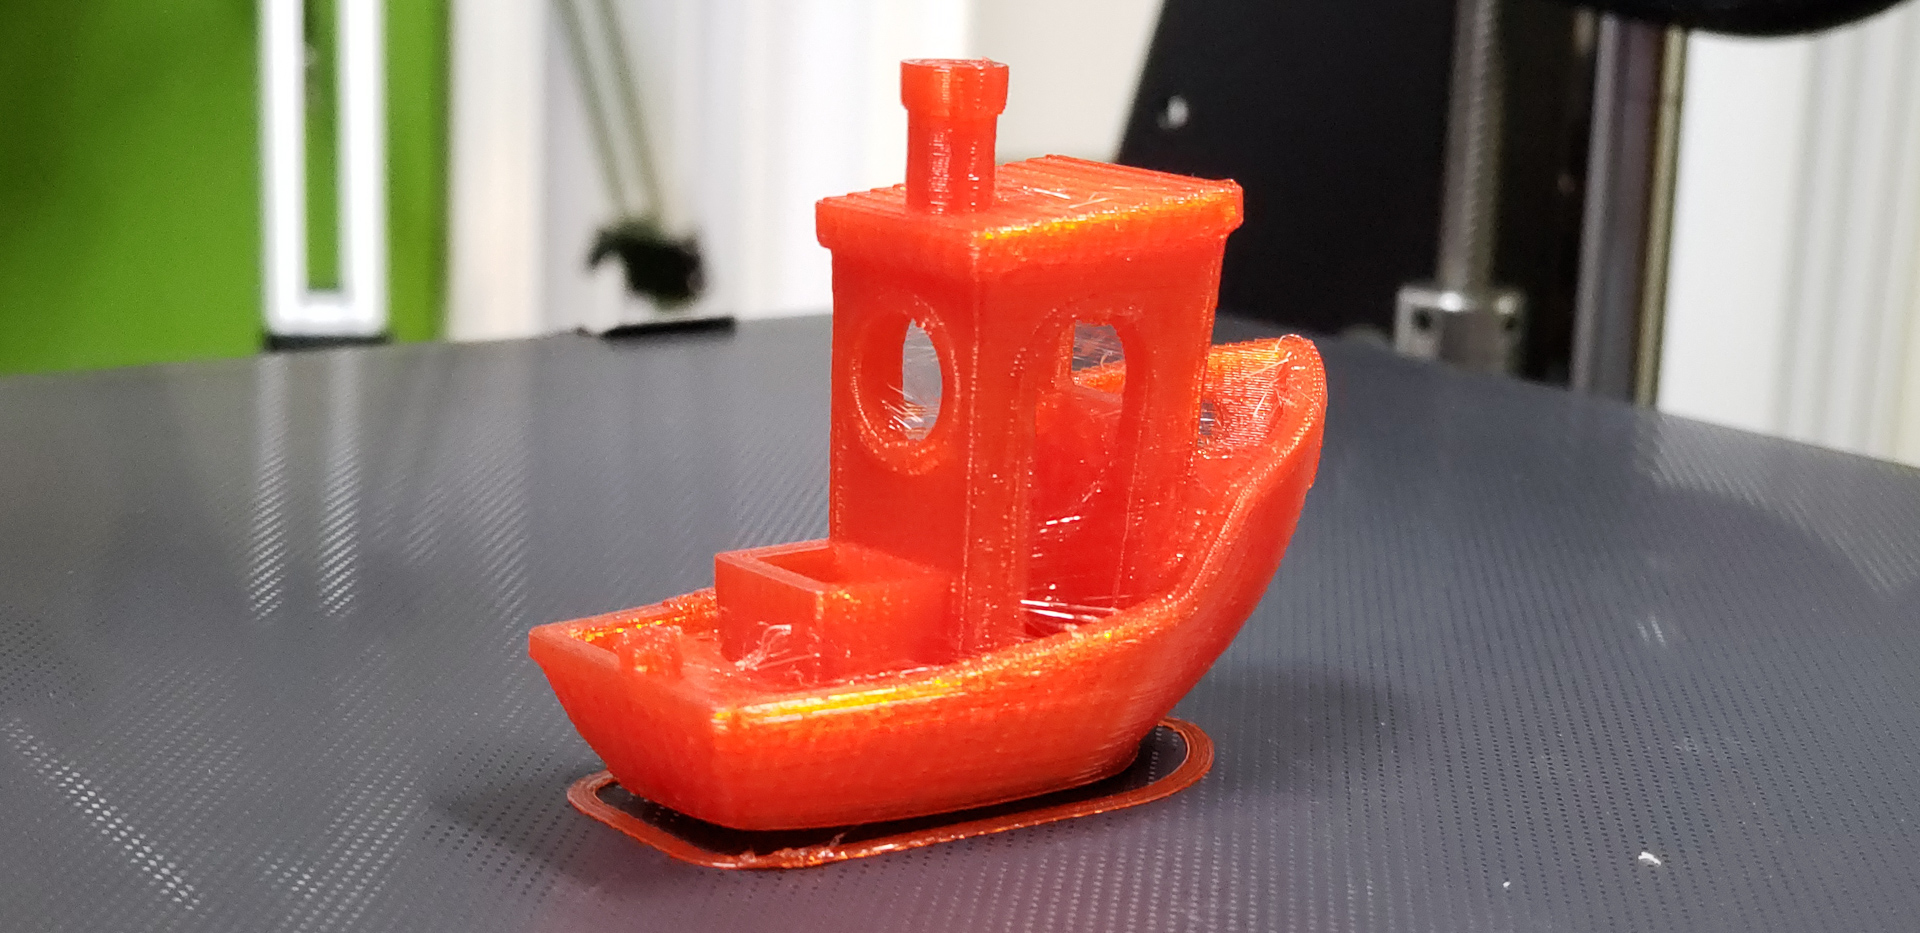
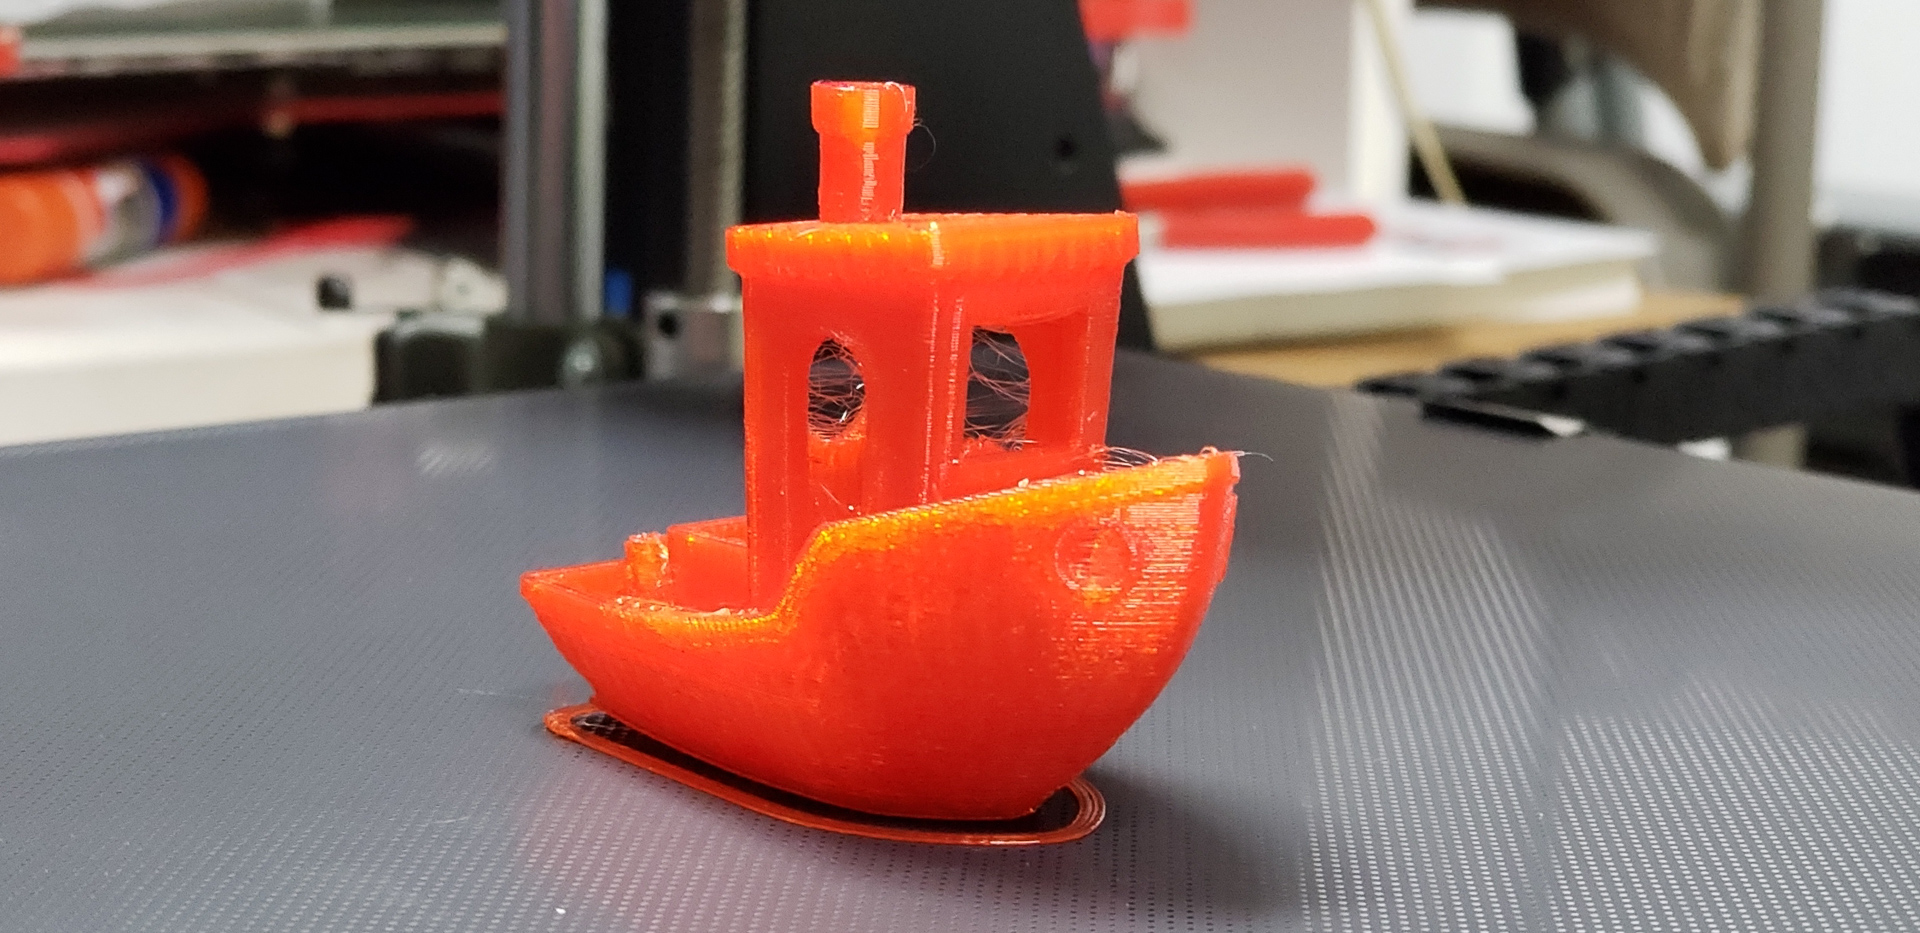
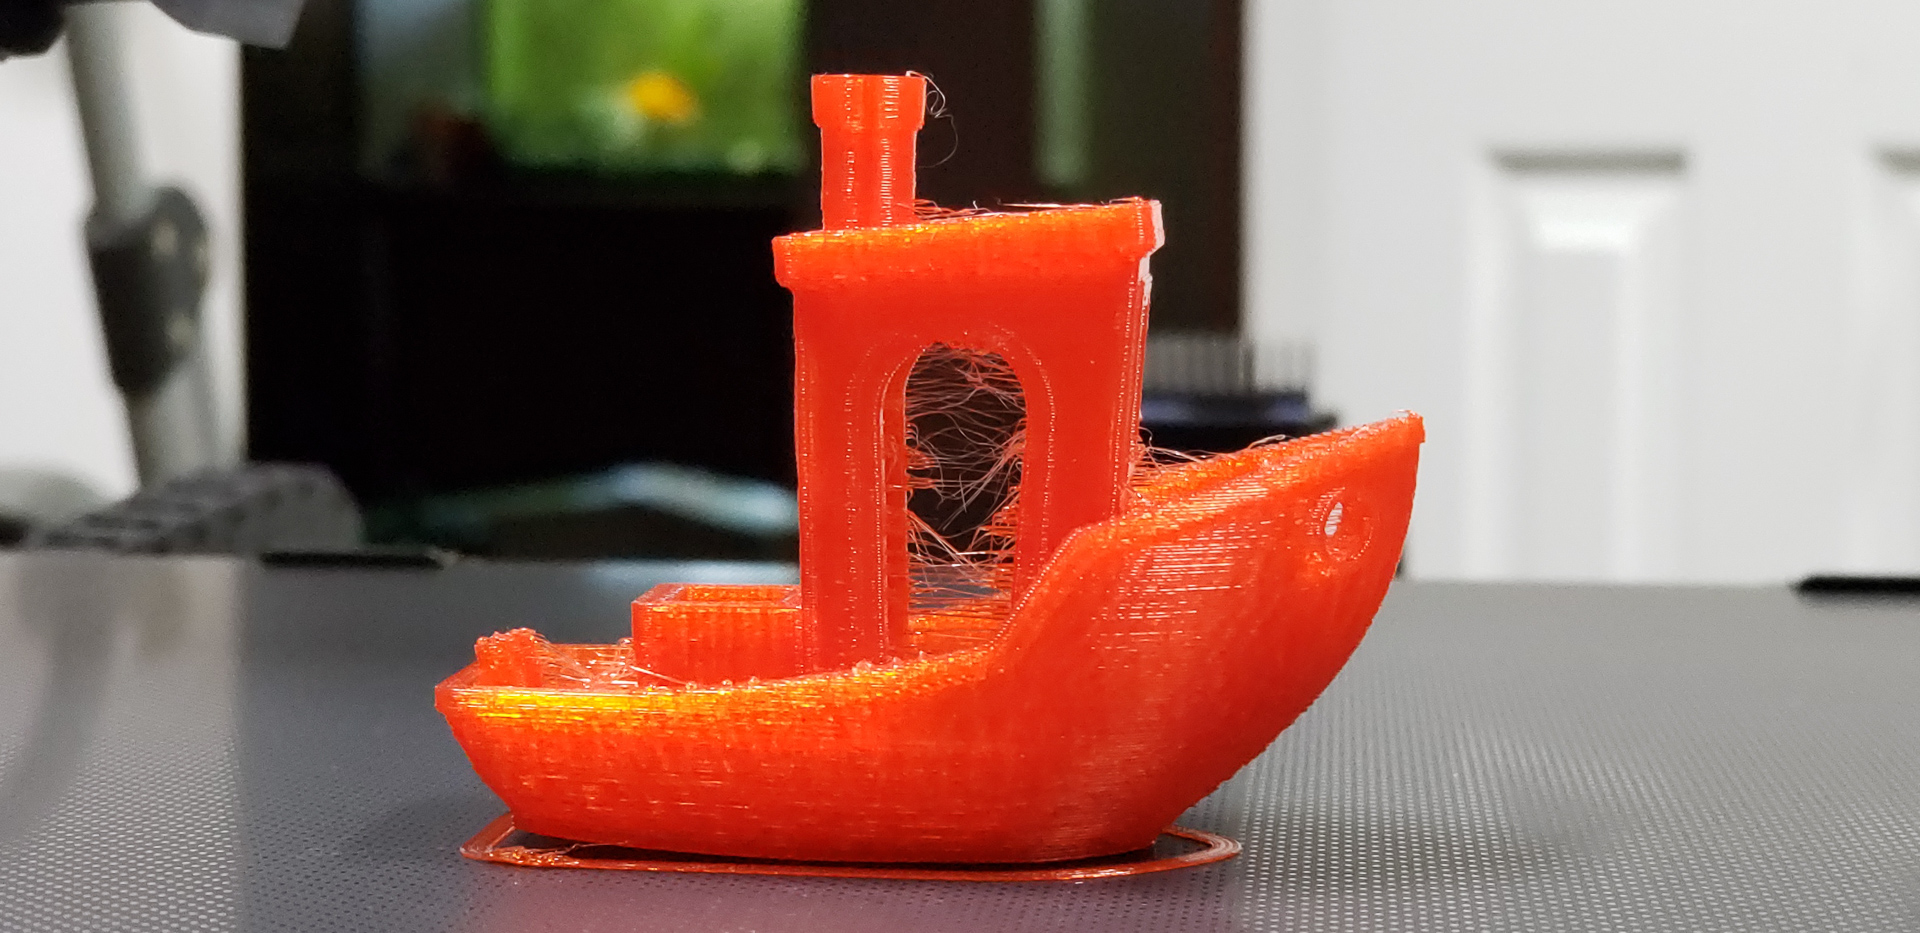
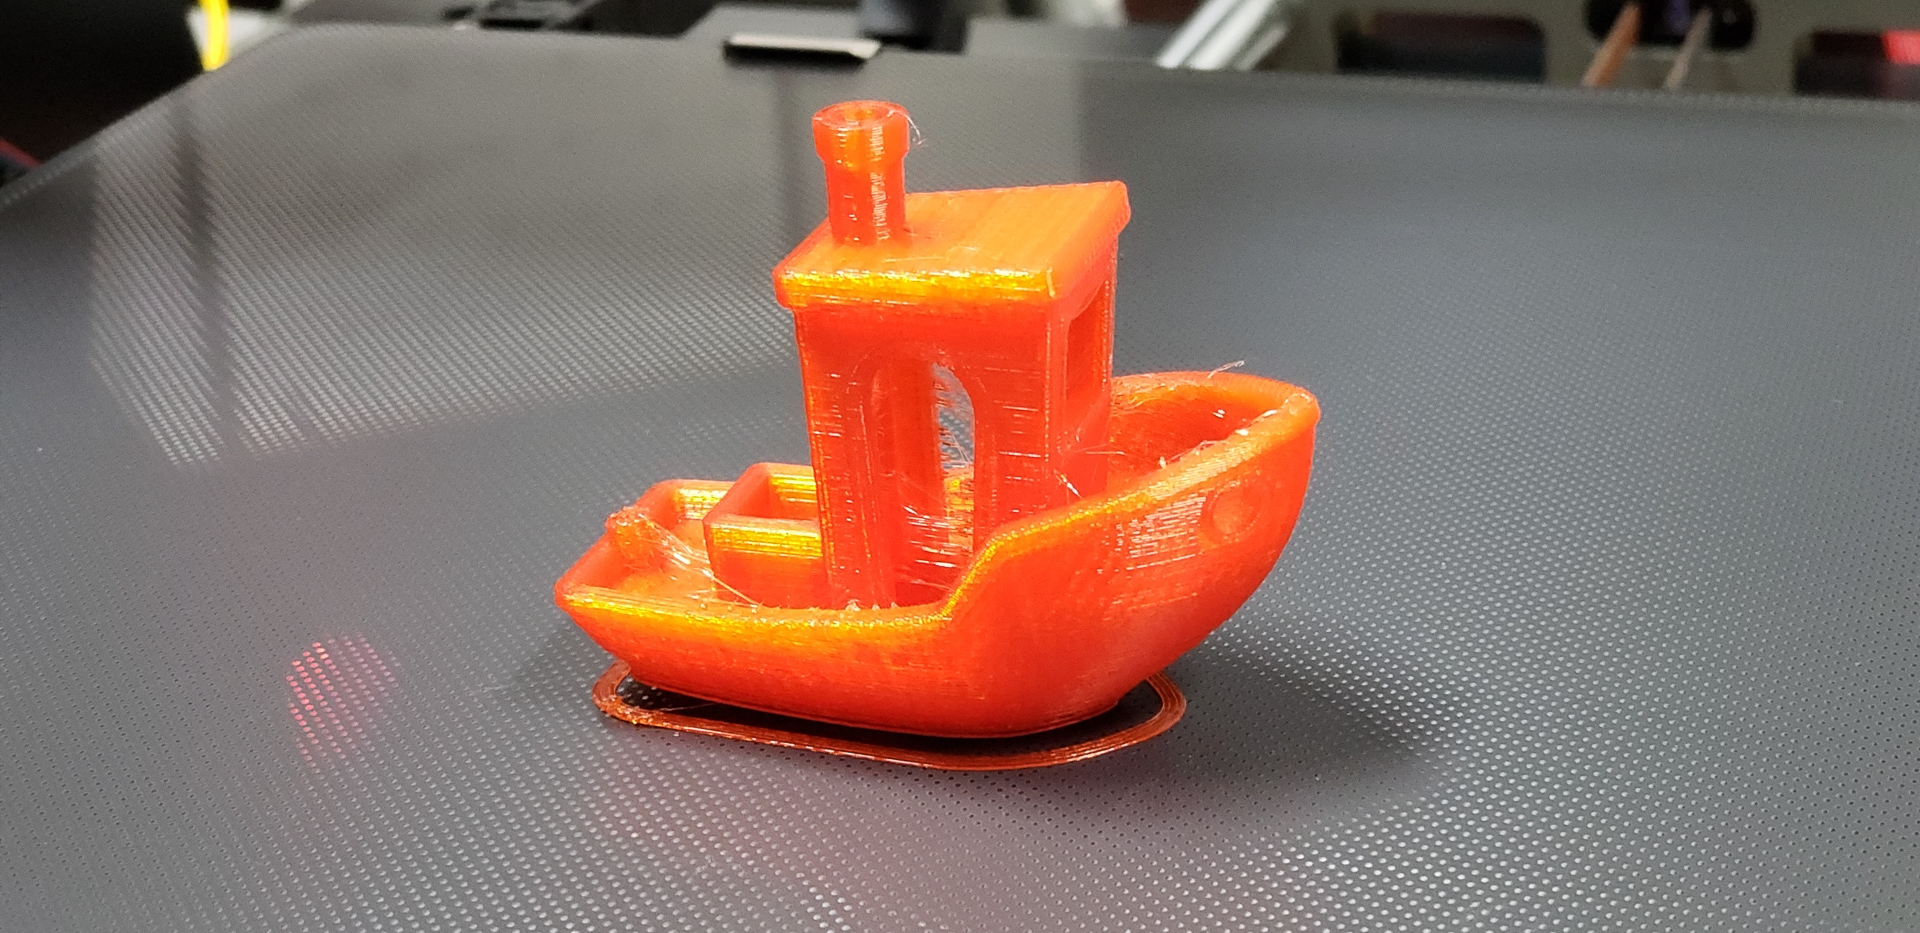
The main issue is the excessive amount of stringing. This isn’t surprising, since the printing parameters for a direct-drive setup (as the Widow had) differ significantly from those needed for a Bowden system. At the very least, the retraction distance should have been set to at least twice as much. And the movement acceleration settings were a complete mess — I have no idea what the default firmware values were (probably something like “launch at full speed,” judging by the motors’ anguished squeals). I even had to manually enable layer cooling directly from the power supply mid-print because I forgot to include that functionality in the firmware, and the controller simply ignored the cooling commands.
But still!!!
“They said I couldn’t teach a llama to drive a car!” (c)… Ha!
P.S. This project has been made possible thanks to the support of the company where I work:

I was given access to some machine hours (four full Saturday morning shifts) on one of our large industrial robots for personal use.
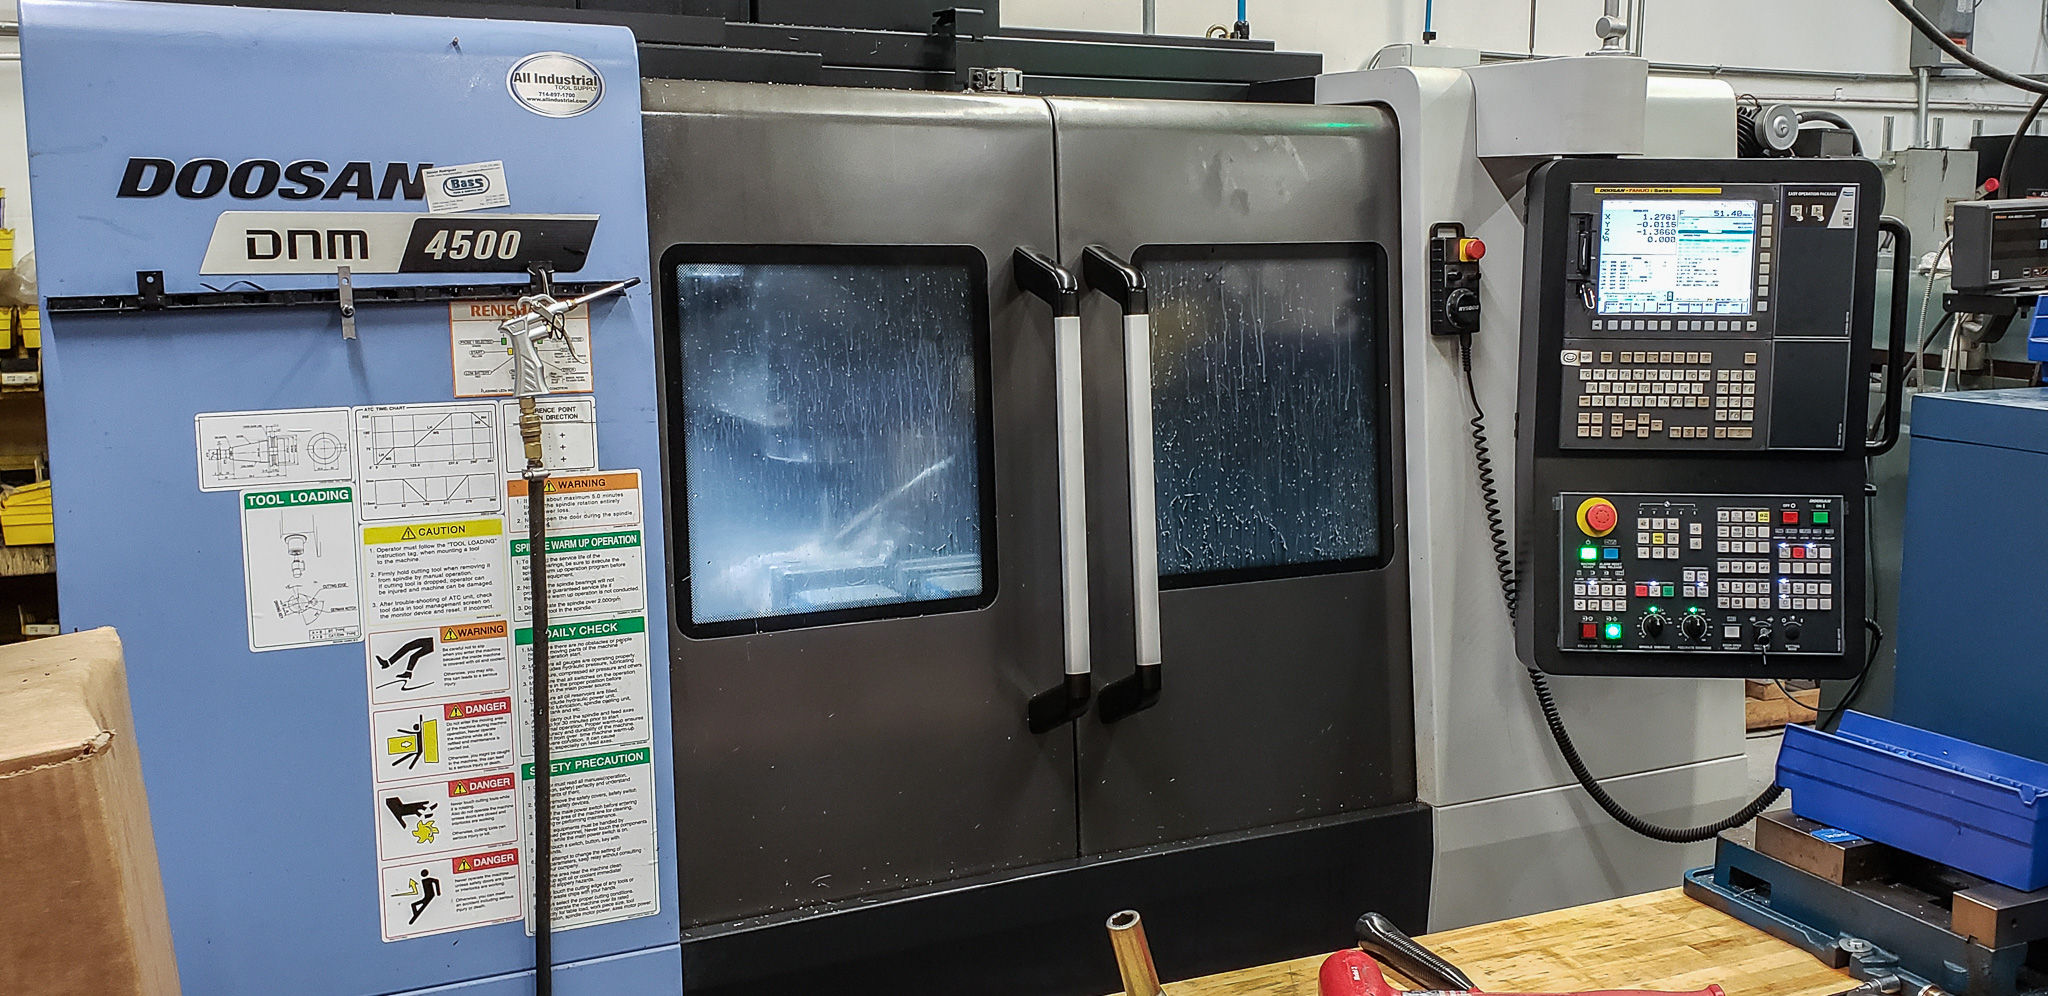
If not for TSS’s support of my project, the joke about “buying a new printer” wouldn’t have been a joke at all. Some of the key components couldn’t have been fabricated in my home workshop, which is primarily set up for woodworking, not metalwork. Beyond a hacksaw and a file, I don’t have much there that’s suitable for working with metal.
P.P.S. Honestly, I always knew it would end like this. Call it fate, sealed the moment I decided to get into this geeky hobby called “3D printing” several years ago. It just took me some time to realize it. And let me warn you — this happens to everyone who dares to walk this path. EVERYONE! Any DIY enthusiast who buys their first 3D printer from the Chinese will eventually find themselves in my position: file in hand, crafting some new crazy contraption, muttering, “This time, I’ll do it right.”
With new possibilities comes the curse that accompanies this technology — a curse undoubtedly imposed by the Illuminati in the world government. To lift part of this curse, you’ll need to kiss a frog. Whether you like it or not. By the way, the frog will remain a frog afterward. So don’t count on “happily ever after” either…
That’s how it is… To be continued.