
A constant lack of workspace is a permanent state in any workshop. The more tables and workbenches you have, the more you feel their absence. Such is the paradox.
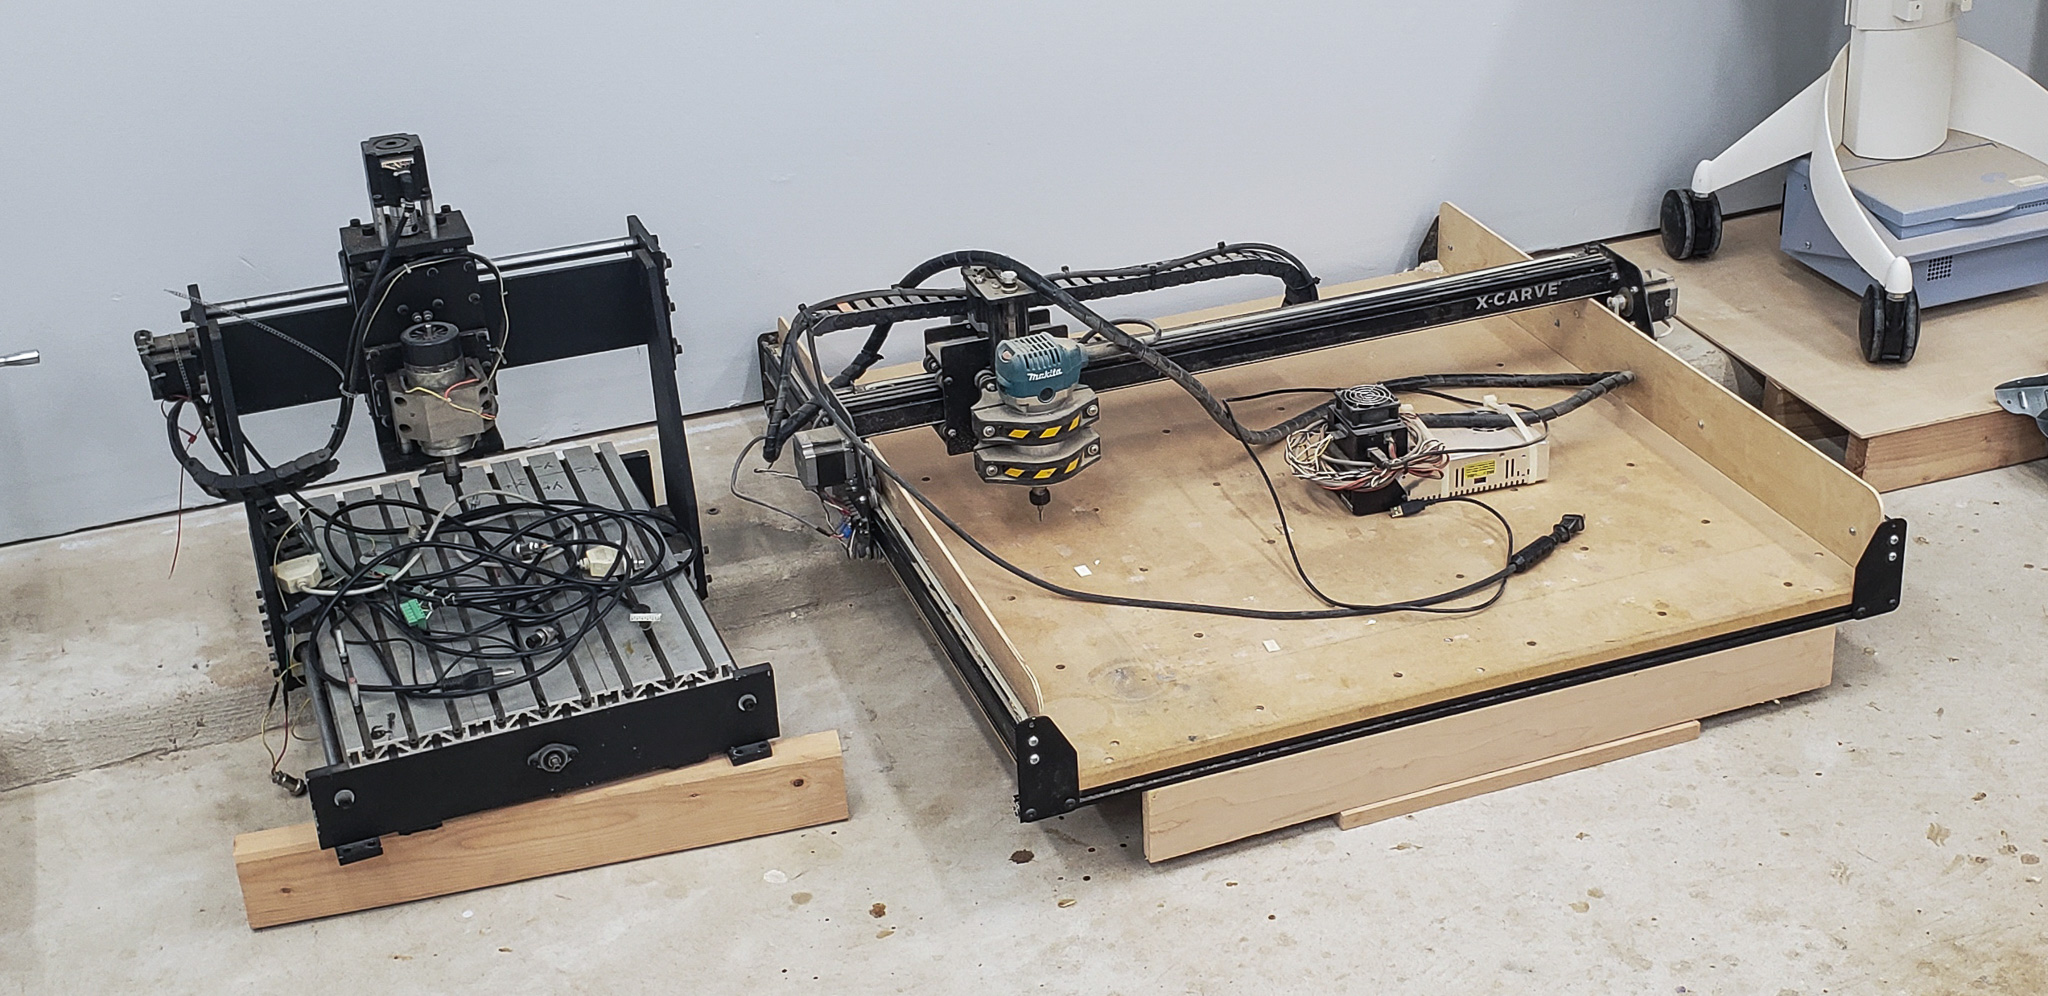
Faced with the prospect of a new large-scale project, this eternal problem has surfaced yet again. Standing in the middle of the workshop, I find myself thinking: “Alright, this workbench is for metalworking, this one for cutting wood, this one is covered with supplies and spare parts, that one is piled high with clutter that I’ll get to someday, and this one is occupied by the Cat.” And so on. I’ve got this new project idea in my head, but once again, there’s nowhere to implement it. Another table or workbench is needed to assemble yet another crazy contraption.
The idea of tidying up and clearing one of the existing tables is, of course, out of the question. Ridiculous, right?
Quite often, in such cases, a folding garden table from Costco can come to the rescue. Sure, it’s not a proper workbench, but for assembling something moderately large and precise, it’s usually sufficient. However, the upcoming project promises to be heavy — not in terms of complexity, but in the purely physical sense.
Spoiler alert:
For smaller projects created in my “lab,” I have a great, reliable assembly table:
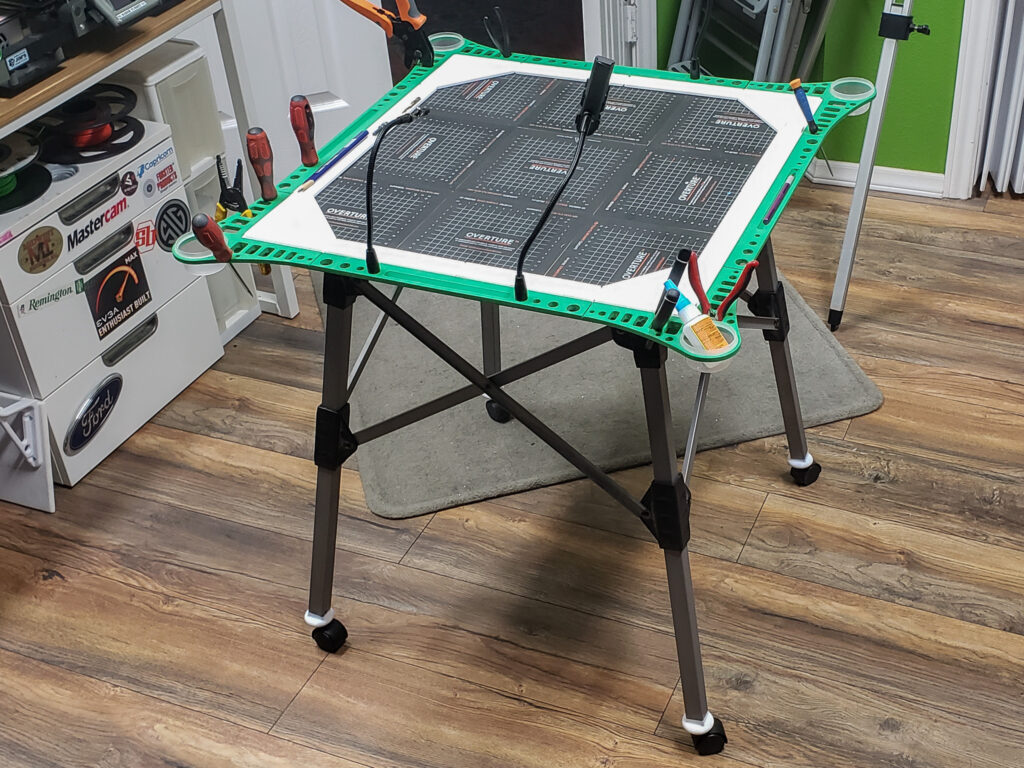
It’s mobile, can be rotated and moved around the room, and provides unrestricted access to all sides of whatever is being assembled.
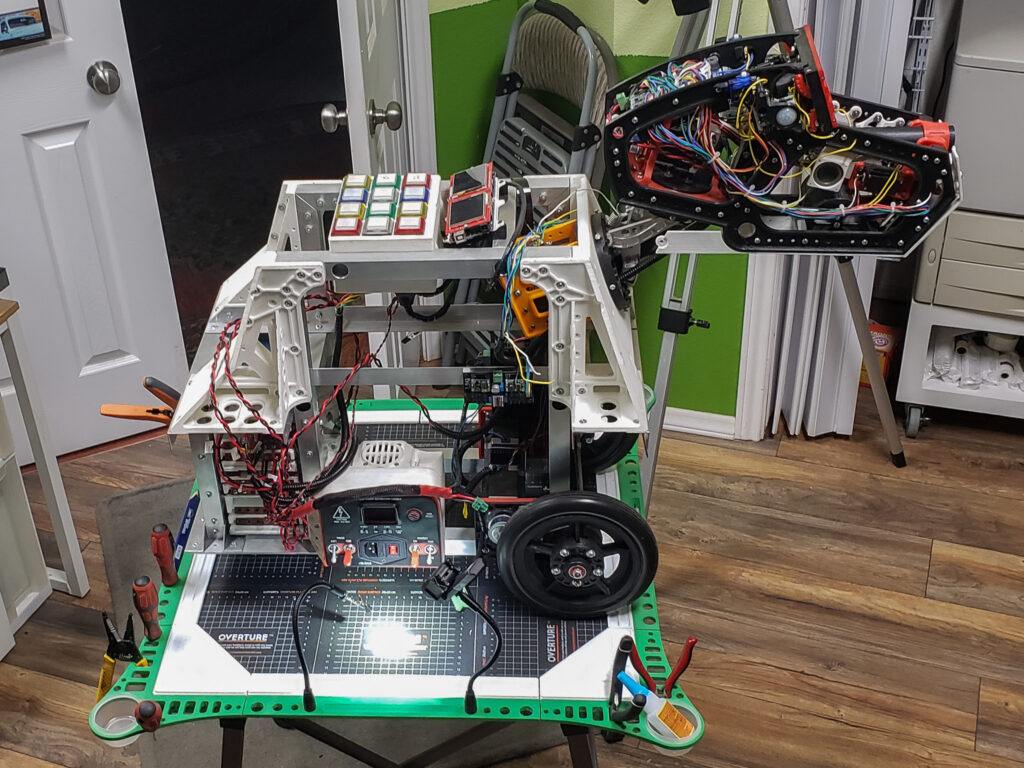
Now, I needed something like this, but larger and sturdier. An assembly table where I could, theoretically, build a full-scale locomotive! Or something along those lines…
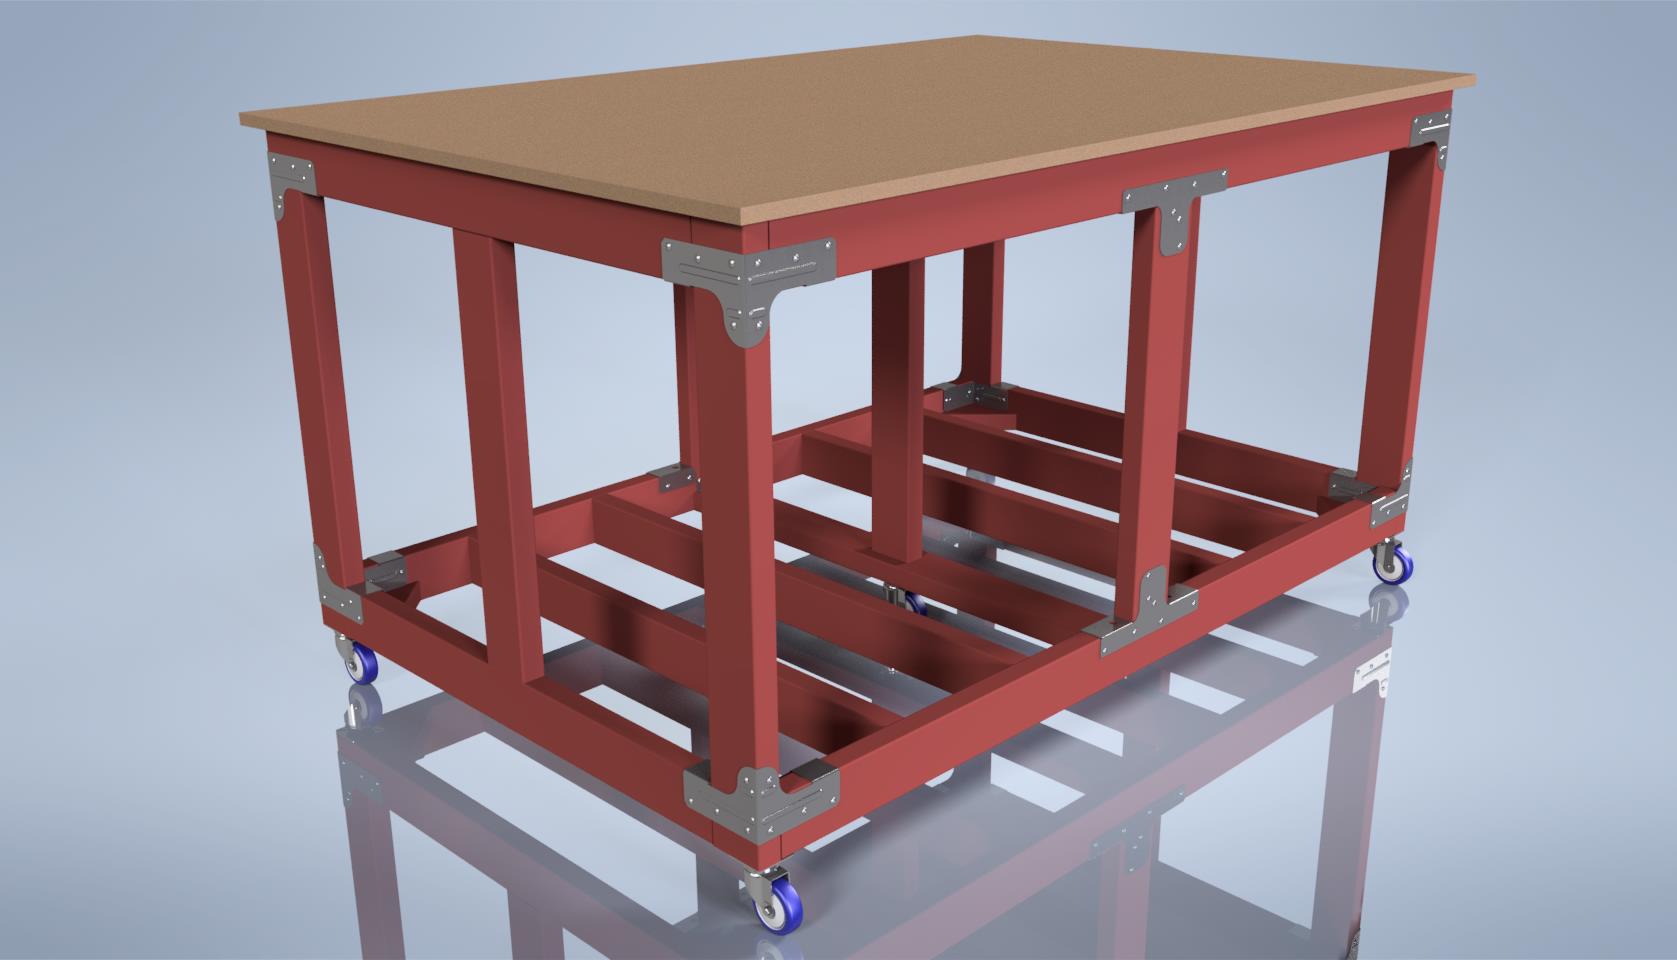
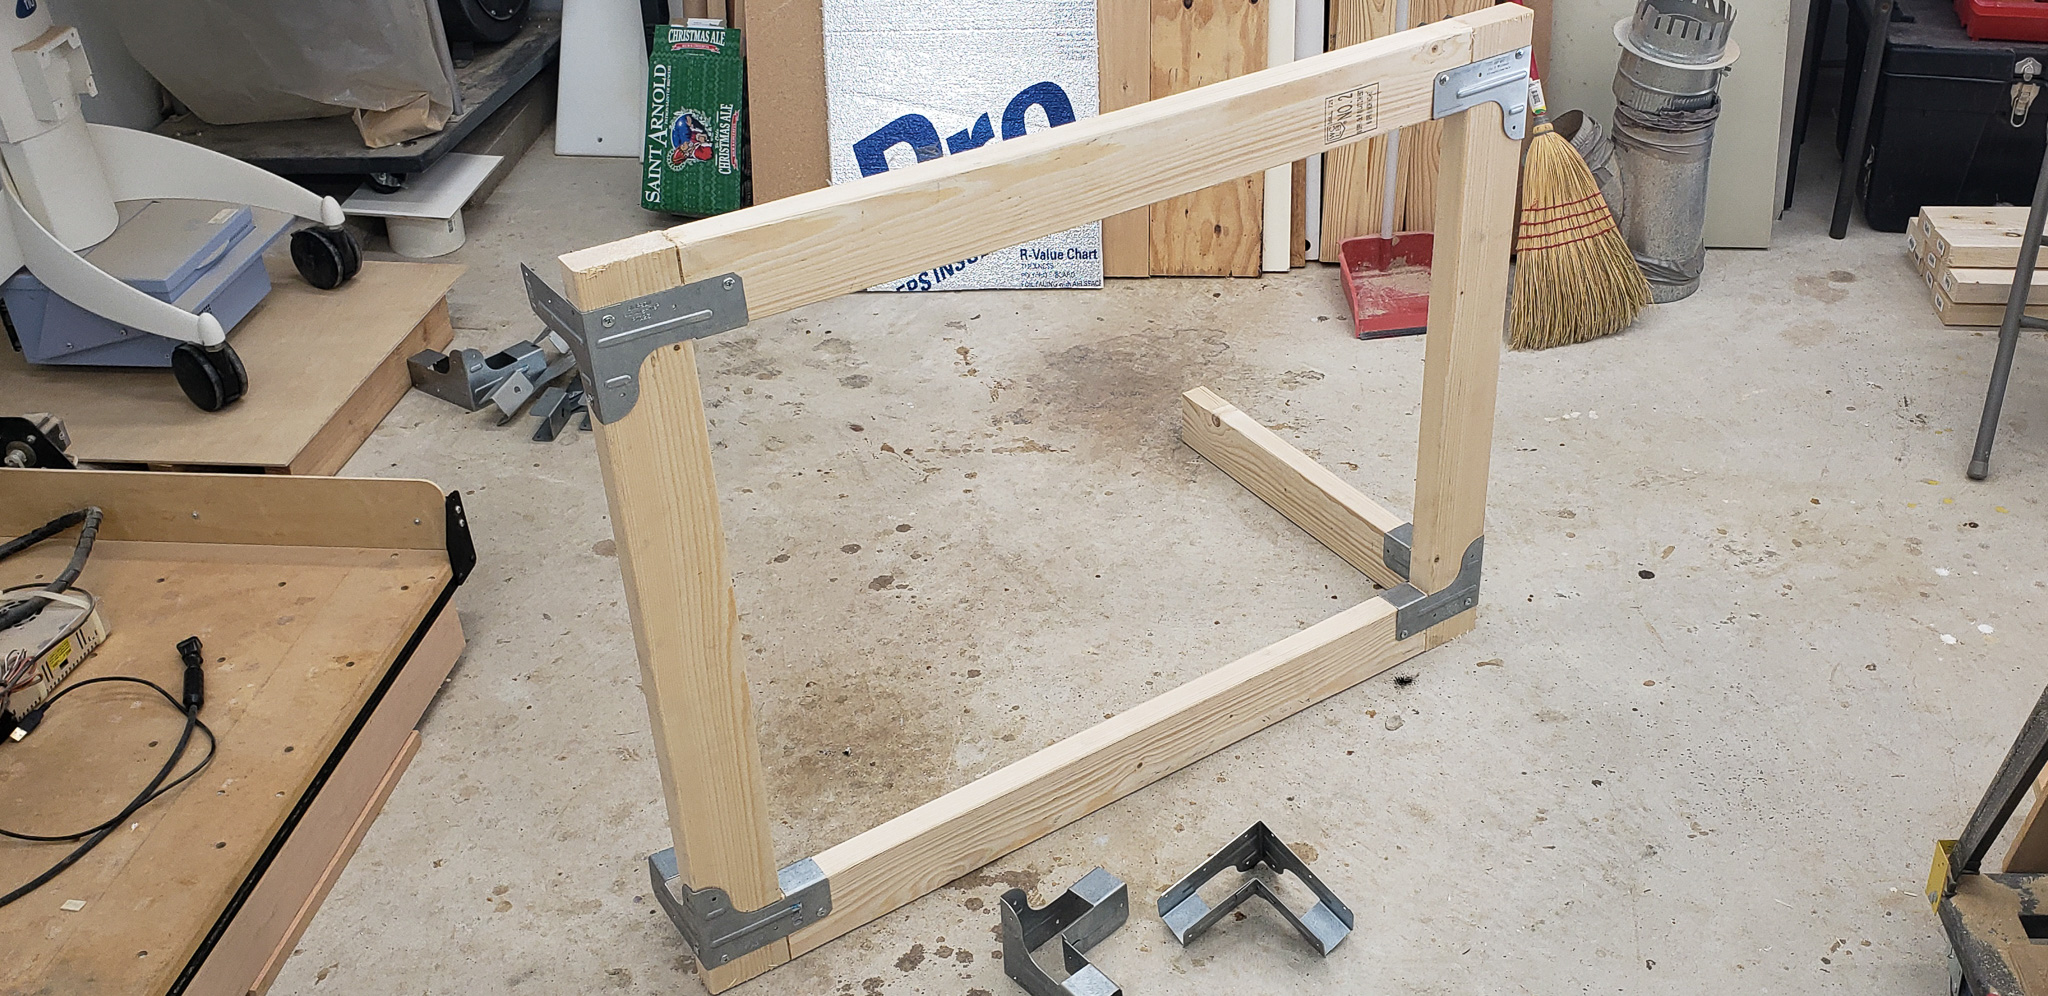
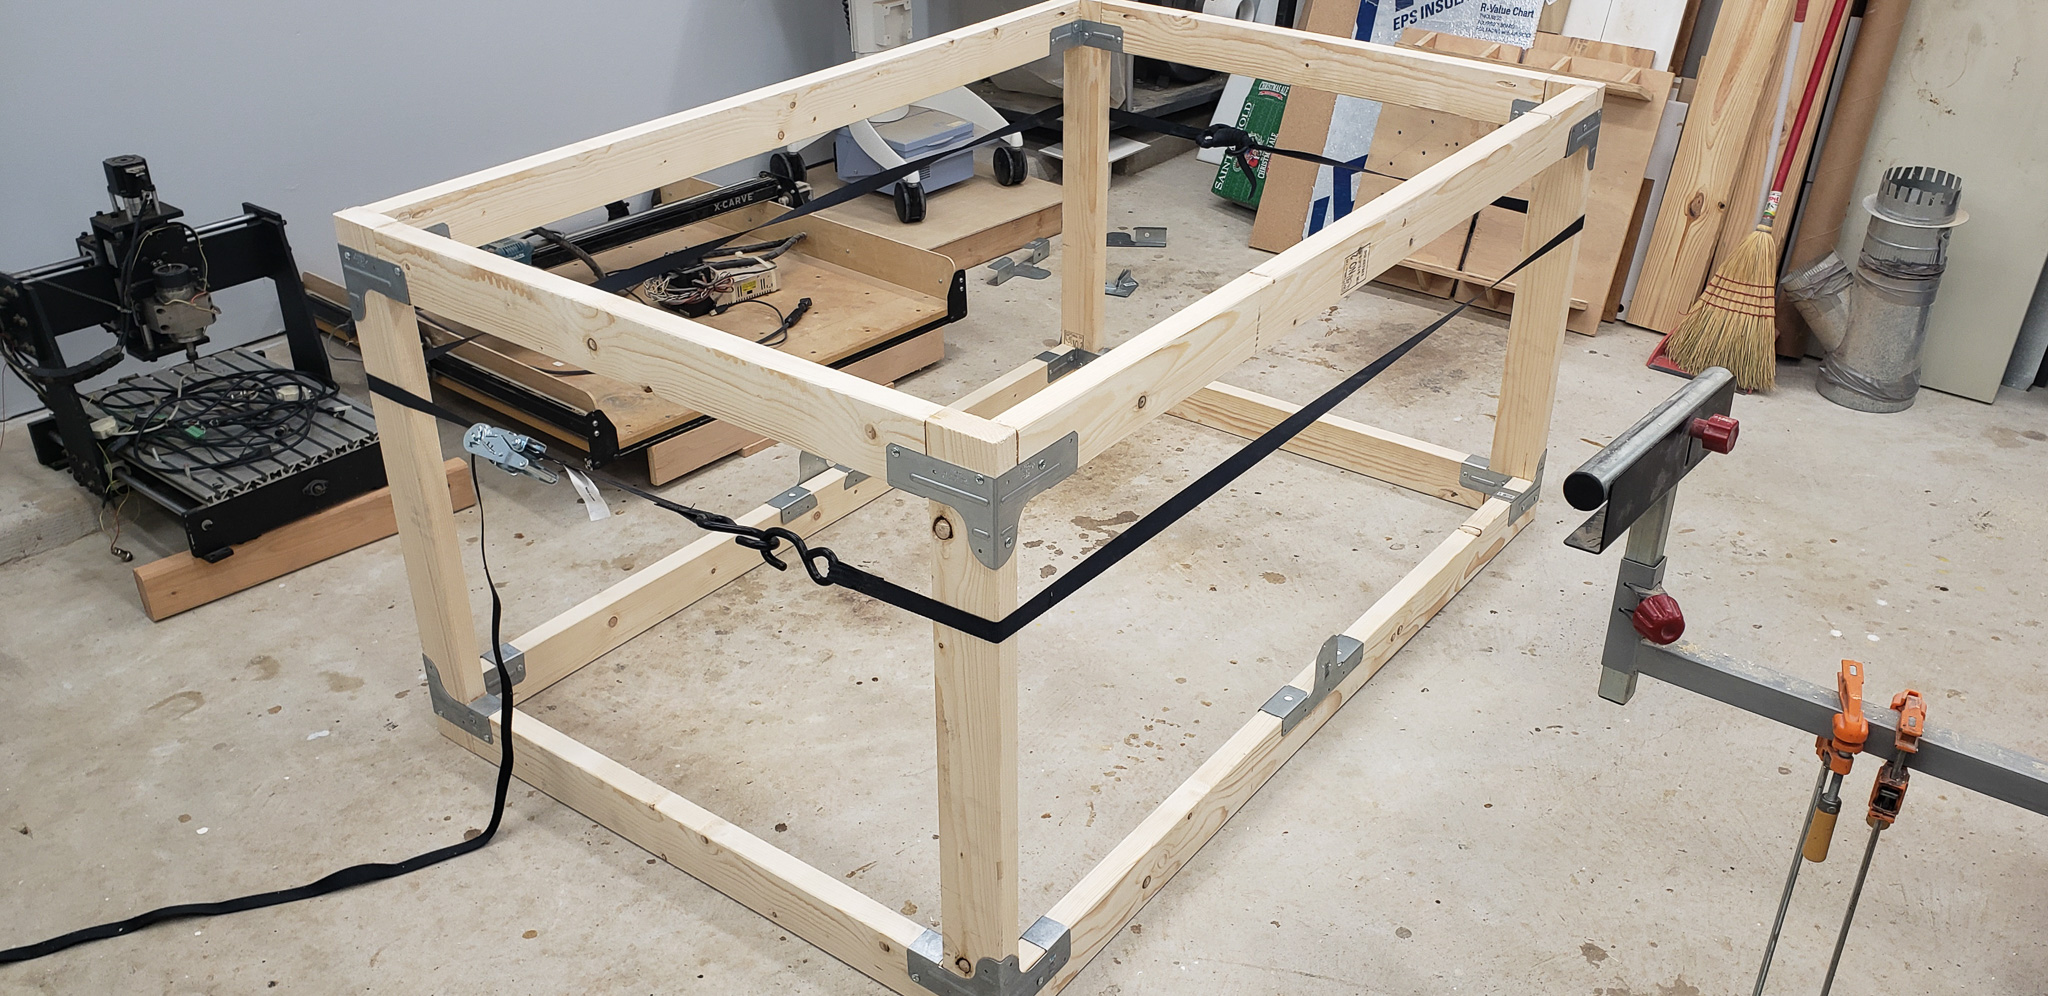
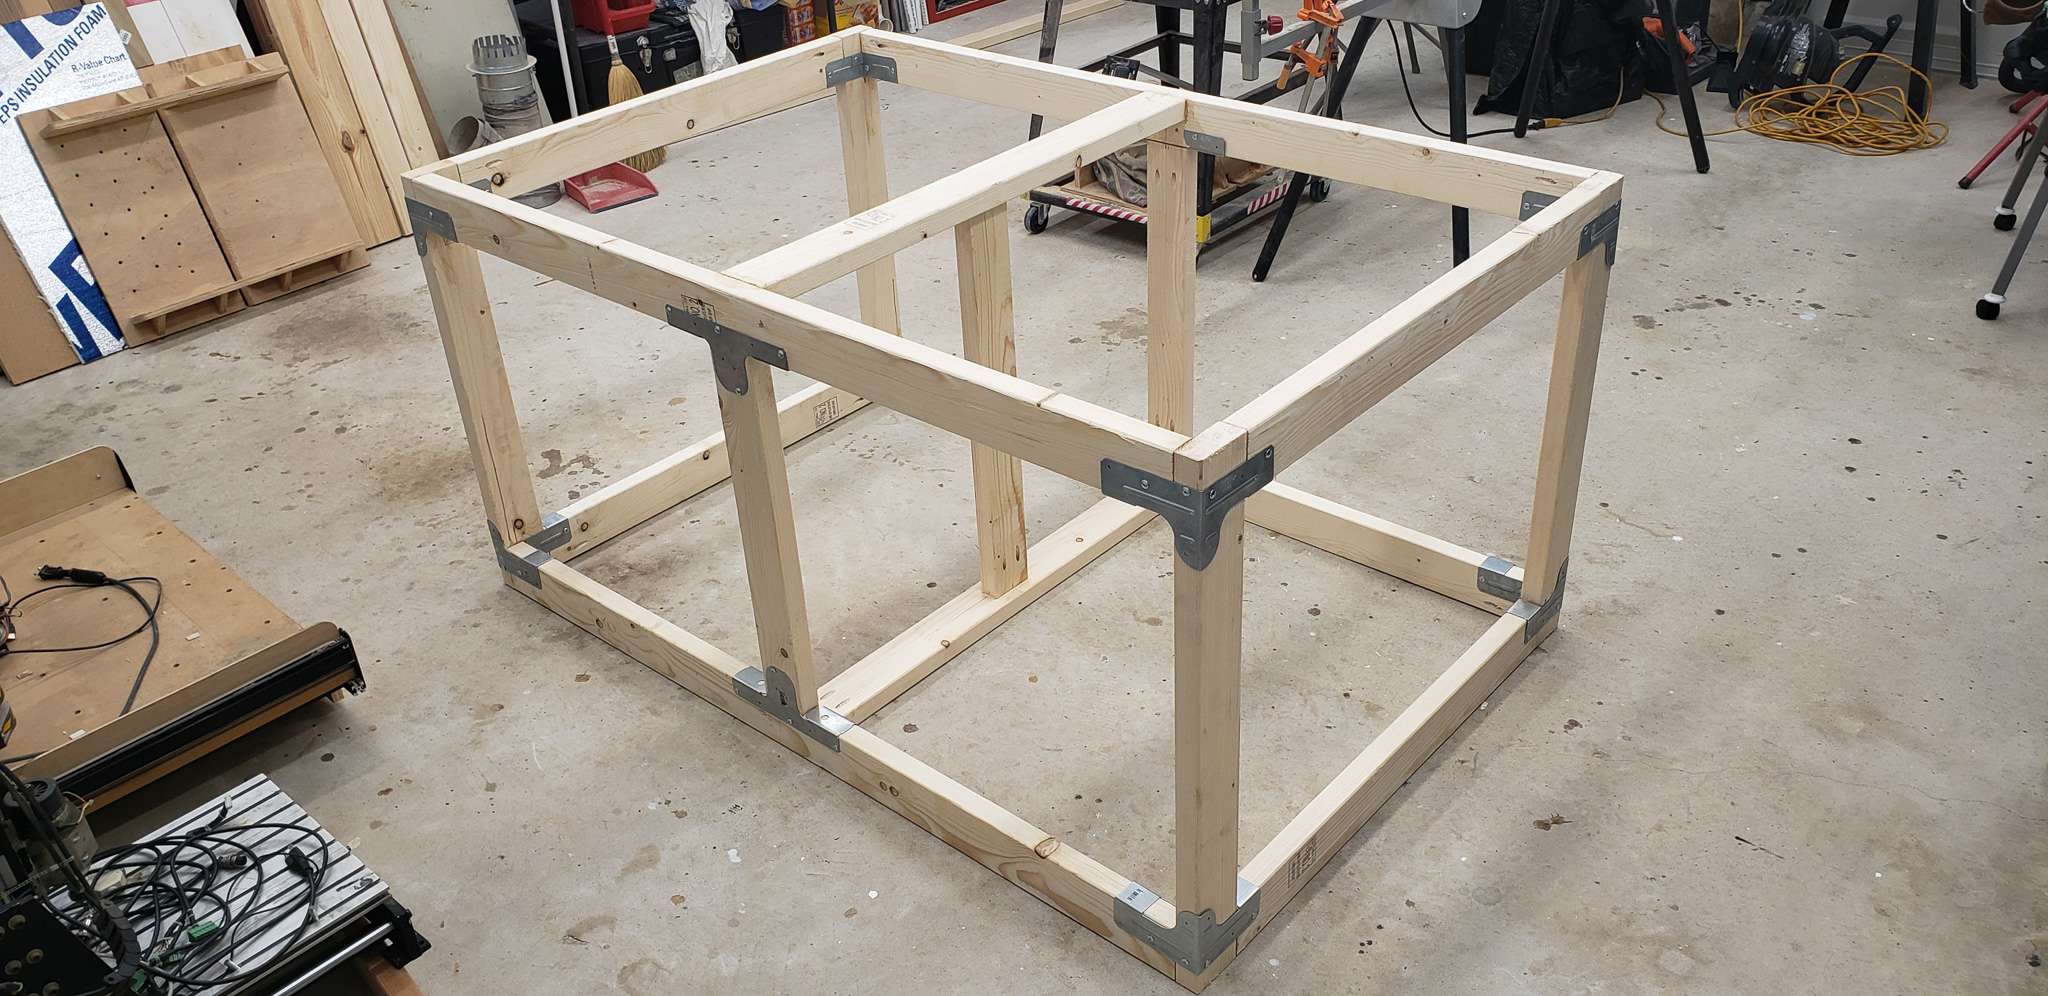
Initially, the plan involved a simple structure made from “two-by-four” lumber, sturdy and heavy enough to handle the intended loads:
The other requirements remained the same:
- Mobility
- Access to whatever is placed on the table from any side
- Space to hang or store commonly used tools
The primary material chosen for constructing this table was standard “two-by-four” construction lumber. While it’s not suitable for making home furniture, it’s perfect for a workshop. If purchased from a store rather than a sawmill, the lumber is already well-processed and can be used as-is.
The frame elements were assembled using glue and through-screws. To further reinforce all the primary joints, metal brackets specifically designed for this type of lumber were also used:
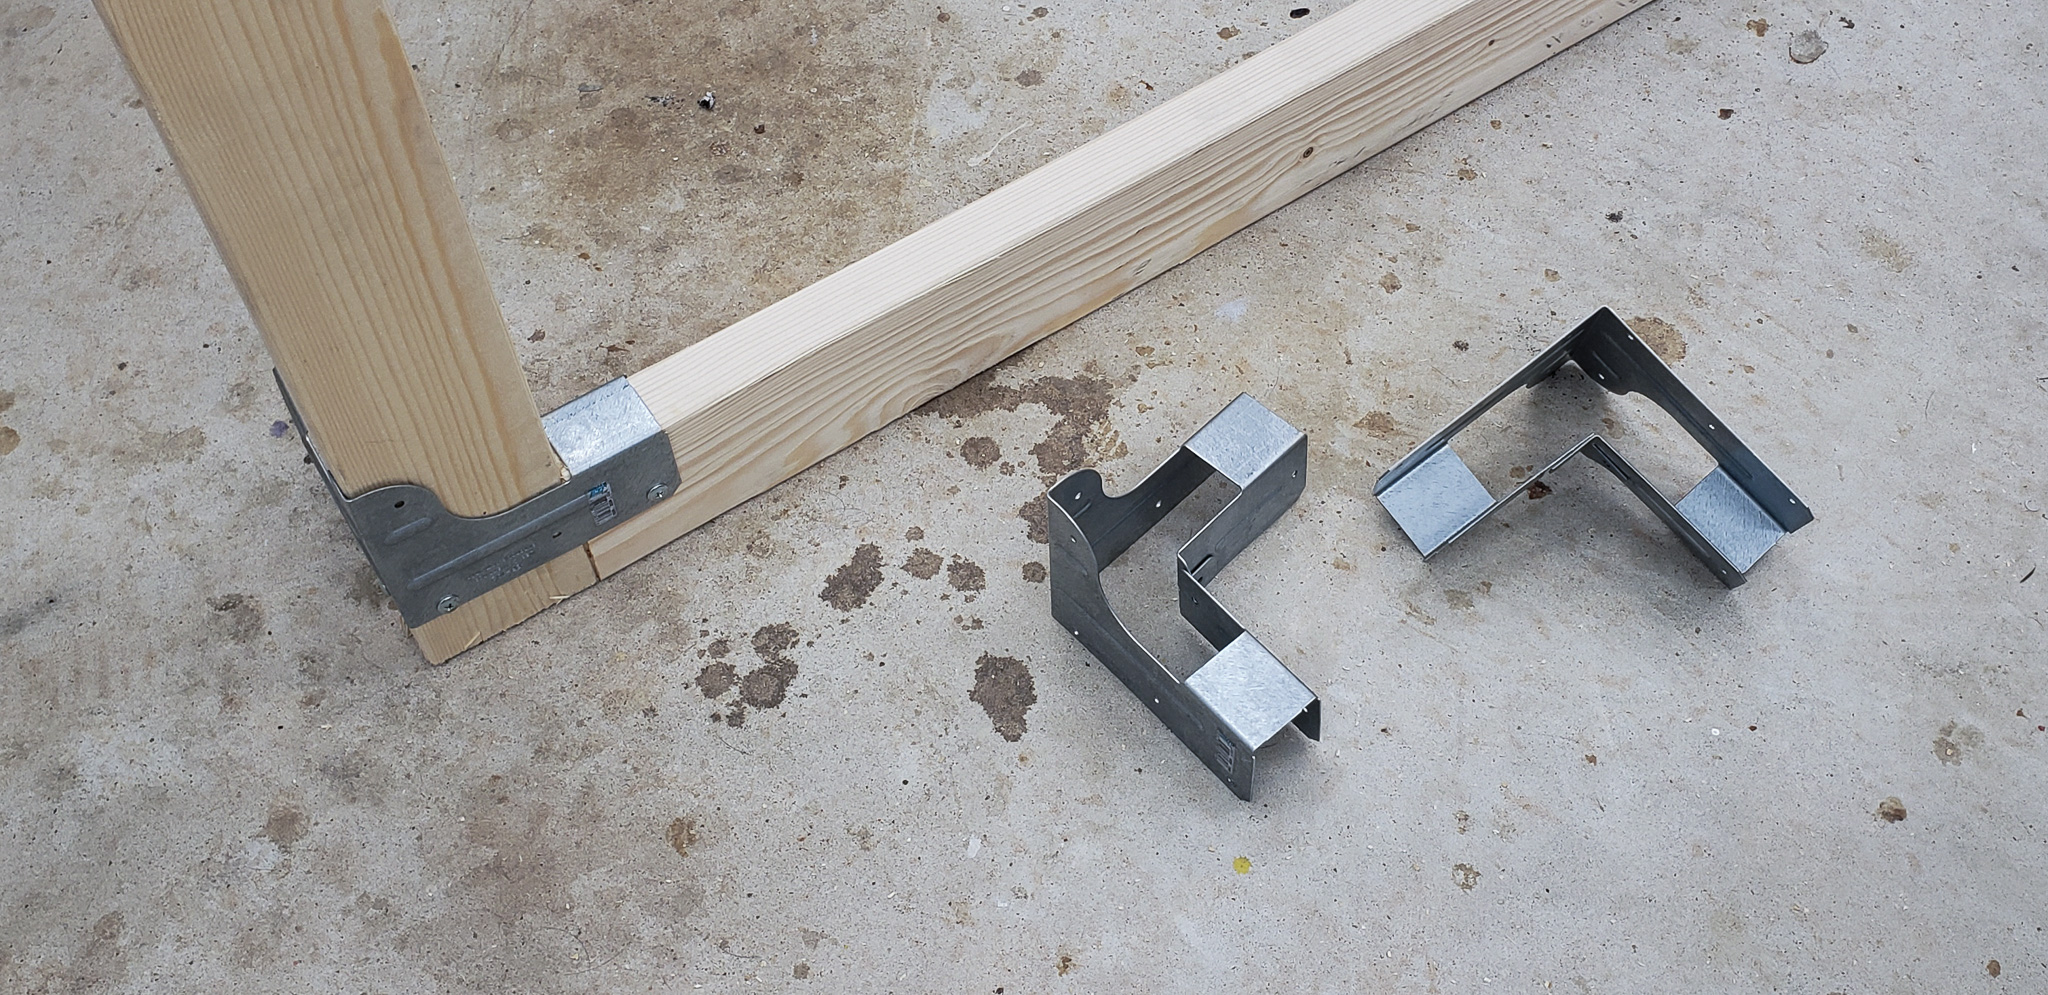
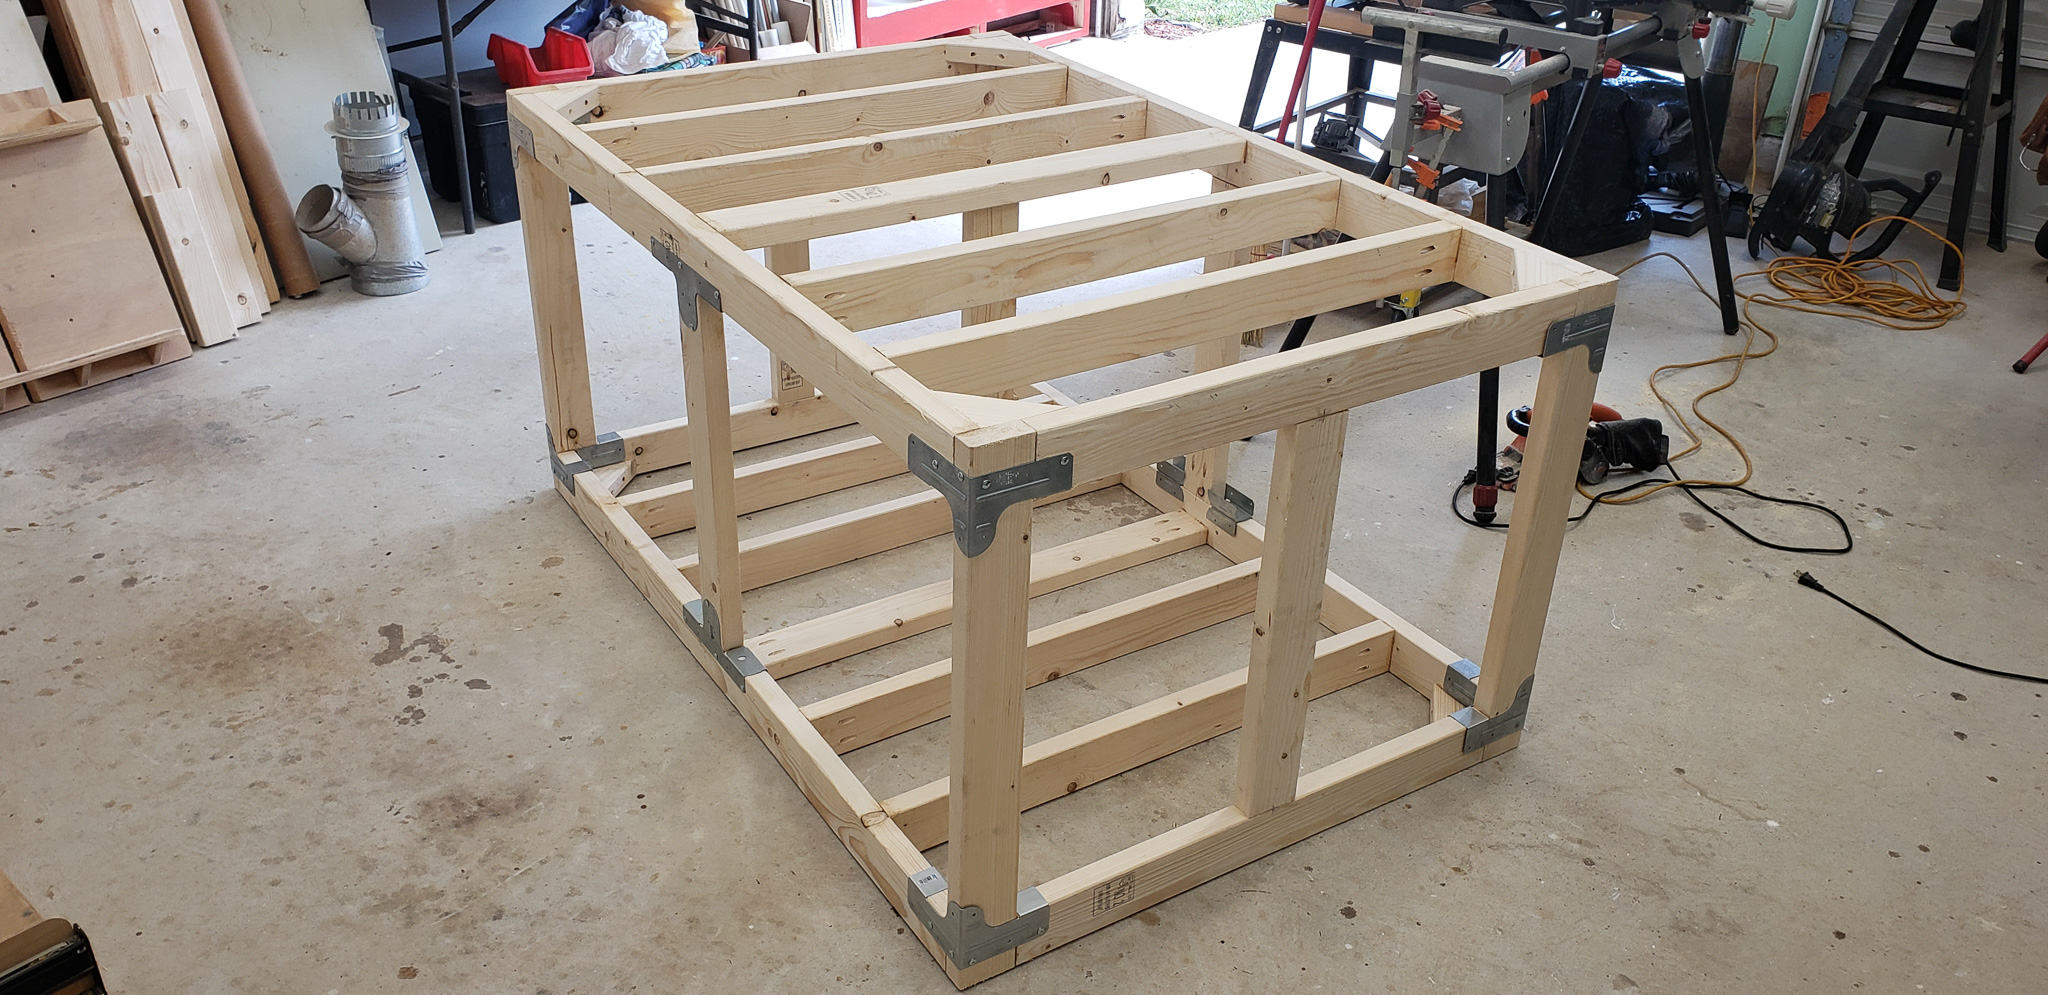
I must confess — I honestly stole this idea from our local grocery store. The vegetable stands there are built exactly the same way: “two-by-four” and metal brackets. The only difference is that they went out of their way to add some aesthetics to the structure, staining the wood to mimic “expensive types of wood” and painting the brackets black.
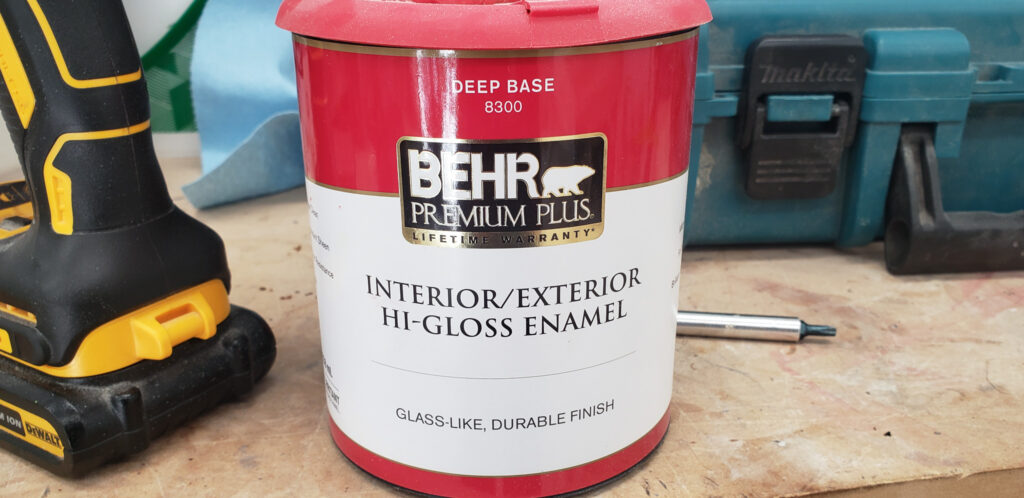
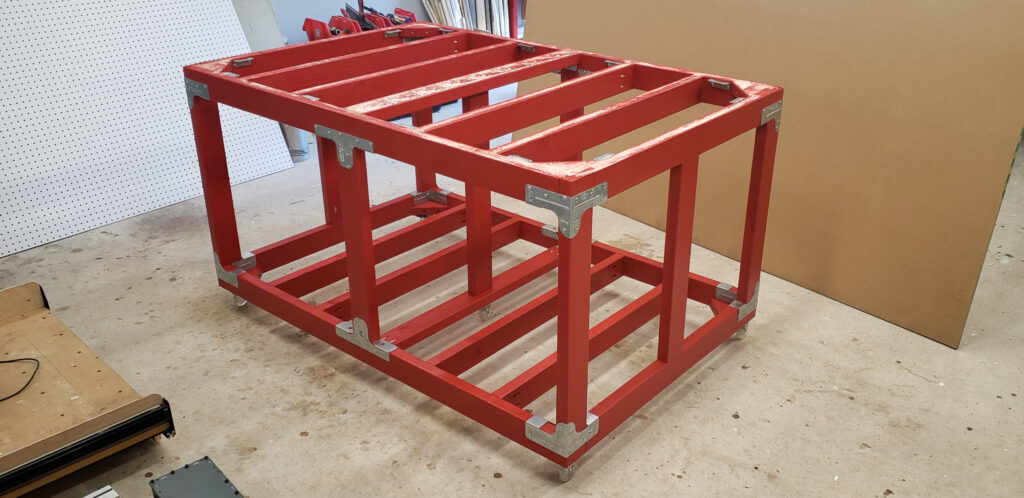
I also tried to add a touch of aesthetics. Instead of wood stain, I used red enamel — tough as nails — and left the metal brackets as they were:
For some time now, I’ve been feeling uncomfortable with the color monotony in my workshop. I understand where it comes from and why it’s usually that way. But I’ve grown tired of this formalism! I want bright colors and variety in my surroundings. That’s why, nowadays, I try to choose a unique color for each project in the workshop. Perhaps, over time, it will all look like an explosion at a unicorn farm, but for now, it makes me happy.
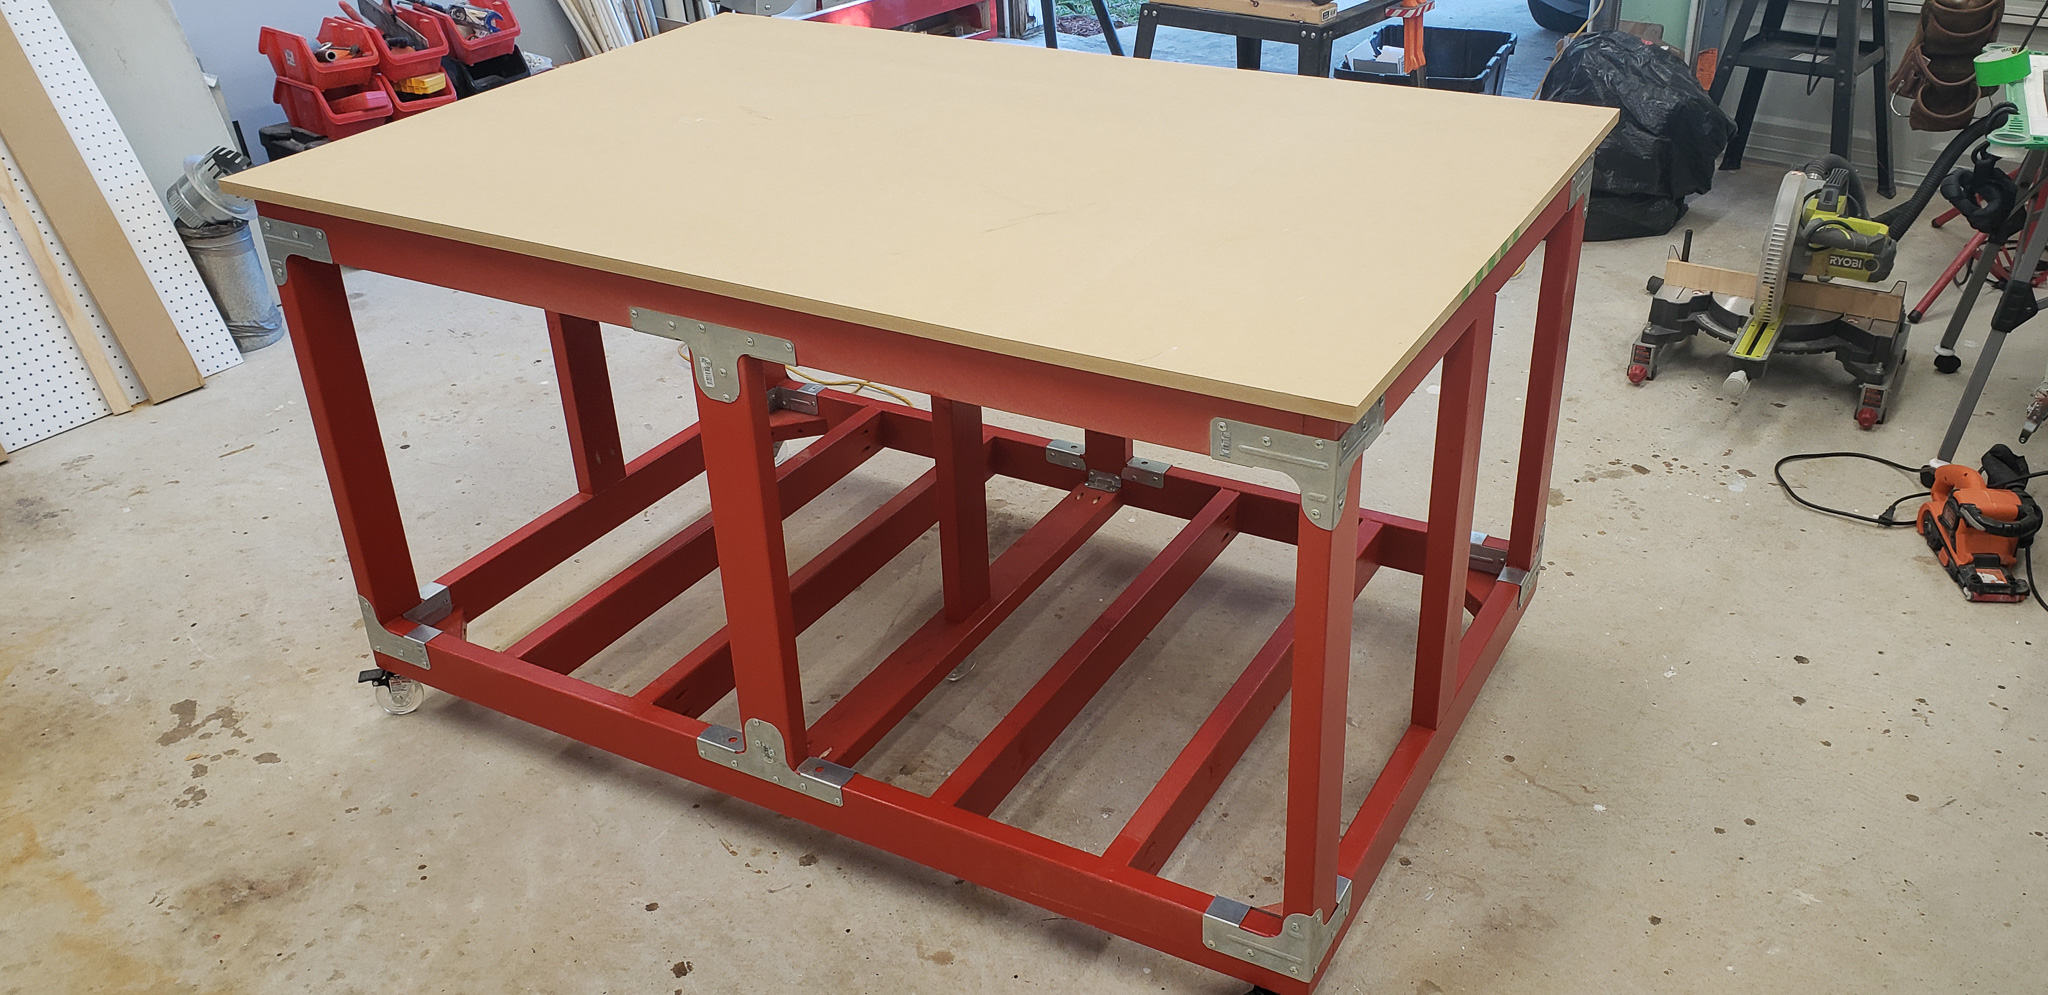
An MDF panel as the tabletop completed the structure:
It seemed like the project could end there. But — no! I wouldn’t be myself if things were that simple!
First and foremost, the “fancy” casters on which the table was mounted turned out to be completely inadequate. They were too soft. I’m not sure what I was thinking when choosing them at the store… Or rather — I know, but that’s beside the point… I was wrong.
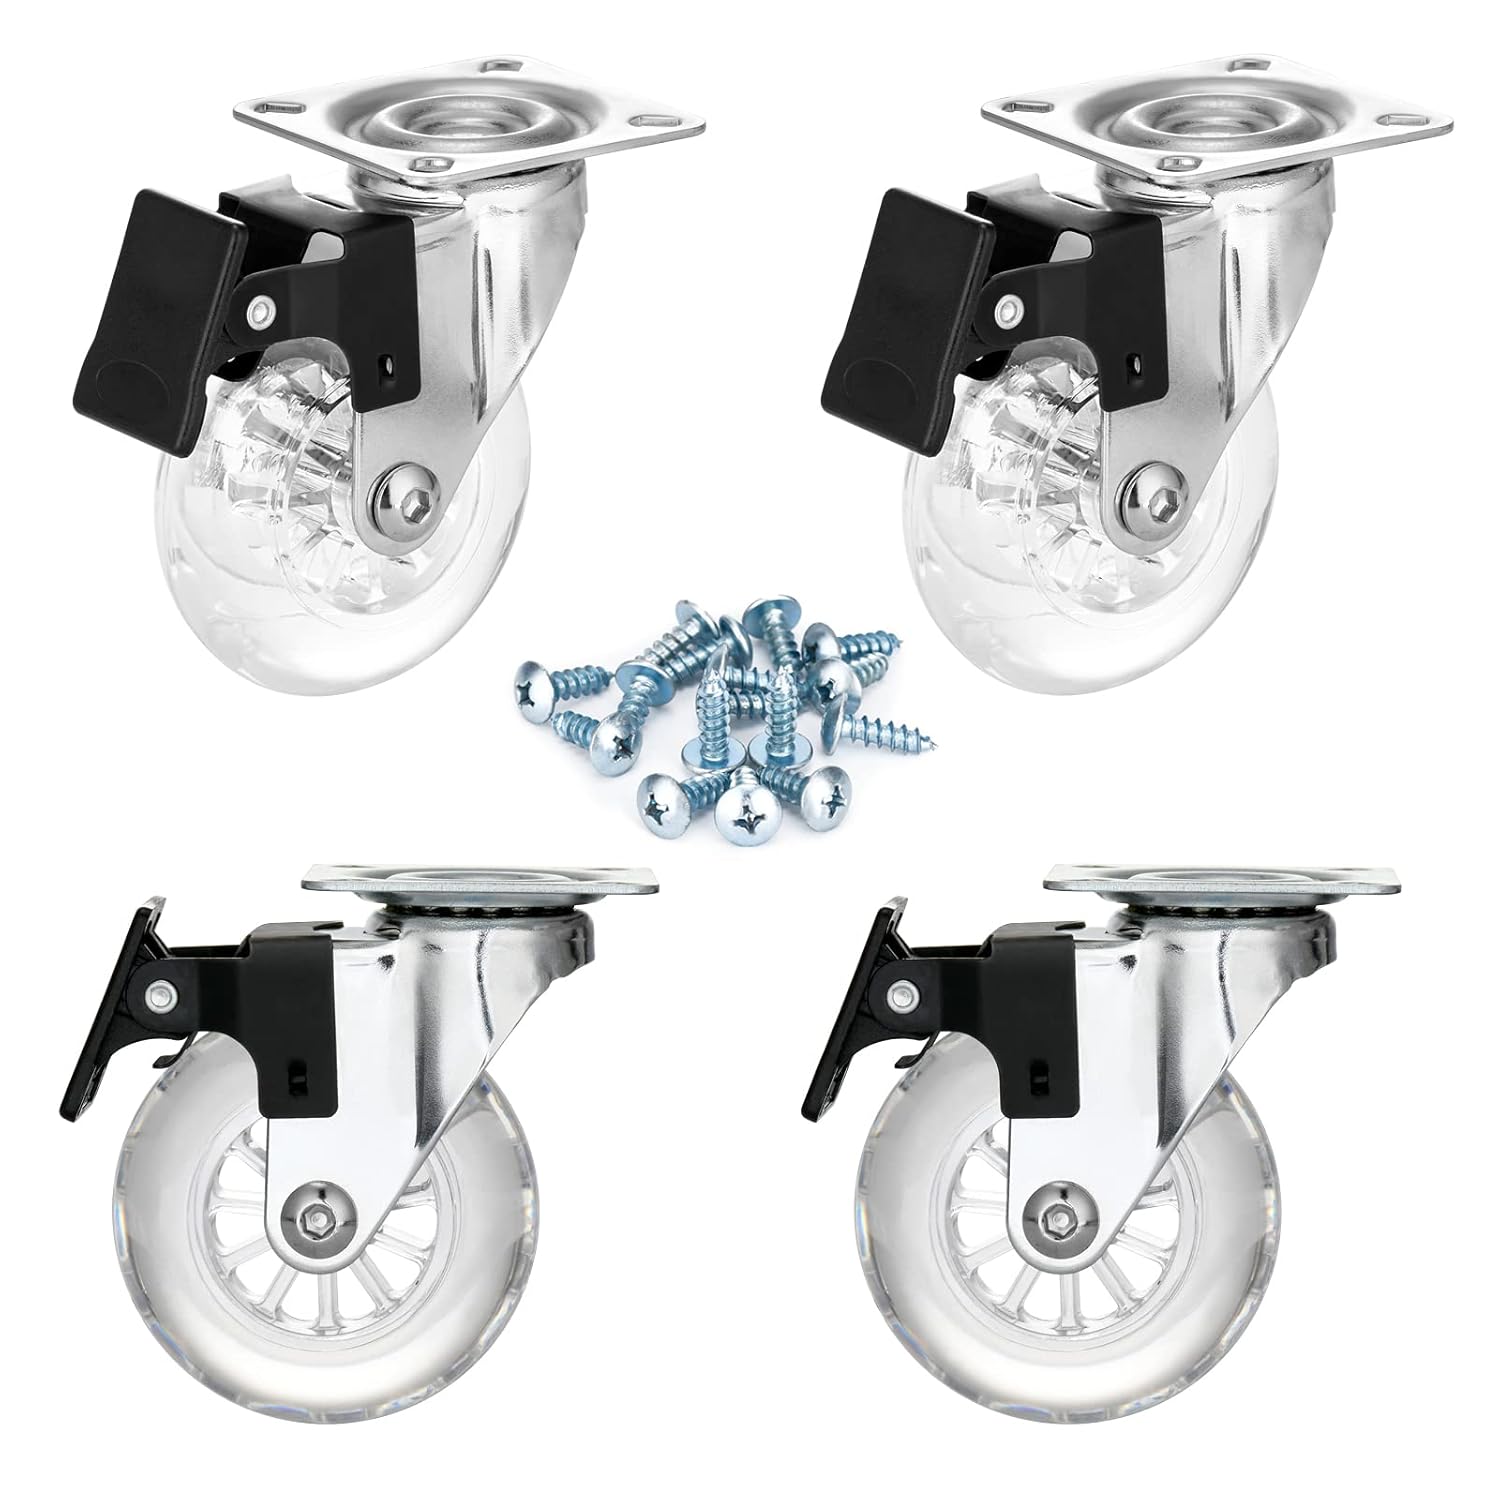
The casters held the weight of the table itself more or less fine. But when something heavy was placed on the table along with a pile of tools, the casters would begin to deform, much like an underinflated car tire. In such a state, they rolled poorly, and moving the table required considerable effort.
What’s more! Even with all the casters locked, the table still had a tendency to slide across the floor. Not ideal for something aspiring to be a workbench, in any sense of the word.
This was a problem that had to be fixed.
Apart from that issue, I was also bothered by the vast empty space under the table. Initially, I thought I’d use it to store boxes of tools and supplies. But there was just too much space! First, filling it would require stacking boxes on top of each other, which isn’t very convenient. Second, such a quantity of toolboxes and boxes of nails or screws weighs quite a lot. Under this load, the table becomes nearly immobile — might as well attach tank treads to it.
Plus, there was still no clear place to store the tools I frequently use…
In the end, instead of enjoying yet another completed project, I found myself buried in Inventor CAD…
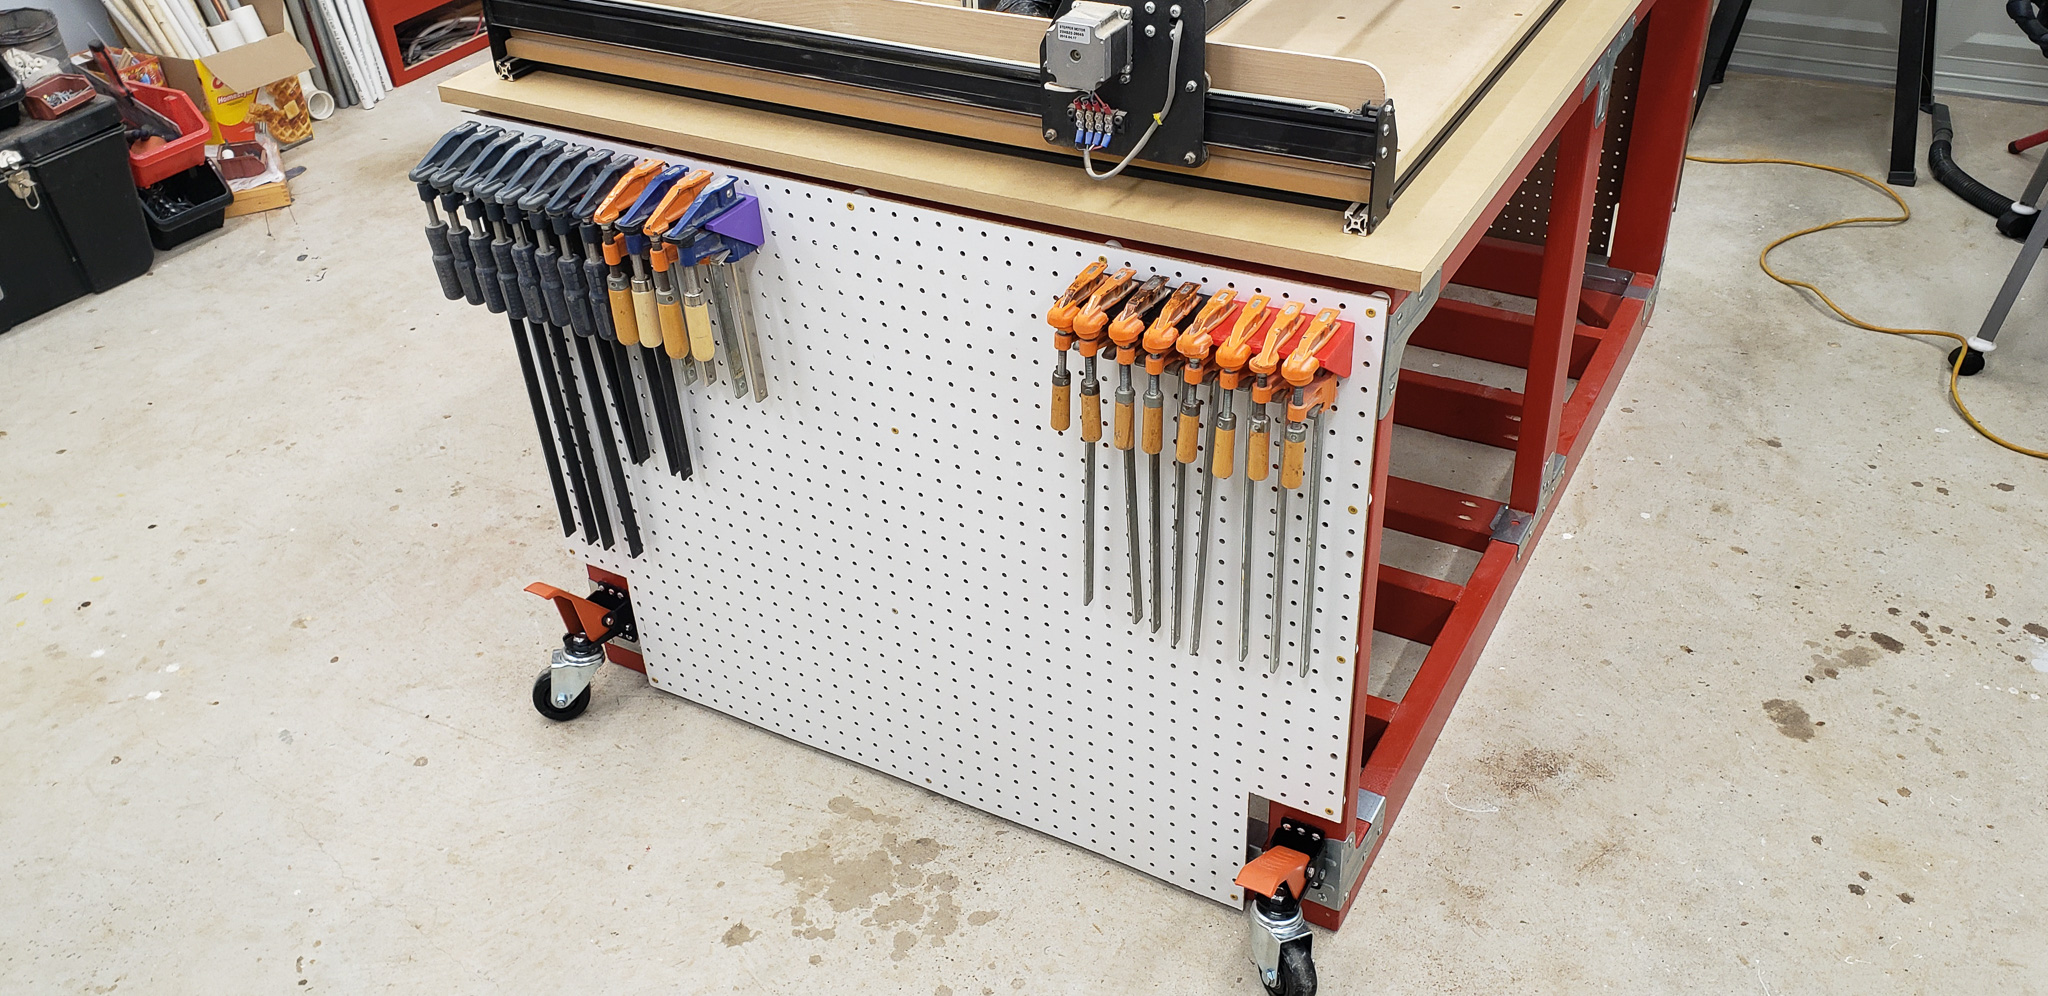
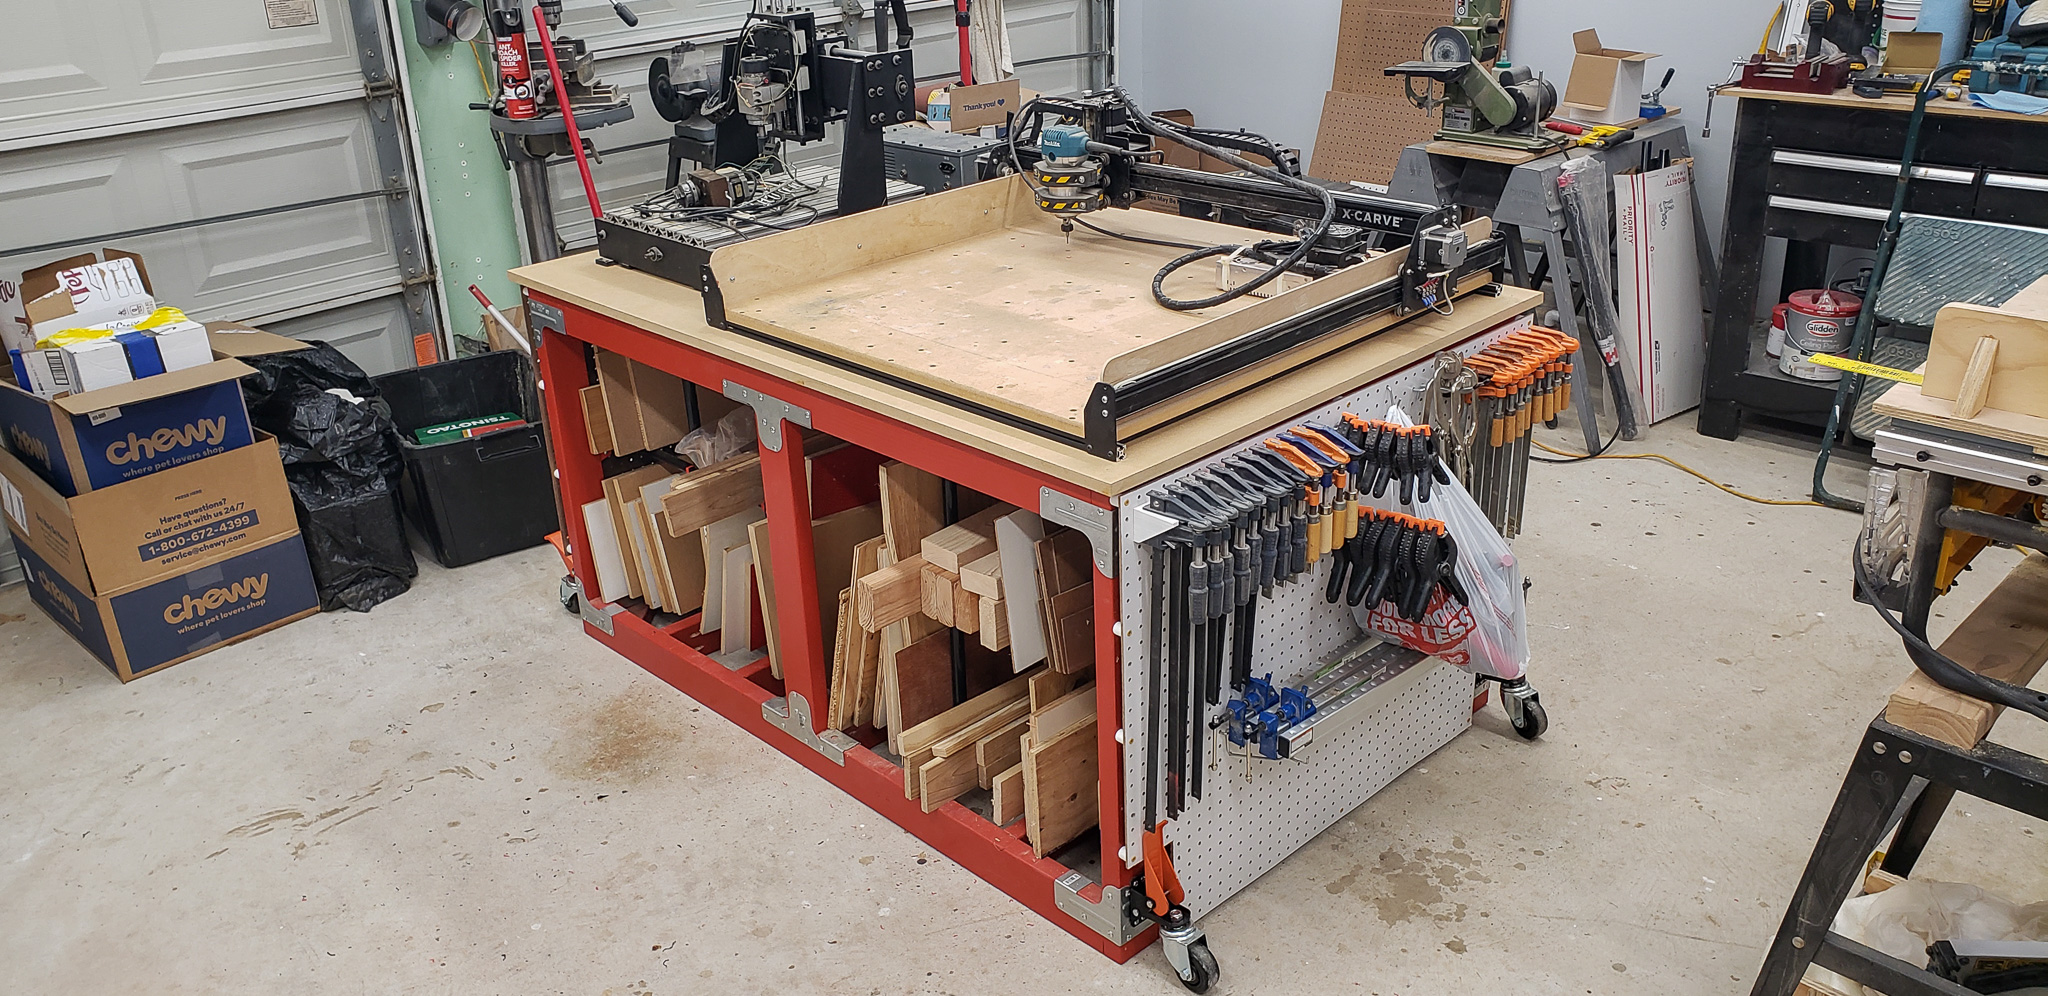
For the frequently used tools, pegboards were designed on the sides of the table:

Since they are not load-bearing parts of the structure, they are attached to the frame using spacers:
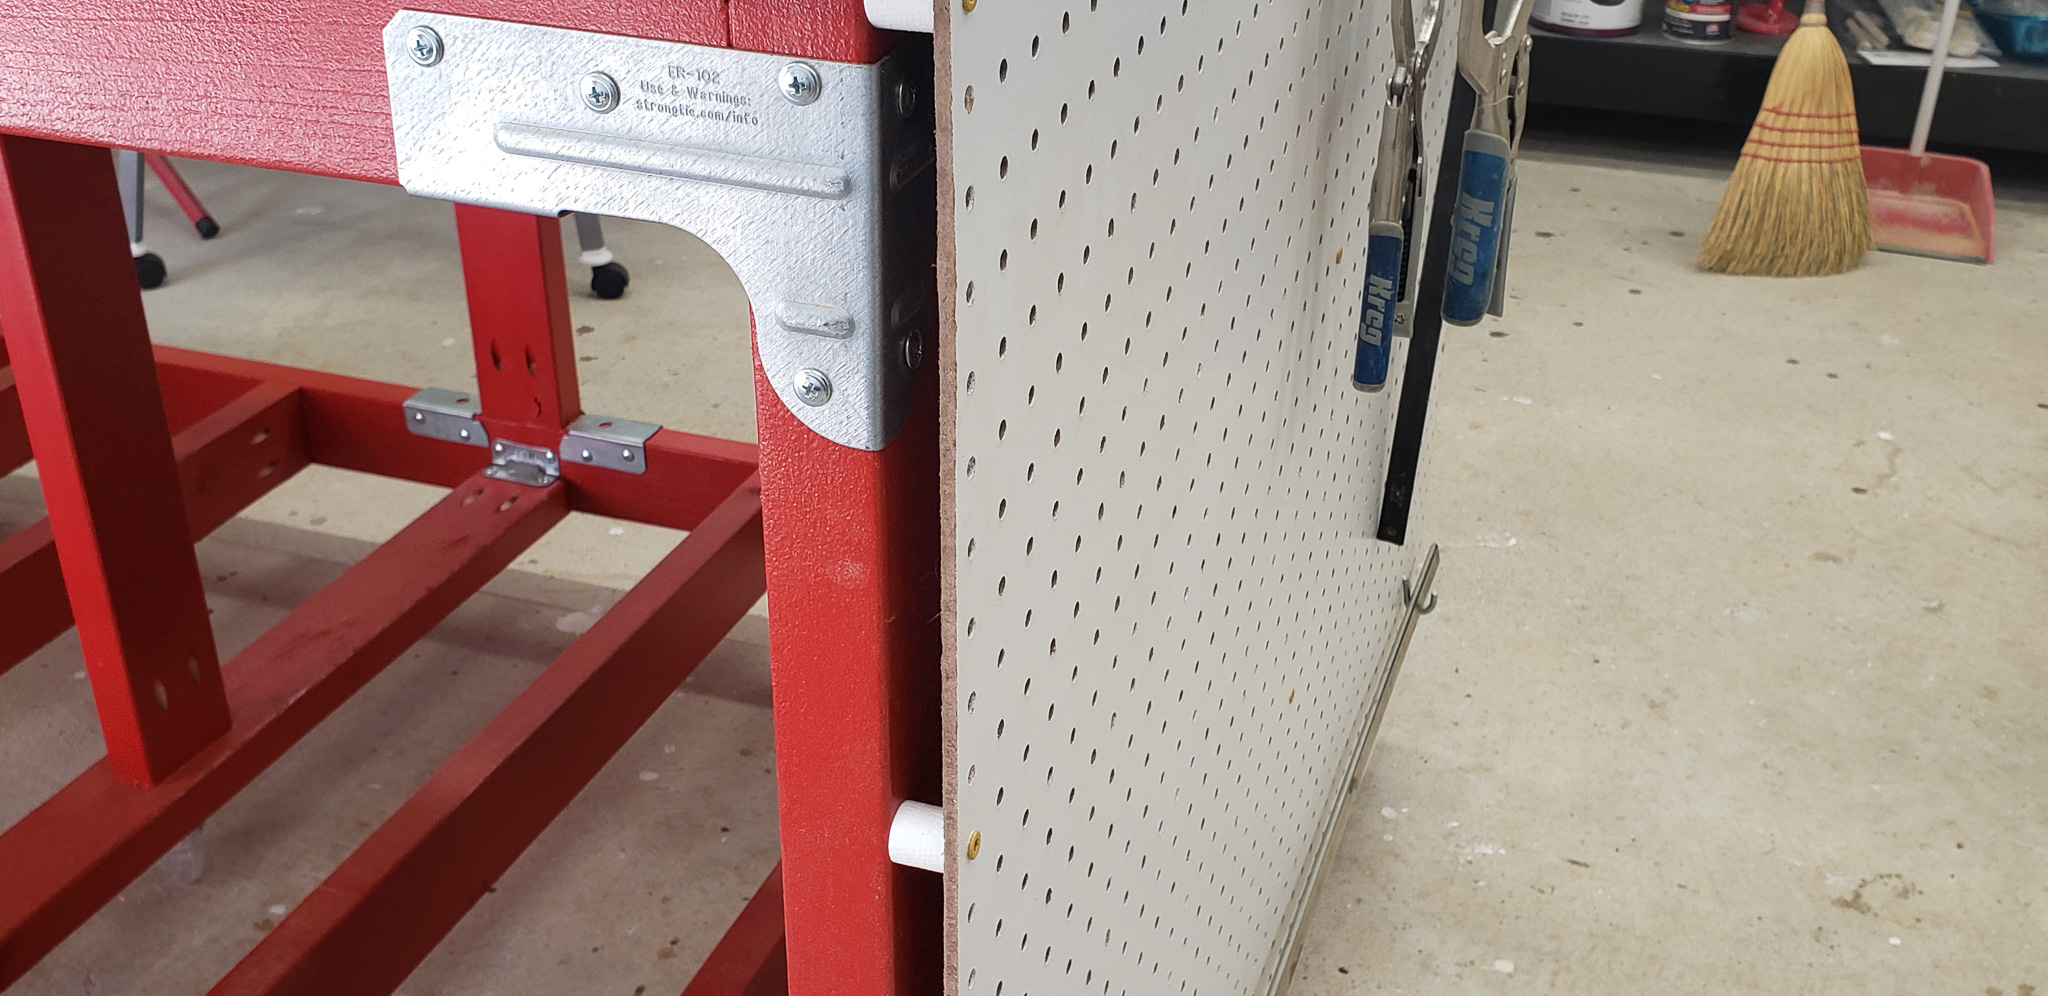
This allows the entire surface area of the pegboard sheet to be utilized, without losing space in areas where it would otherwise press flush against the lumber of the frame.
The problem of hanging frequently used tools was solved. On pegboards of this size, it’s possible to hang almost all the tools I typically use — not just the ones needed at the moment.
The next step was to address the issues of mobility and stability.
This was resolved by using this type of caster:
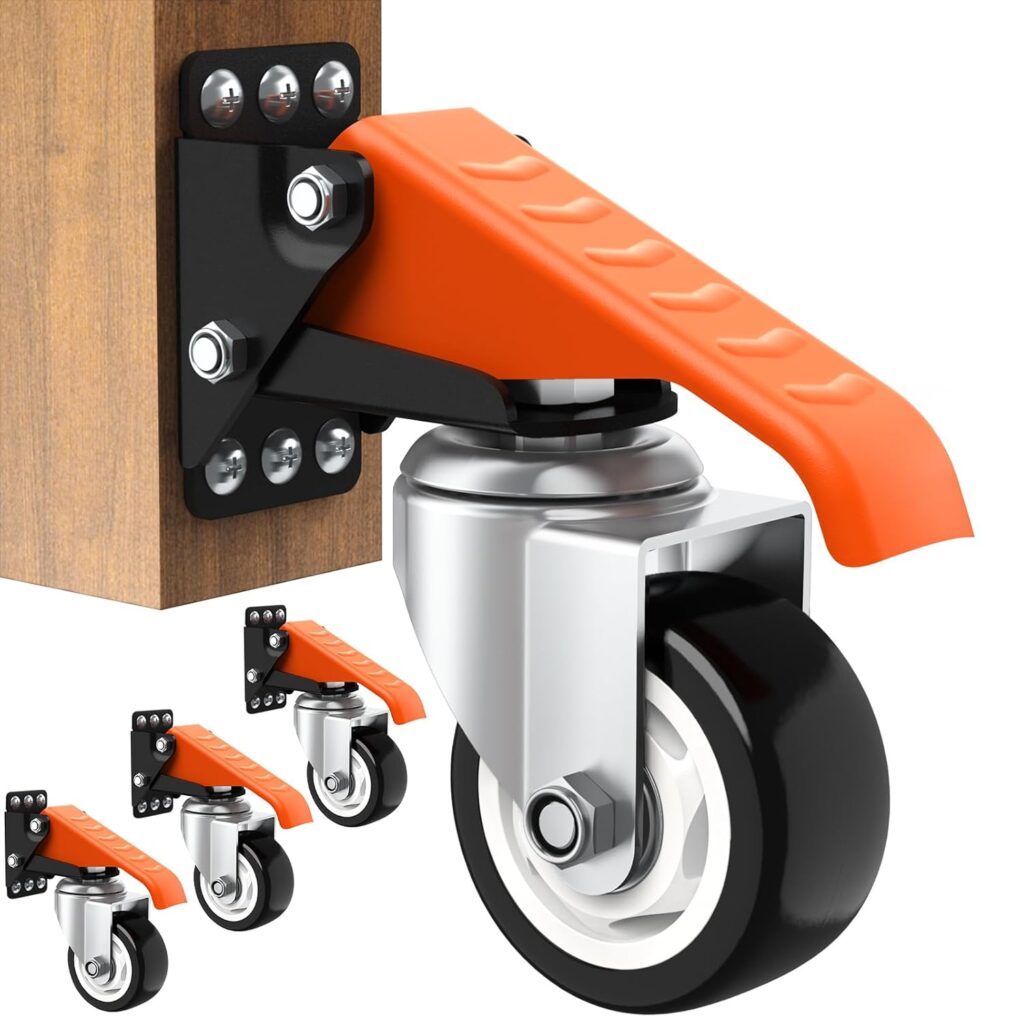
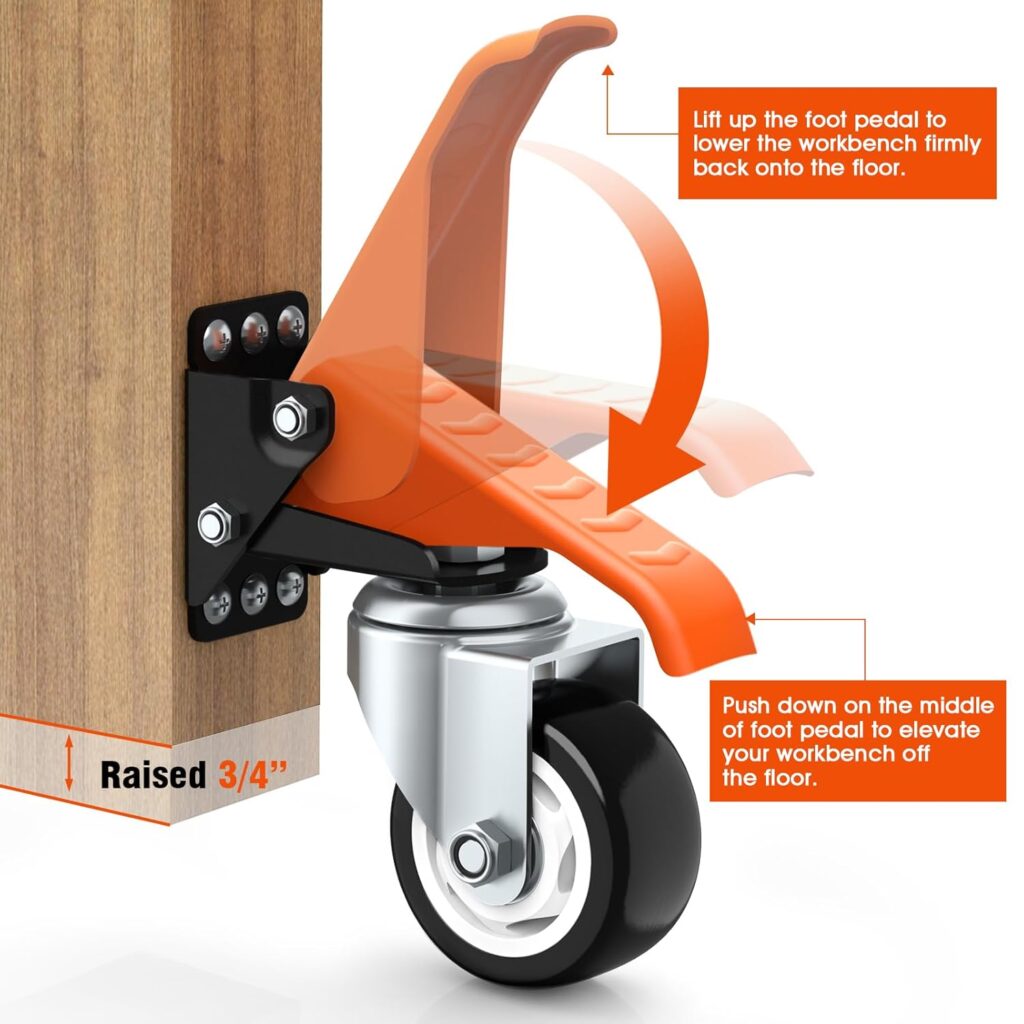
I had already used such casters in my projects before, and they’re fantastic!
- A set of these casters can support a load of up to 880 lbs. I no longer remember how much that is in kilograms, but I can say for sure that it’s far more than I could ever load onto the table during use.
- Thanks to their design, when “disengaged,” they allow the table to rest directly on the floor with its full base, solving the stability problem. At the same time, a simple press on the pedals transforms the table into an easily transportable object, regardless of the weight it’s carrying.
Why I didn’t think of them right away is a question for the voices in my head. Lately, they’ve been doing a poor job at their duties!
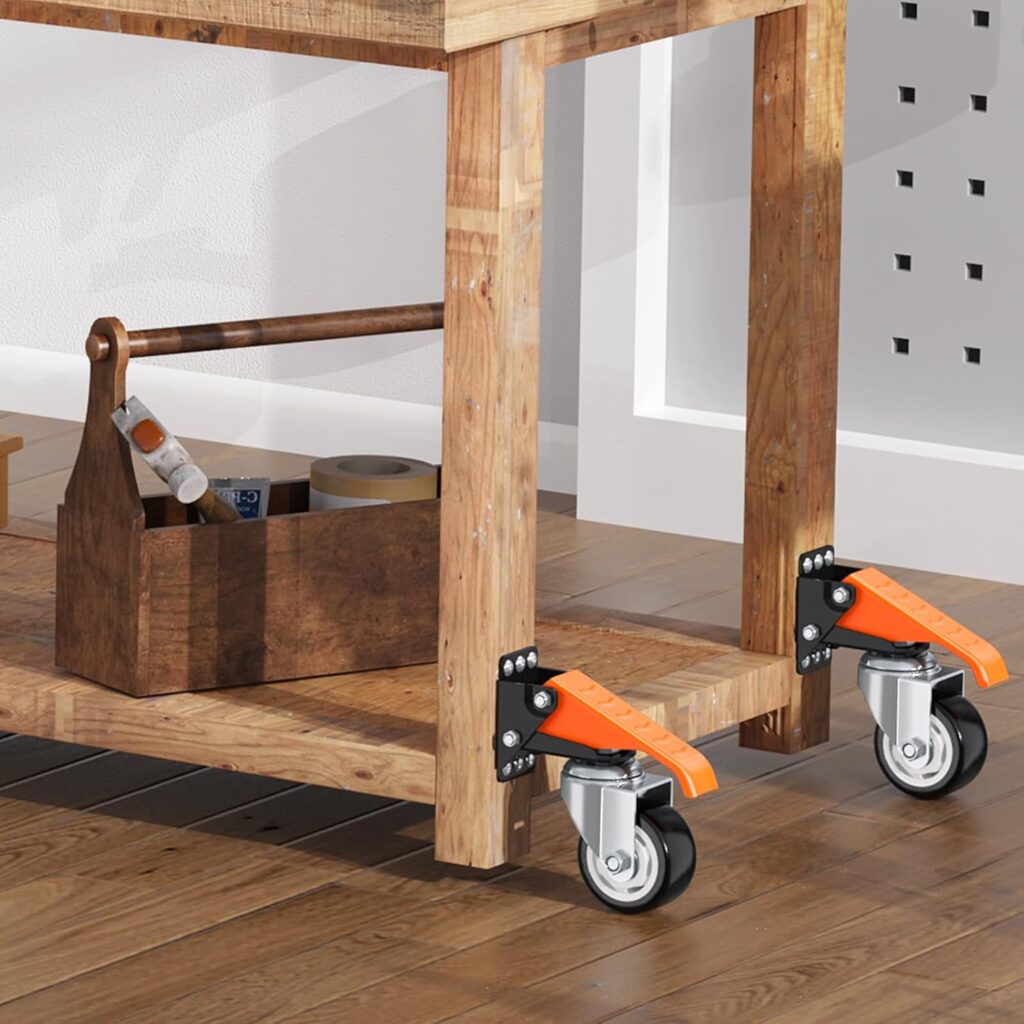
However, installing these casters required modifying the pegboards on the sides of the frame. To ensure their stability, they needed to be securely attached directly to the frame. As a result, the bottom corners of the pegboards had to be cut out:
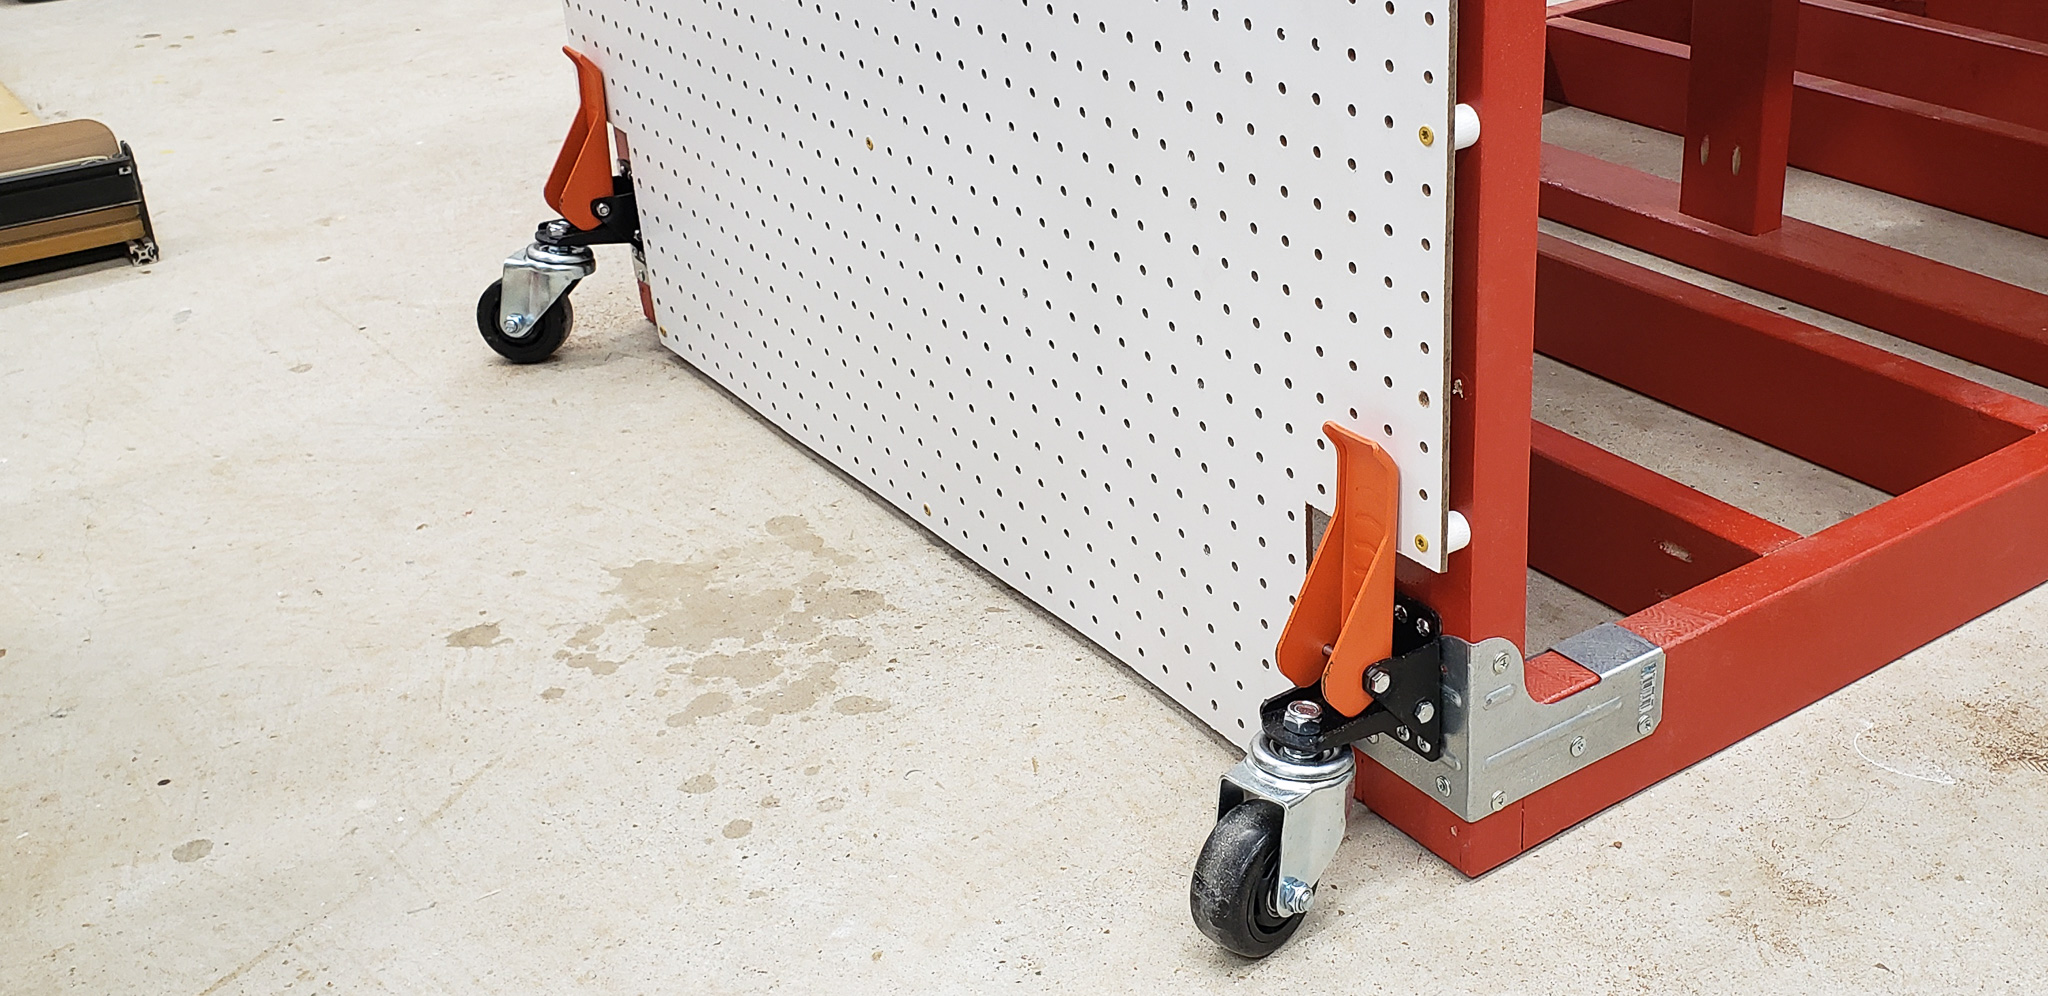
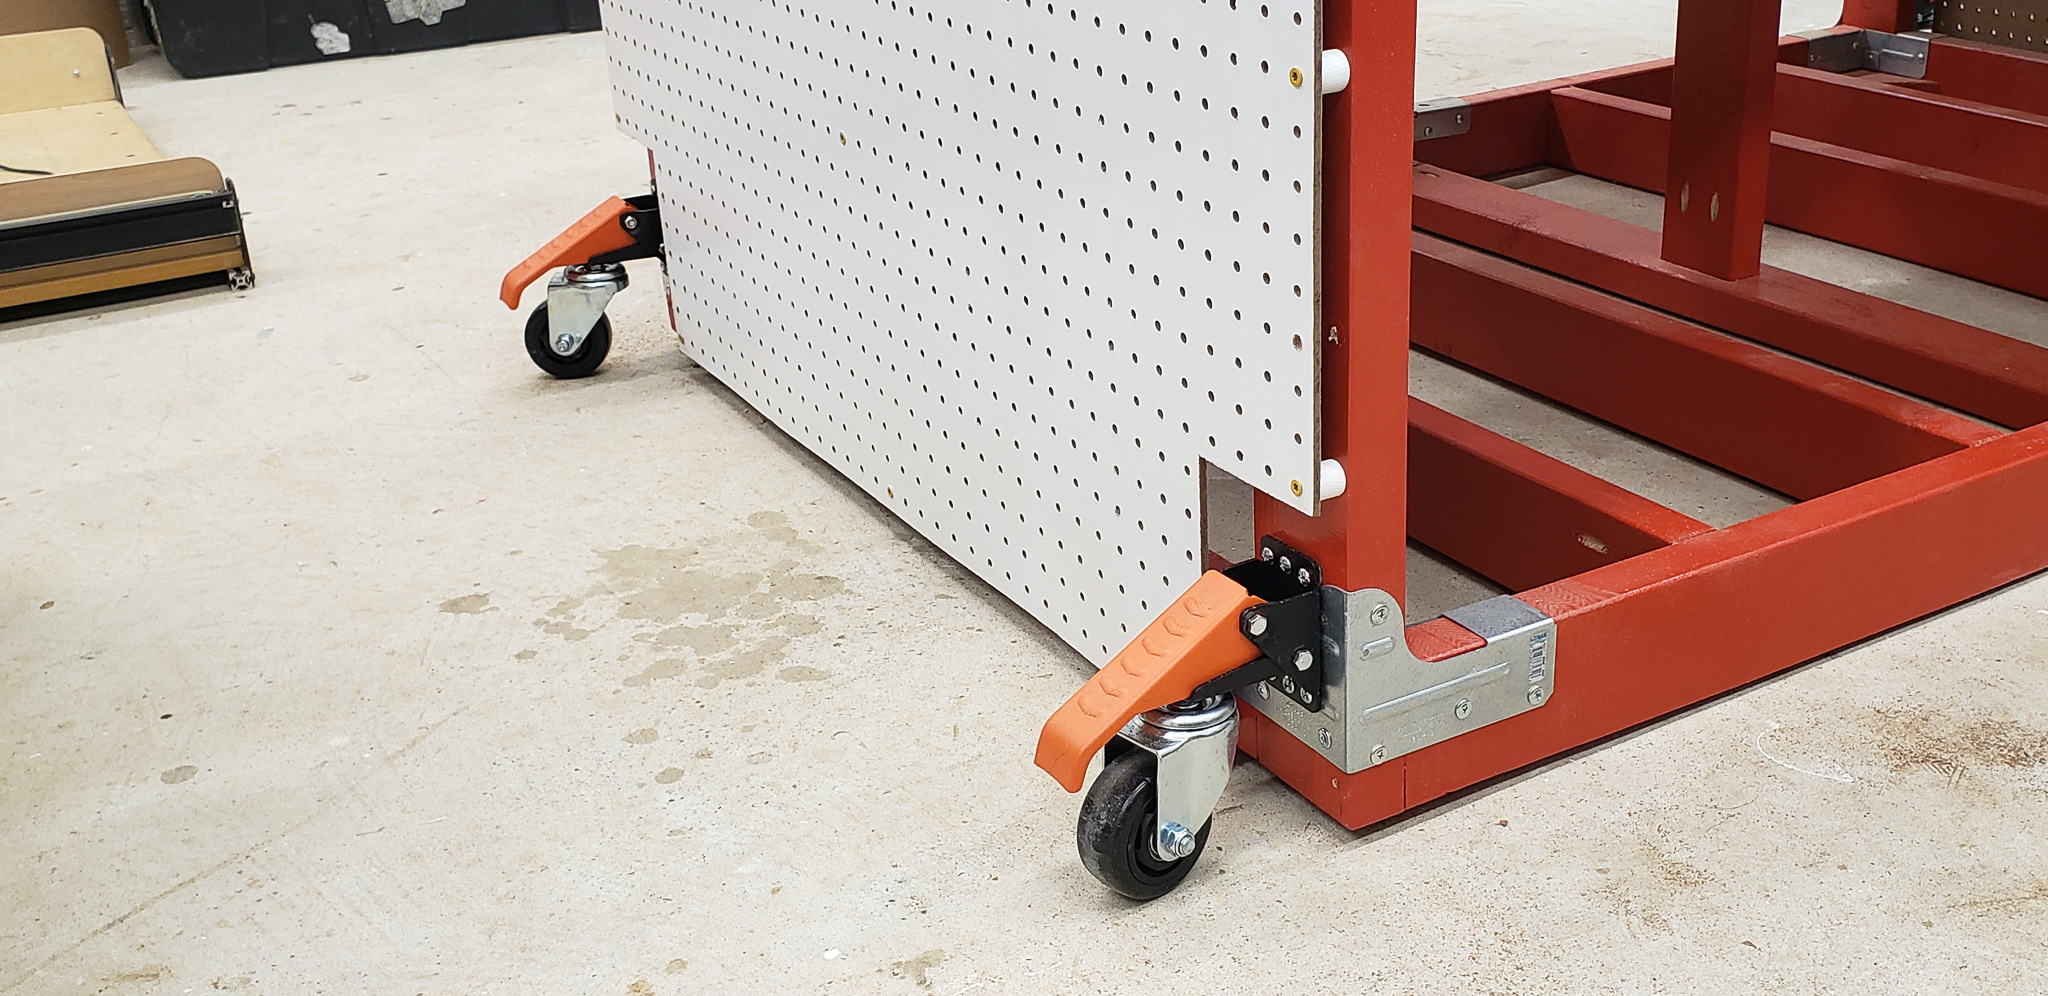
OK… Two out of three problems solved:
Now, the only issue left is figuring out how to organize the empty space under the table.
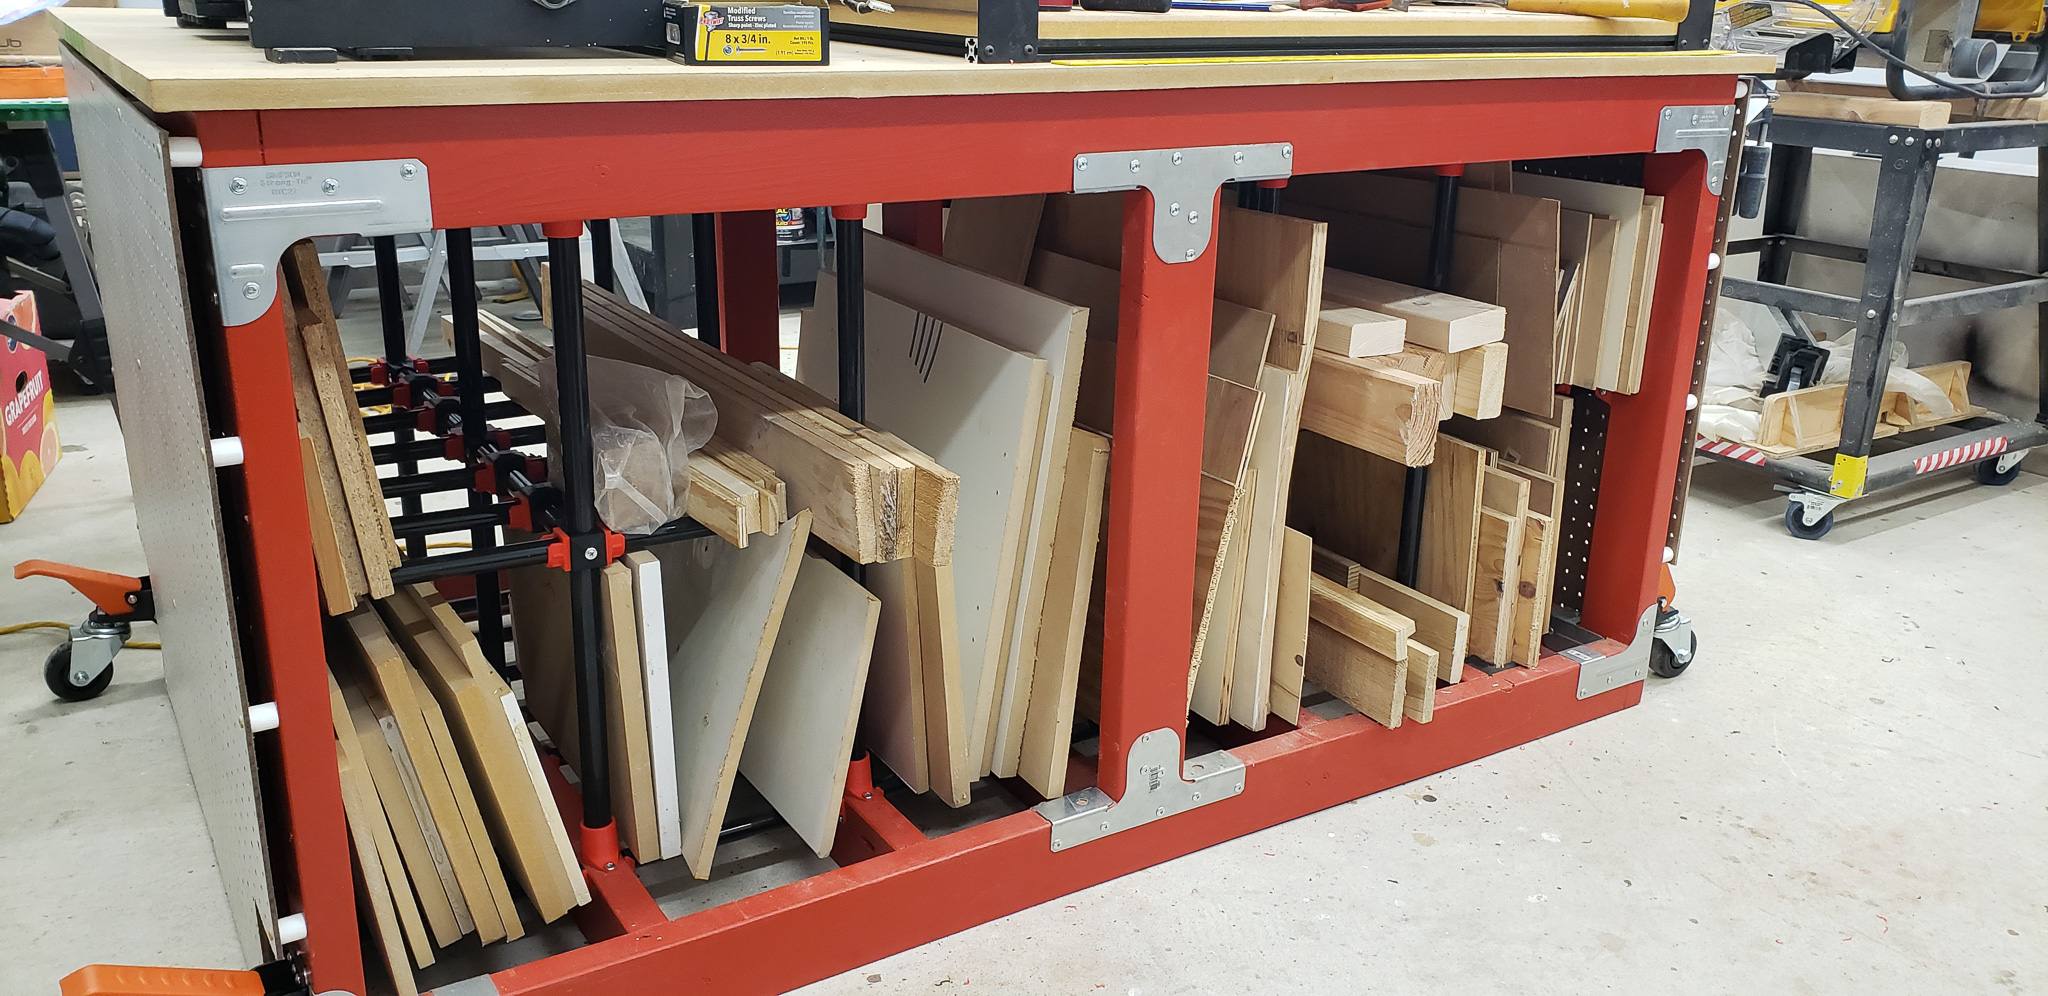
At this point, I began thinking about using the space under the table not for tools and supplies, but for the materials directly involved in whatever is happening on the table — all those countless scraps of panels and wood pieces that are too good to throw away “because they might come in handy someday.” I already have a place for tools. But these scraps and offcuts are scattered all over the workshop, occupying every corner.
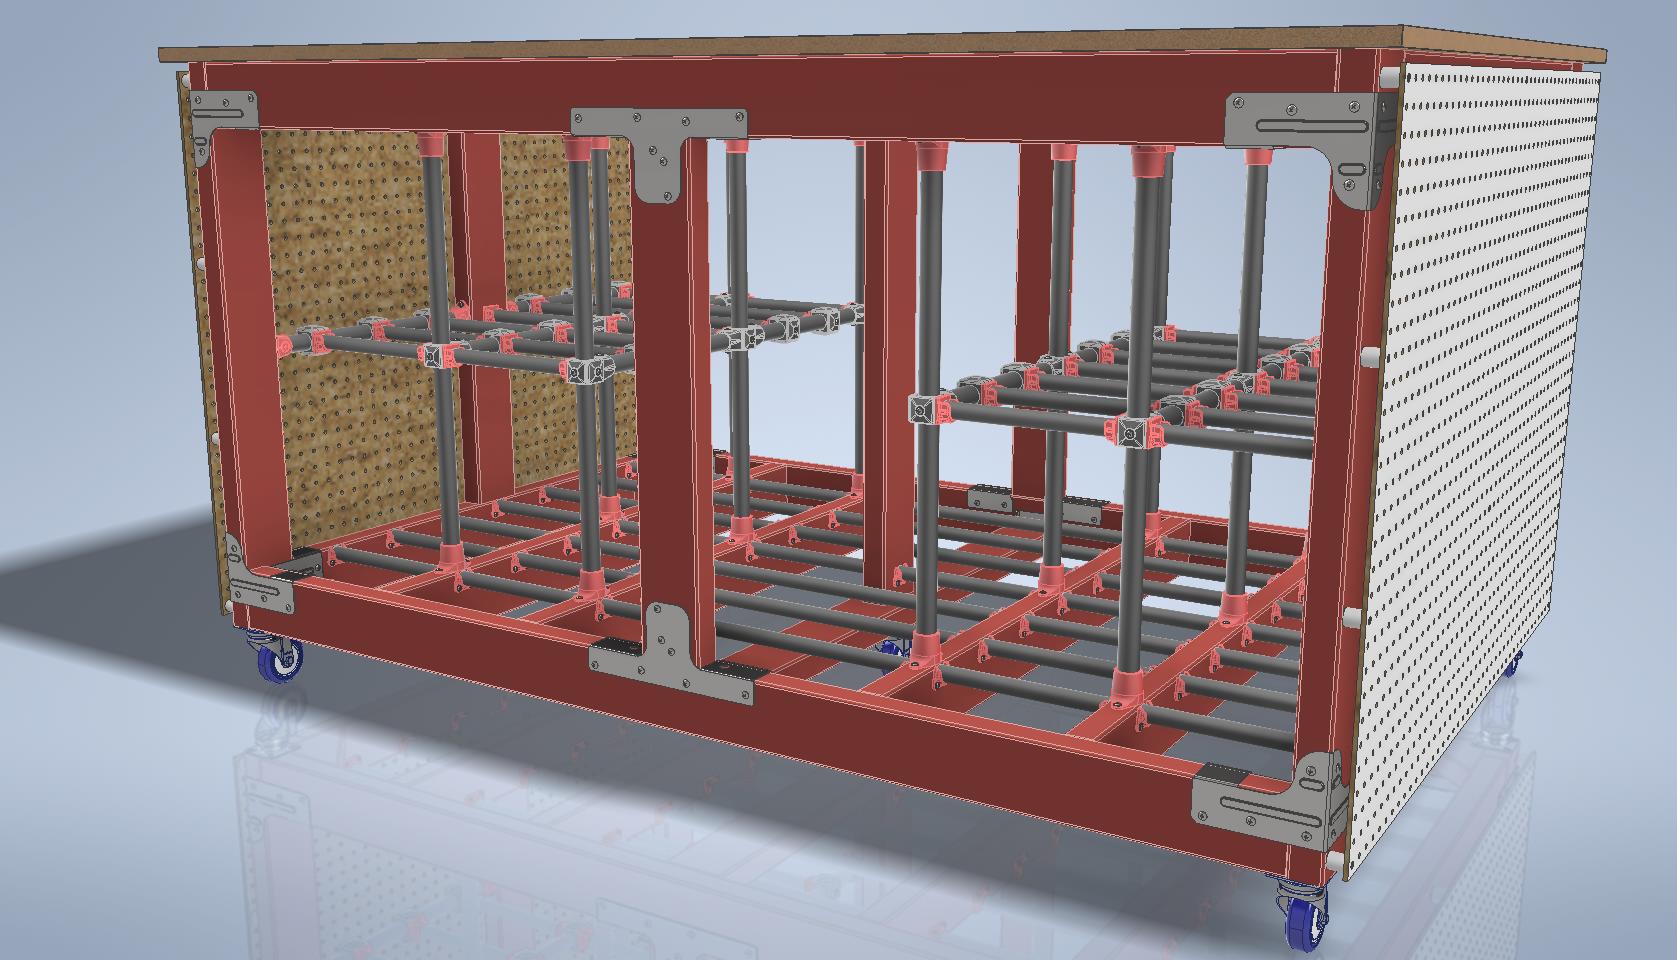
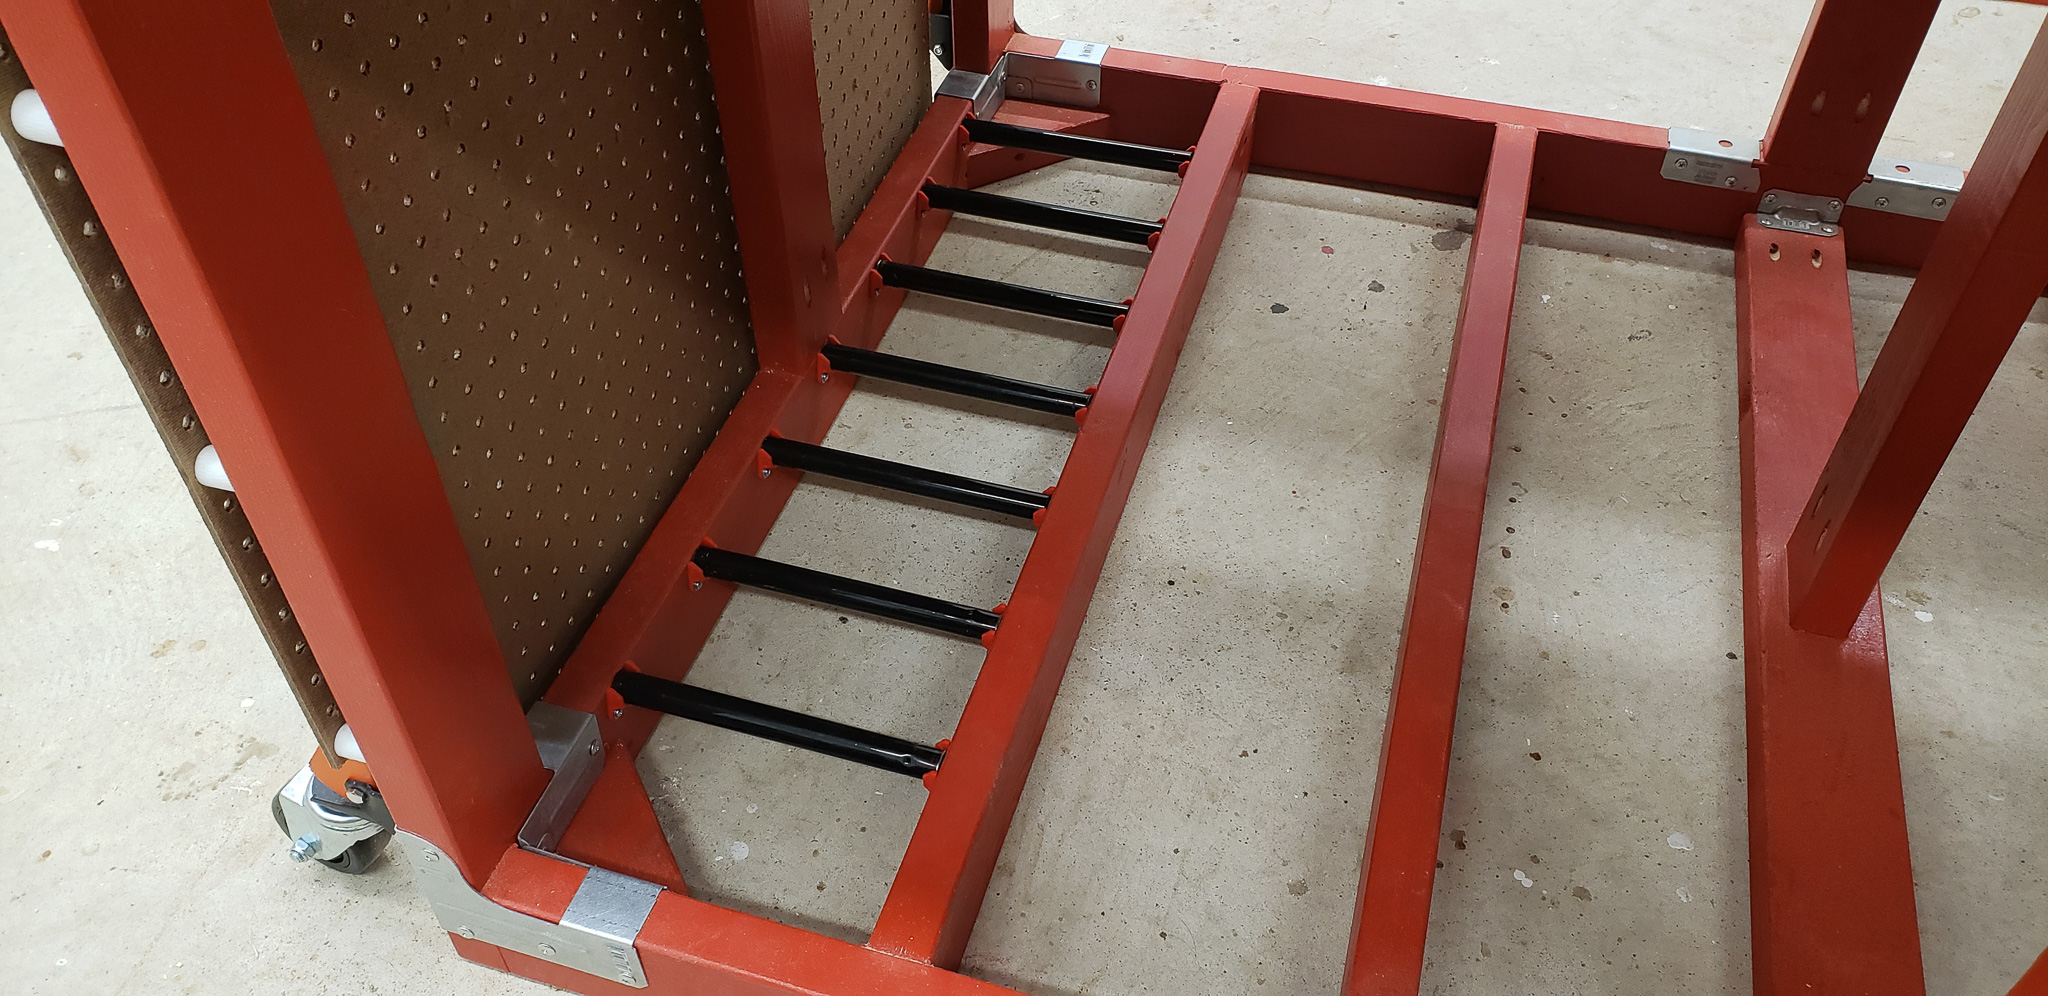
To make more rational use of the available space under the table for these purposes, I decided to create something resembling “cages” where the materials could be stored in multiple tiers, allowing easy access without needing to rummage through the entire “collection” to find the right piece:
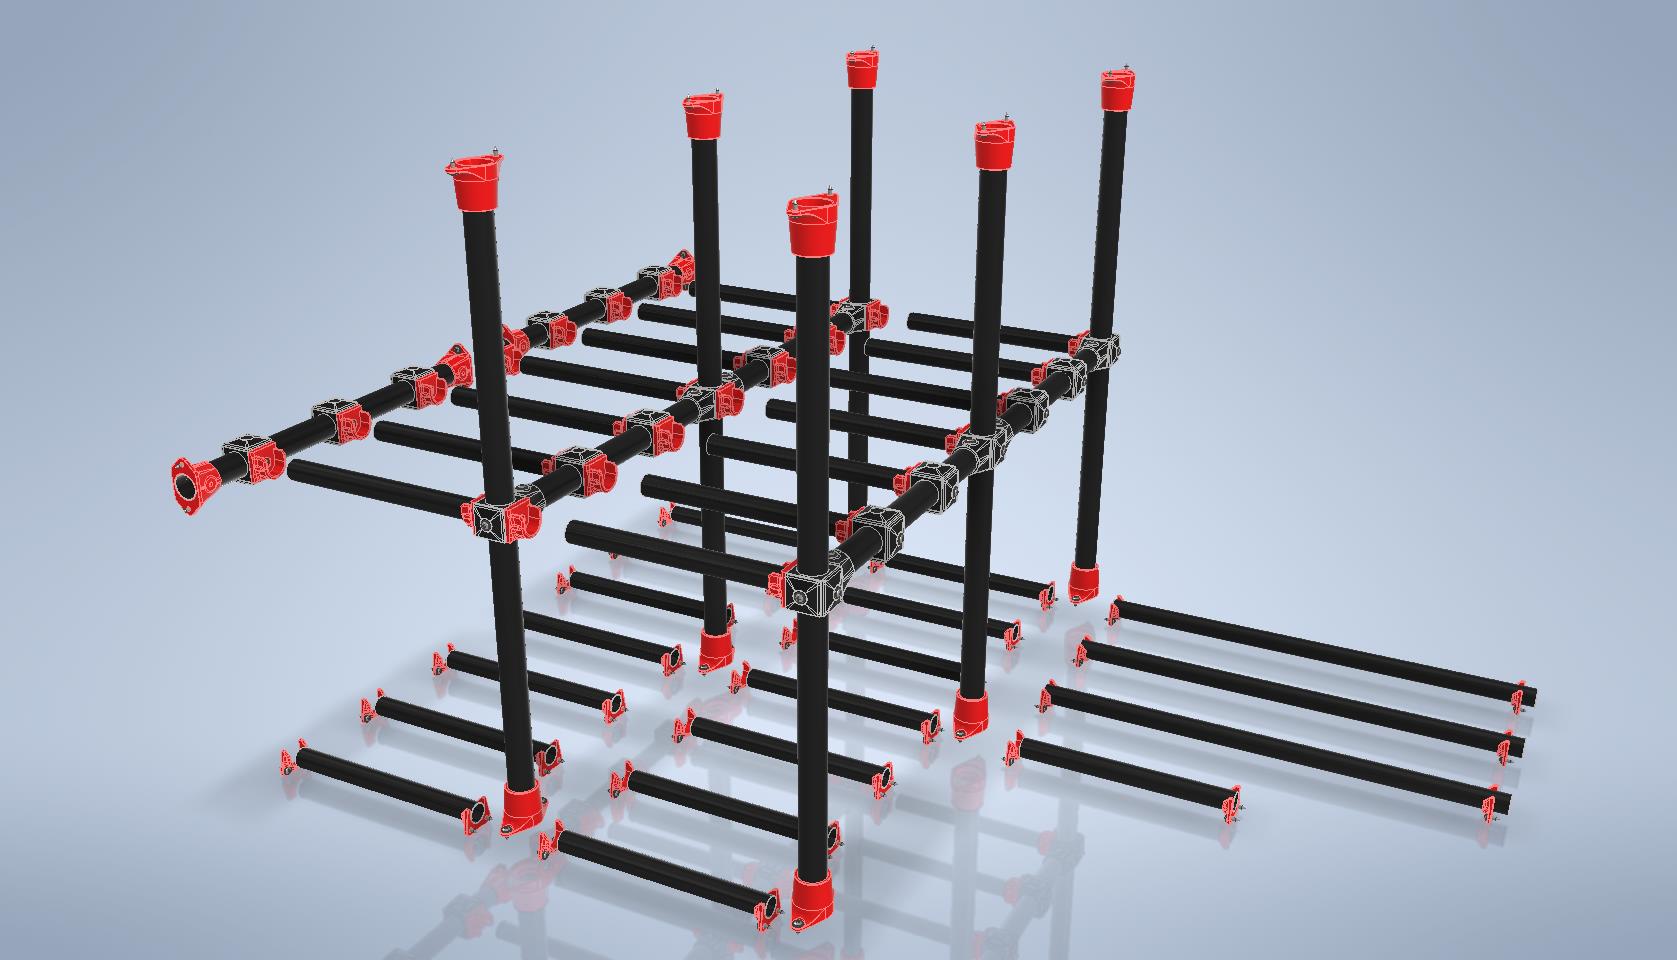
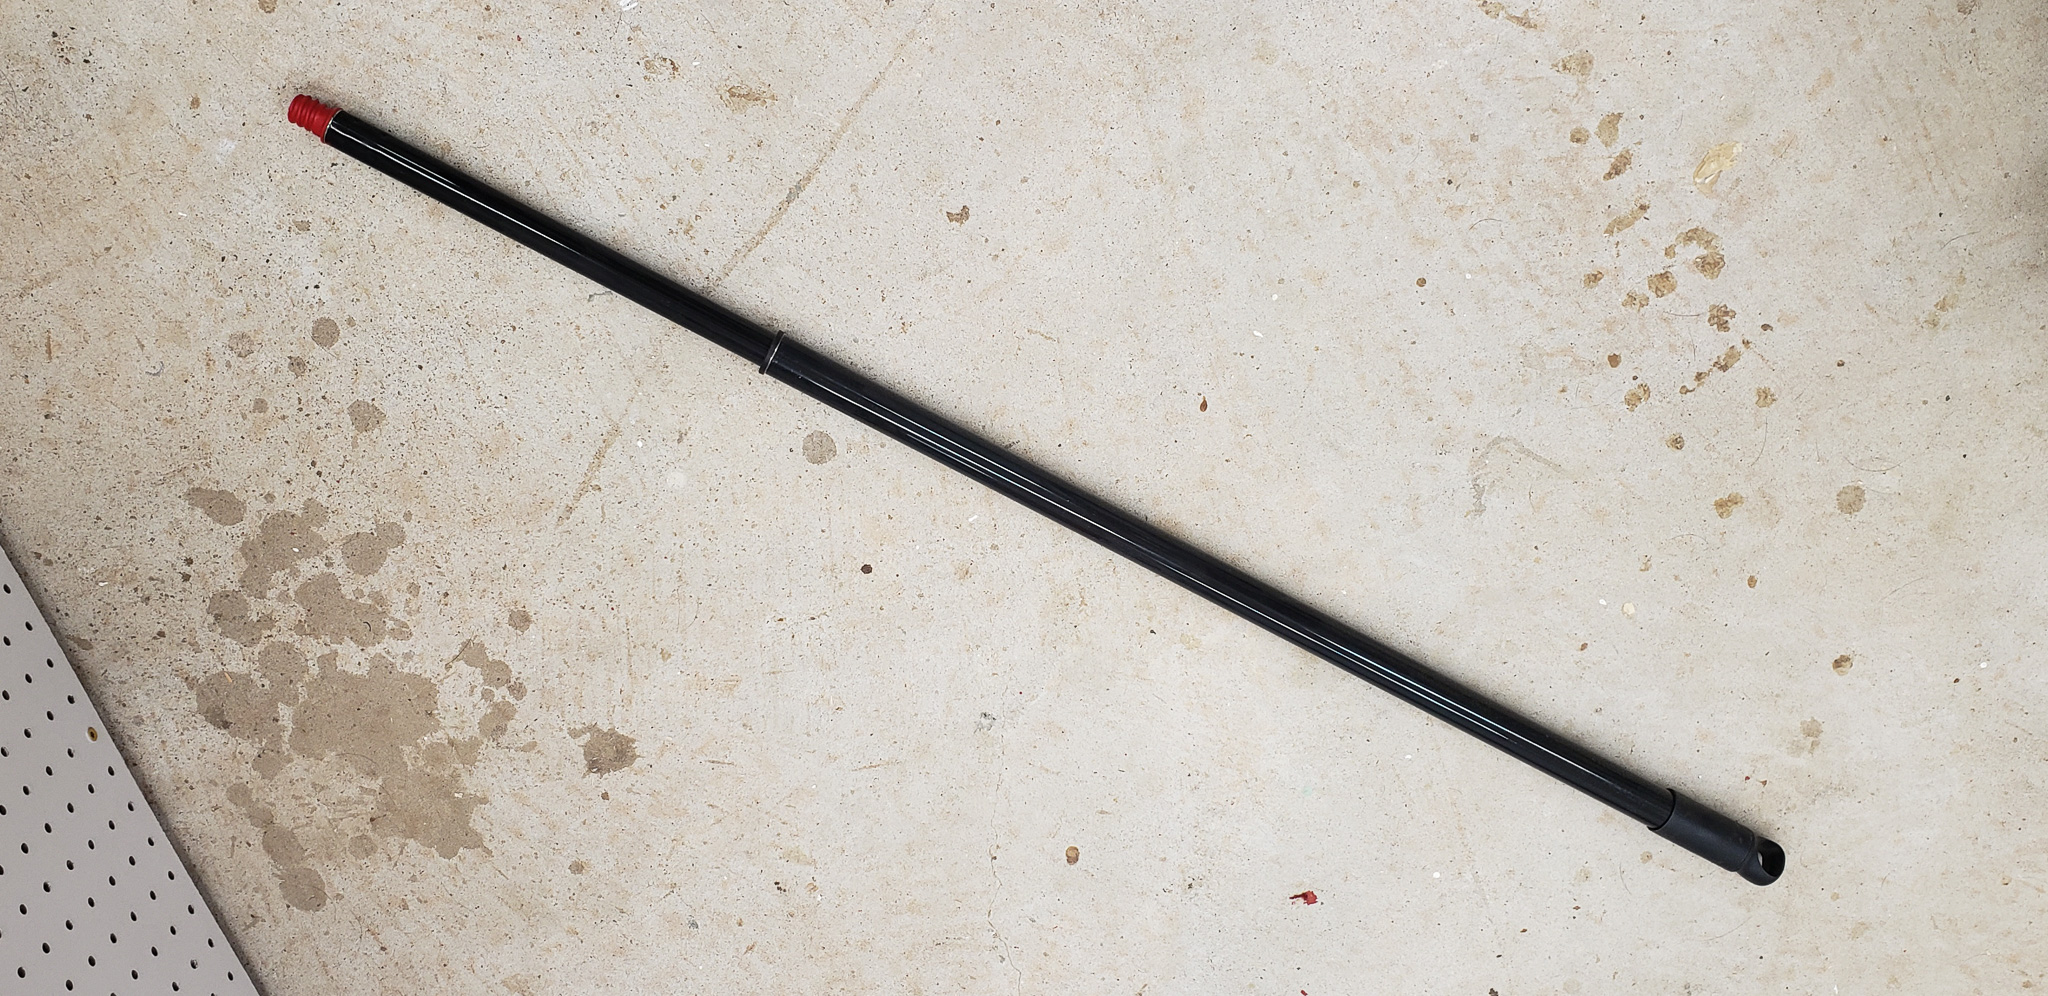
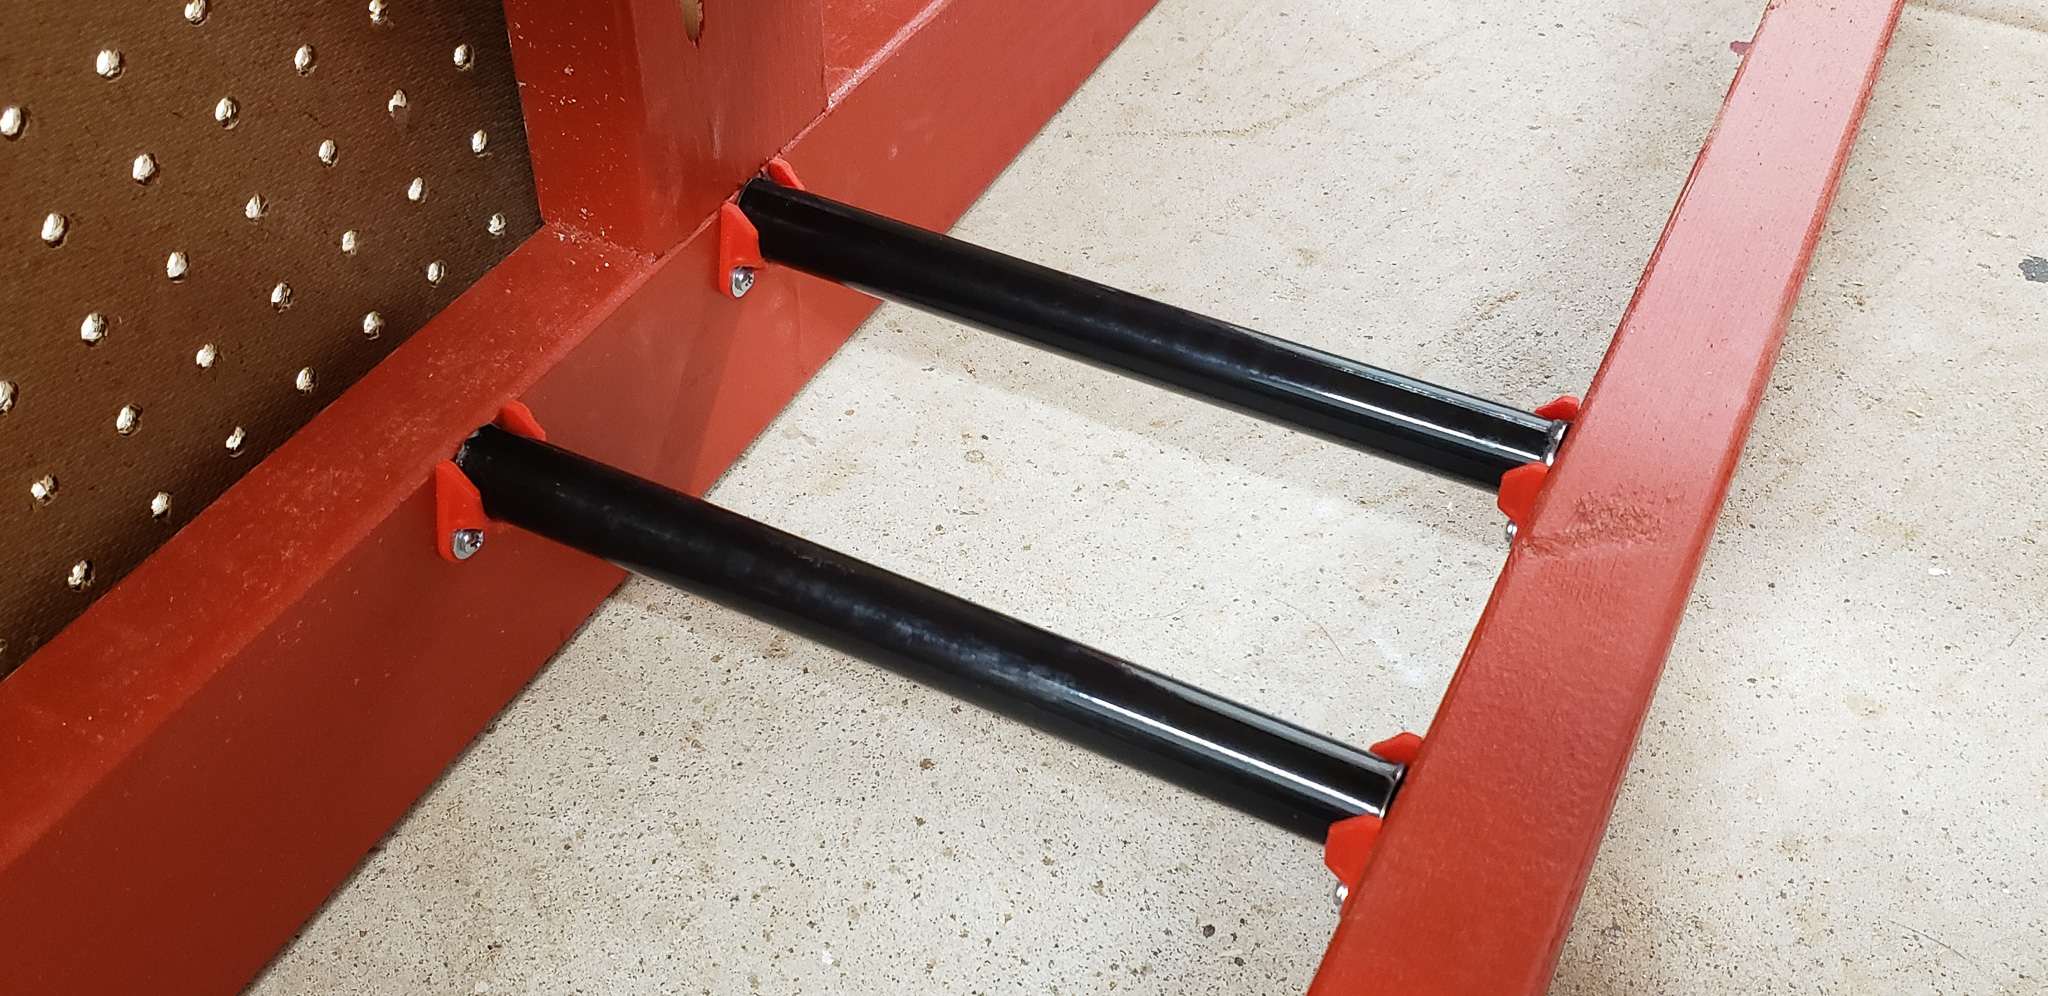
The crossbars for the “cages” were planned to be made from mop handles. I have a lot of them — I once managed to get several boxes of these on occasion. They’re excellent construction material: laminated, thin-walled, lightweight steel tubes that can be used for more than their intended purpose:
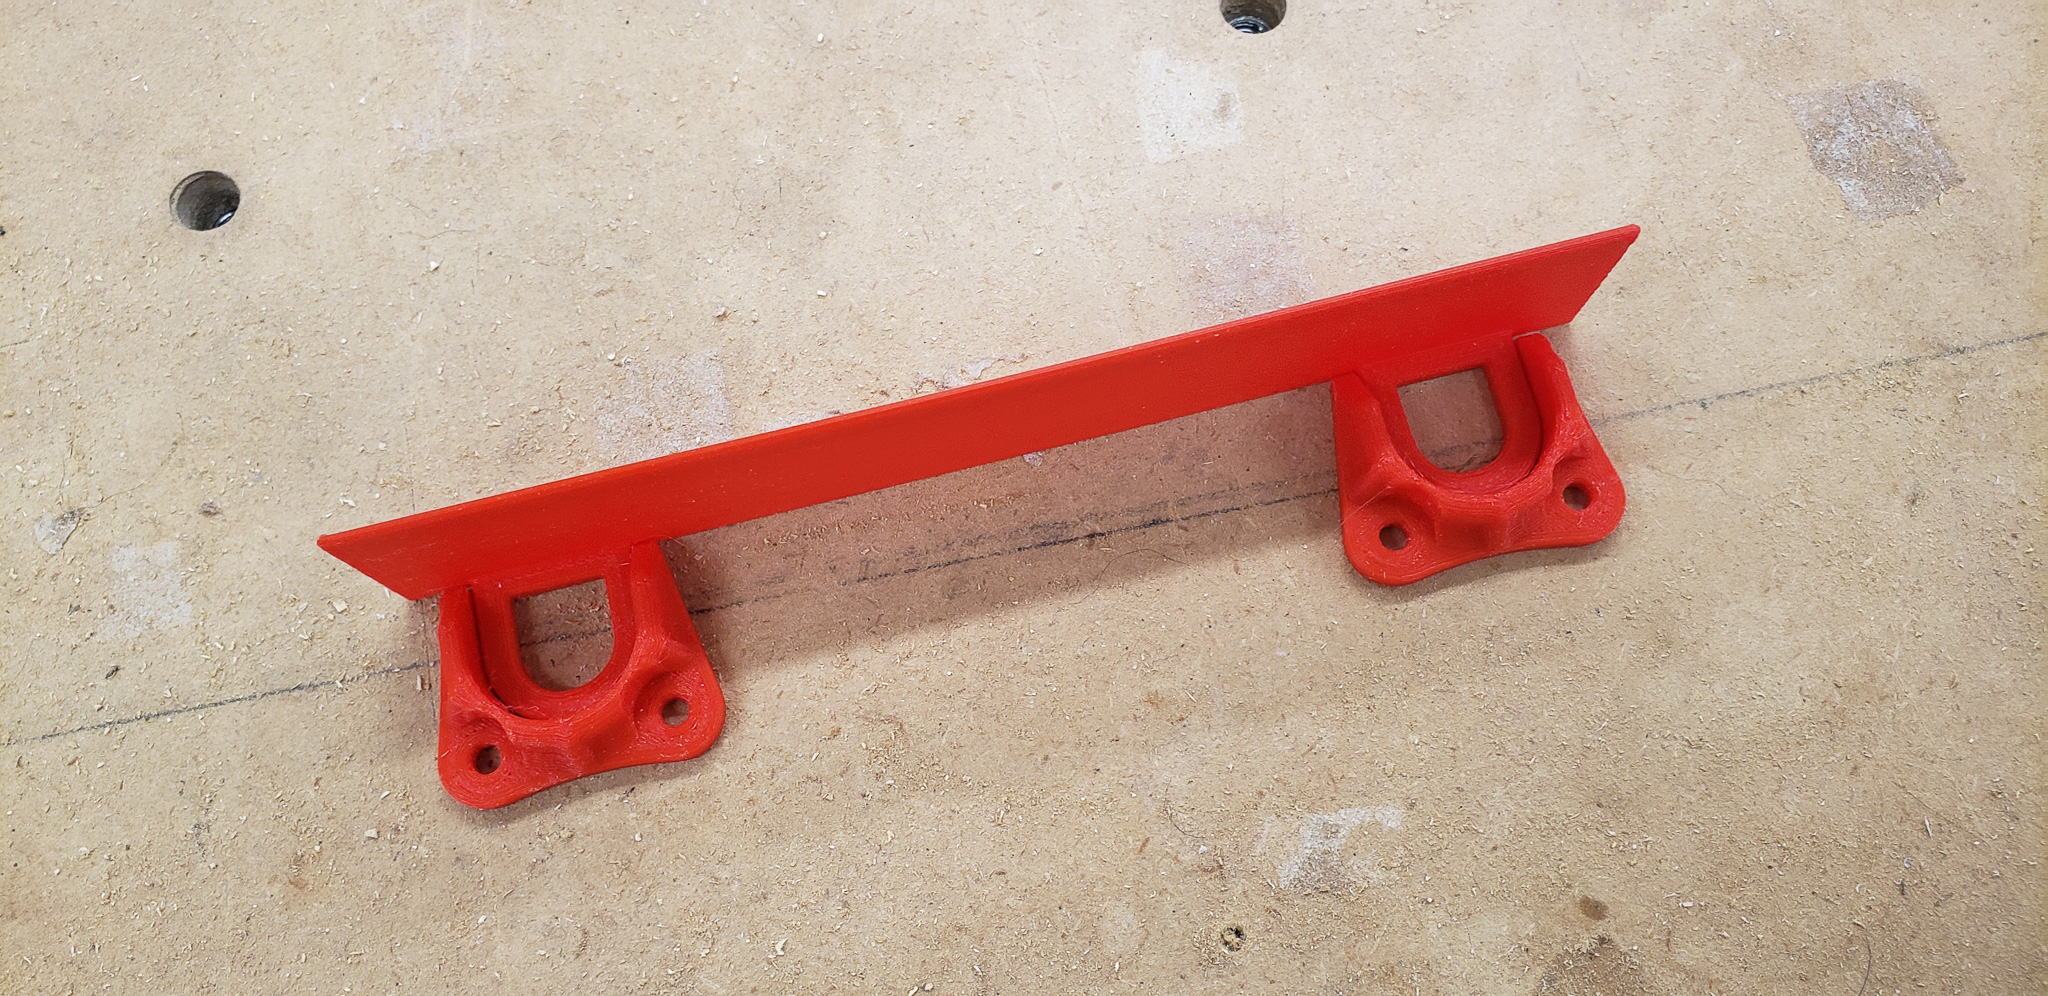
Inside the table’s frame, they are mounted using simple brackets printed on a 3D printer:
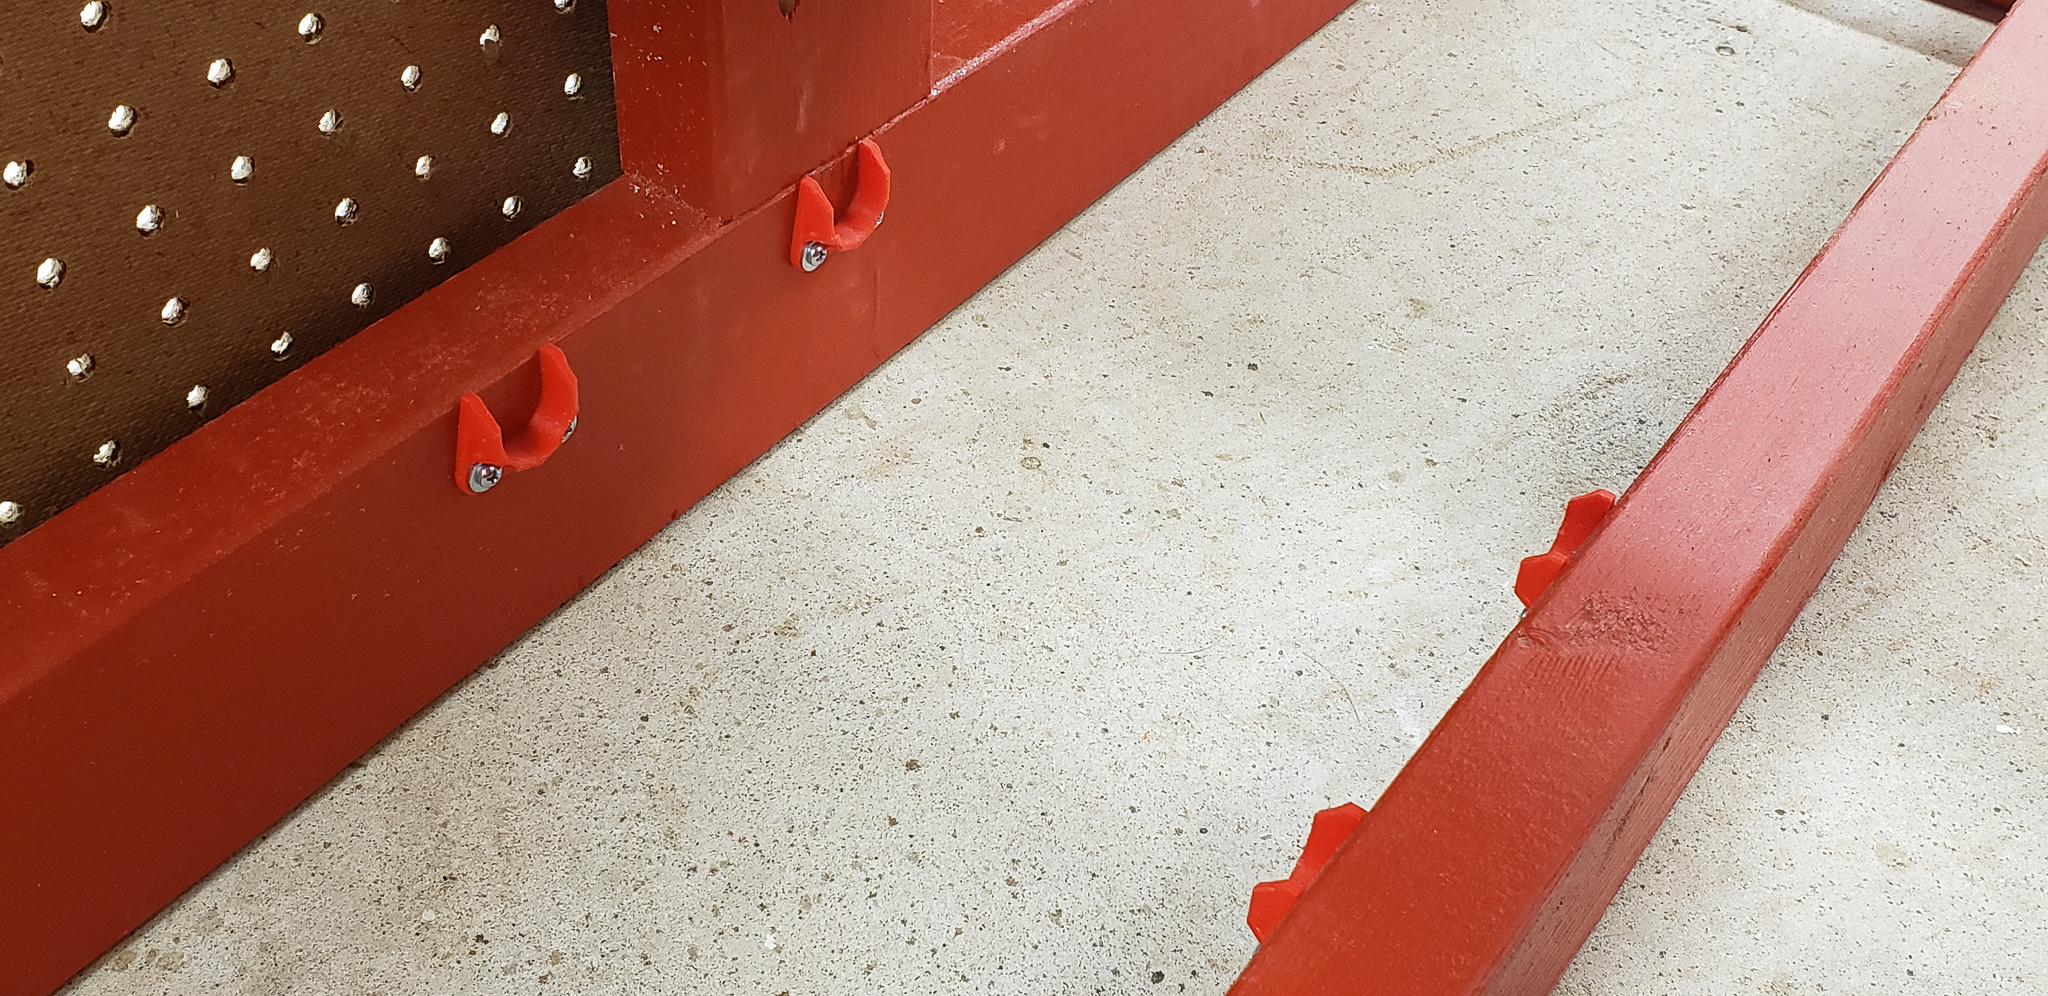
To avoid marking out every single bracket individually, I printed a template jig. Using it, I only needed to mark the placement for the first bracket in a row, and the rest were attached without additional marking:
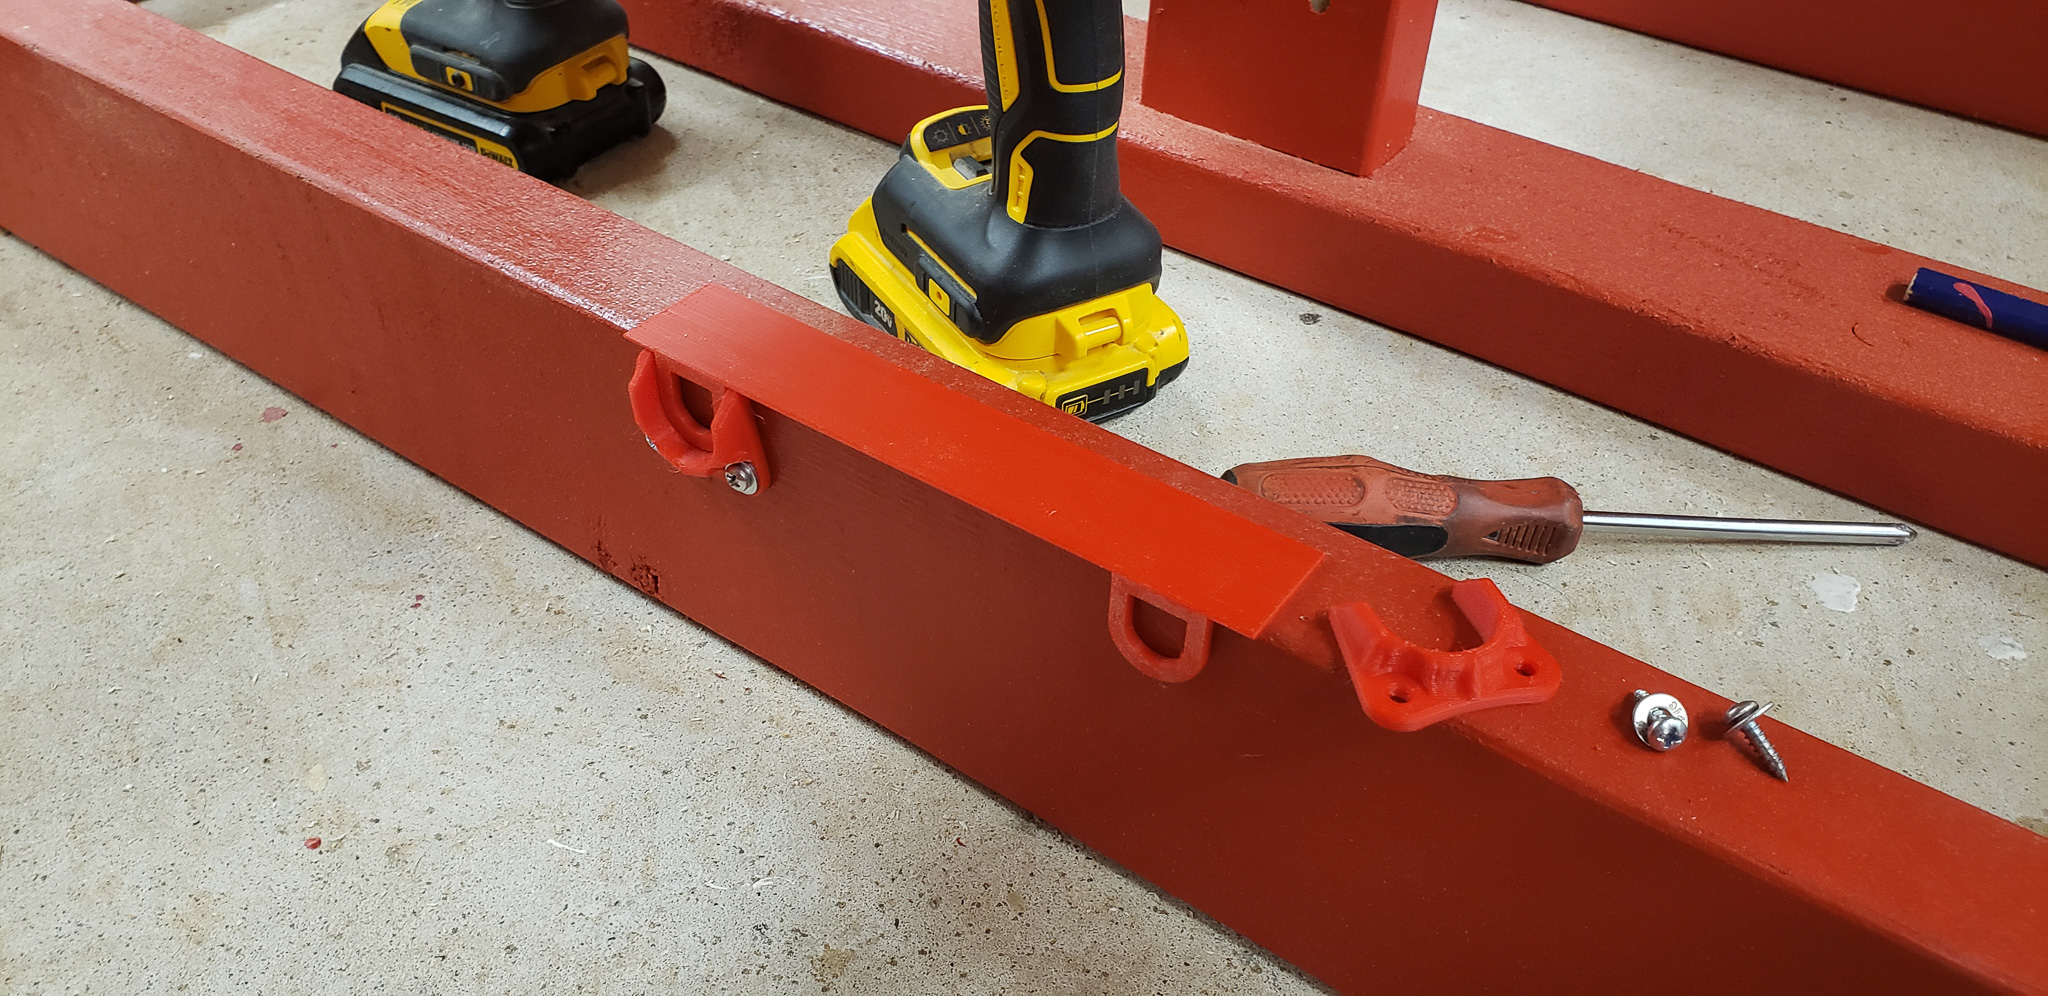
Each mop handle provided three crossbars, with only the smaller-diameter sections of the telescopic handle being used:
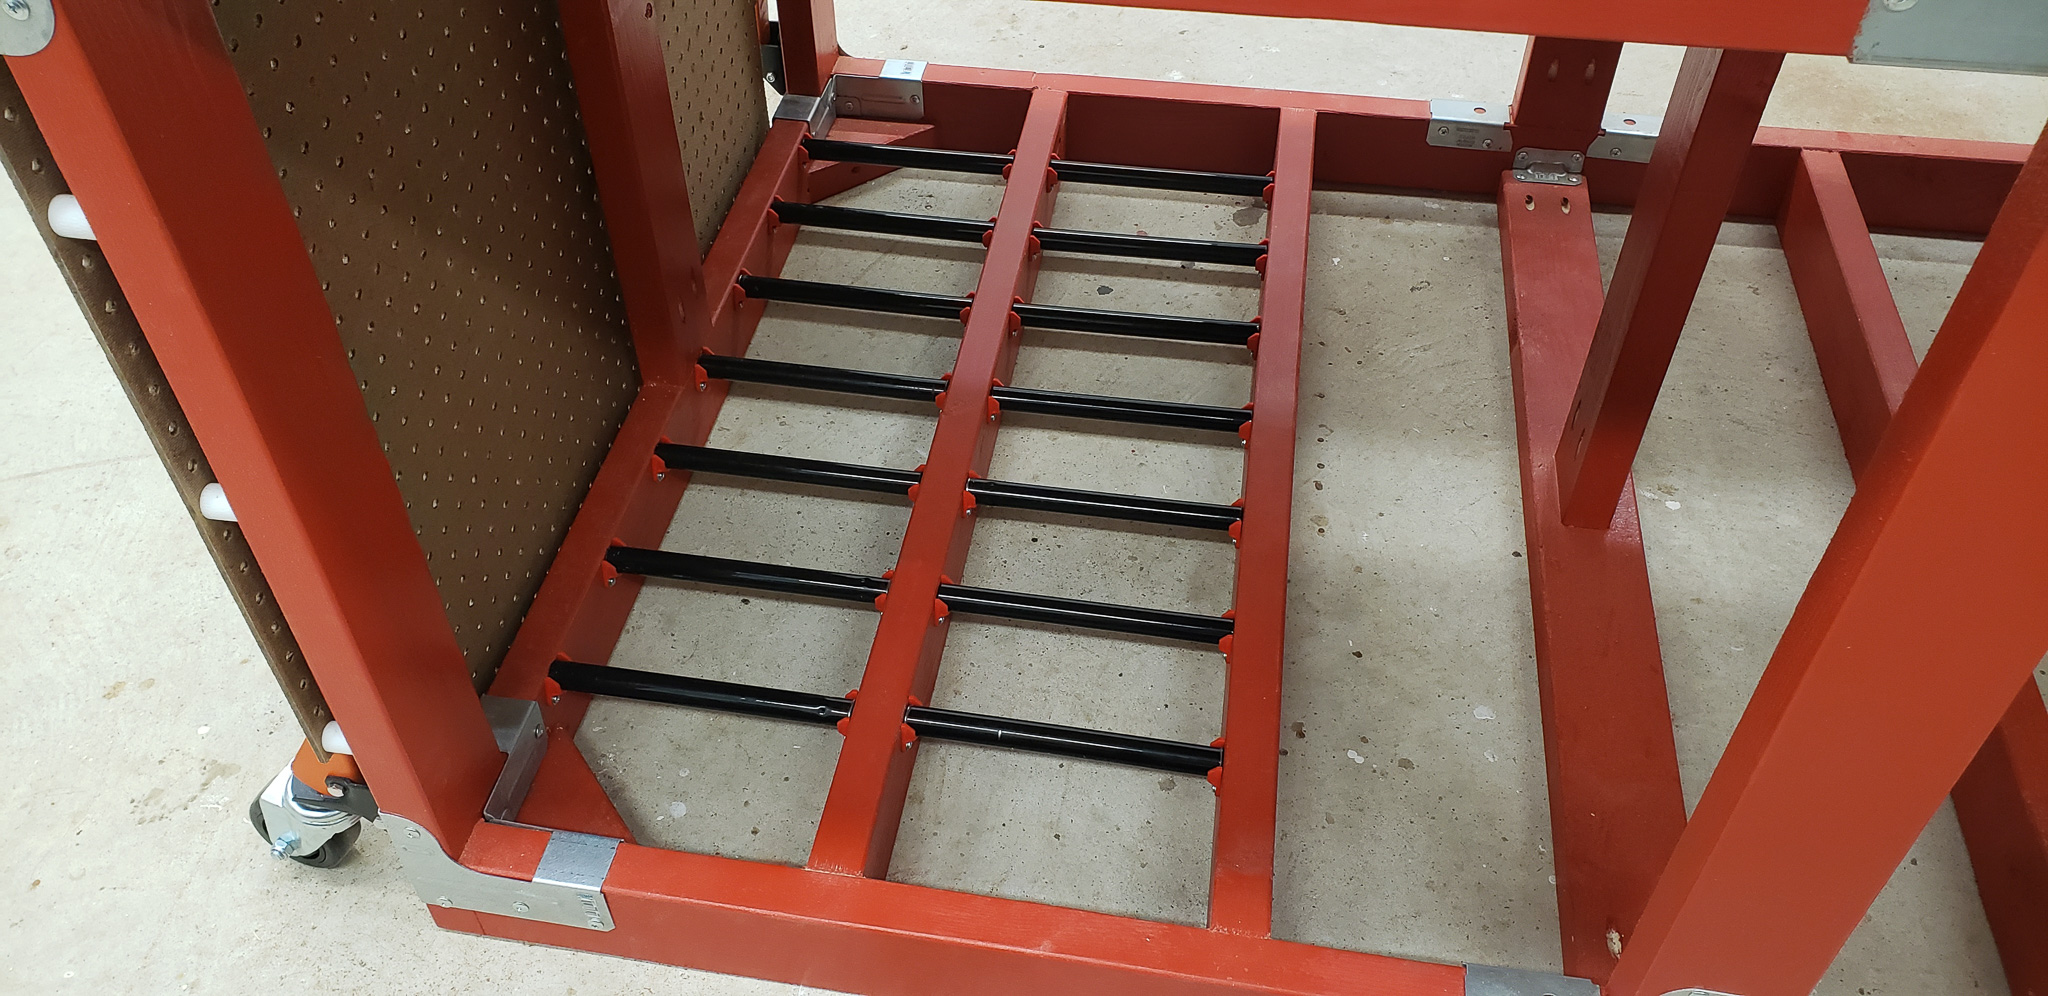
An additional bonus of the design is that the crossbars rotate in their mounts. This creates long rollers that make it easier to roll large stored pieces deeper into the table.
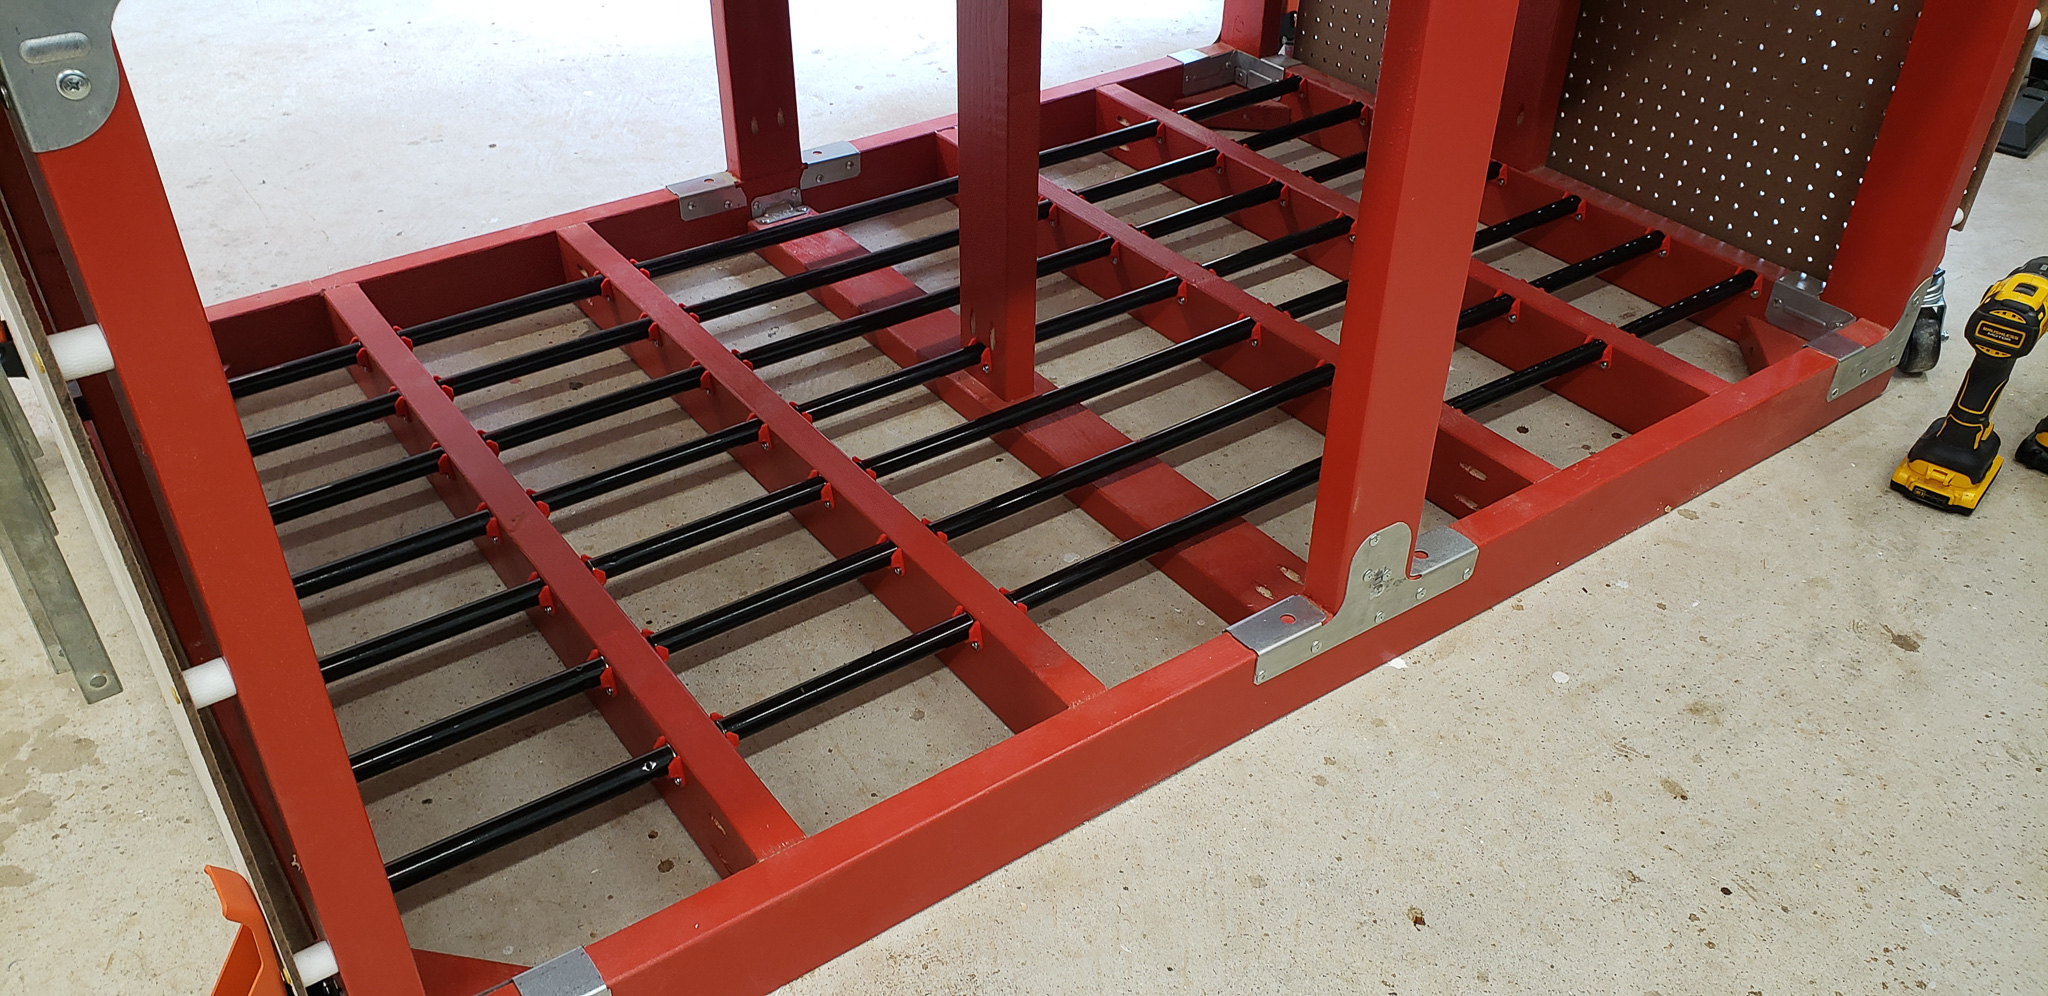
The larger-diameter sections of the telescopic mop handles found another purpose. They became vertical posts and parts of the frames for forming the “cages”:

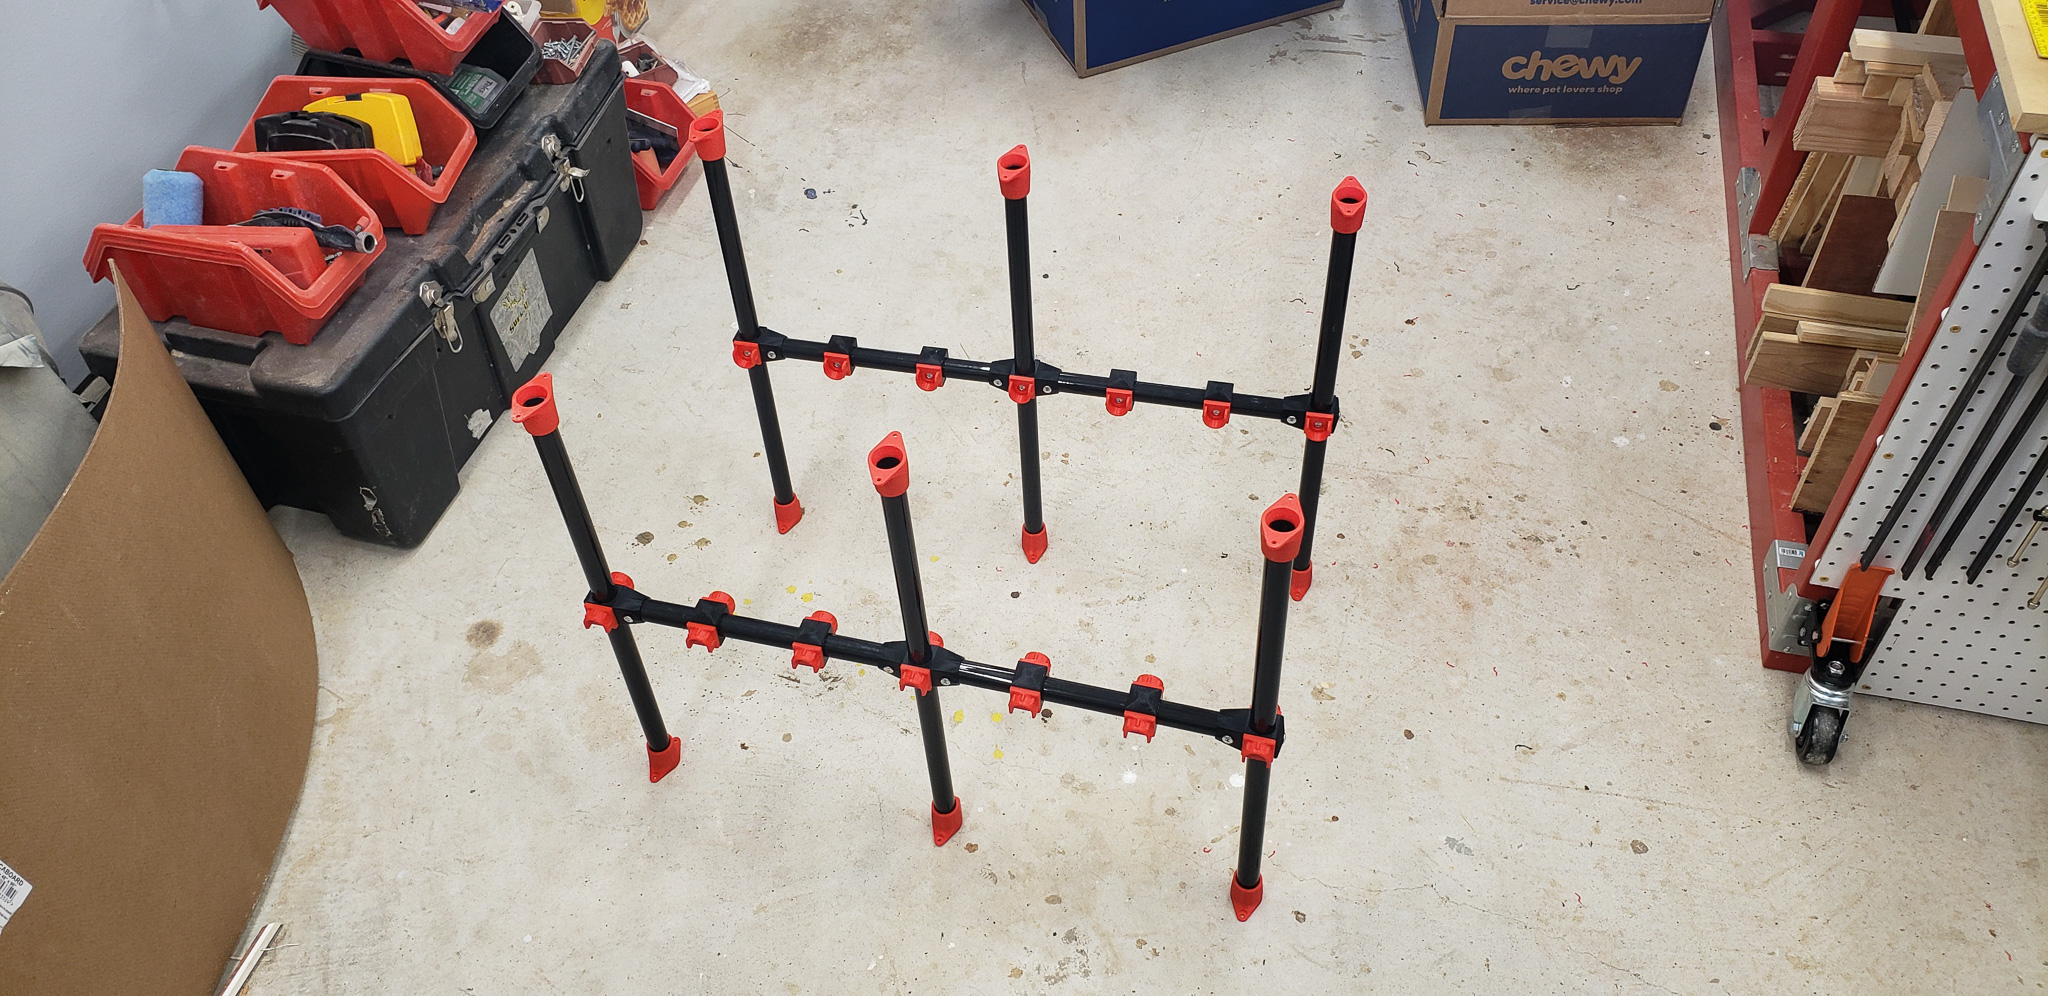
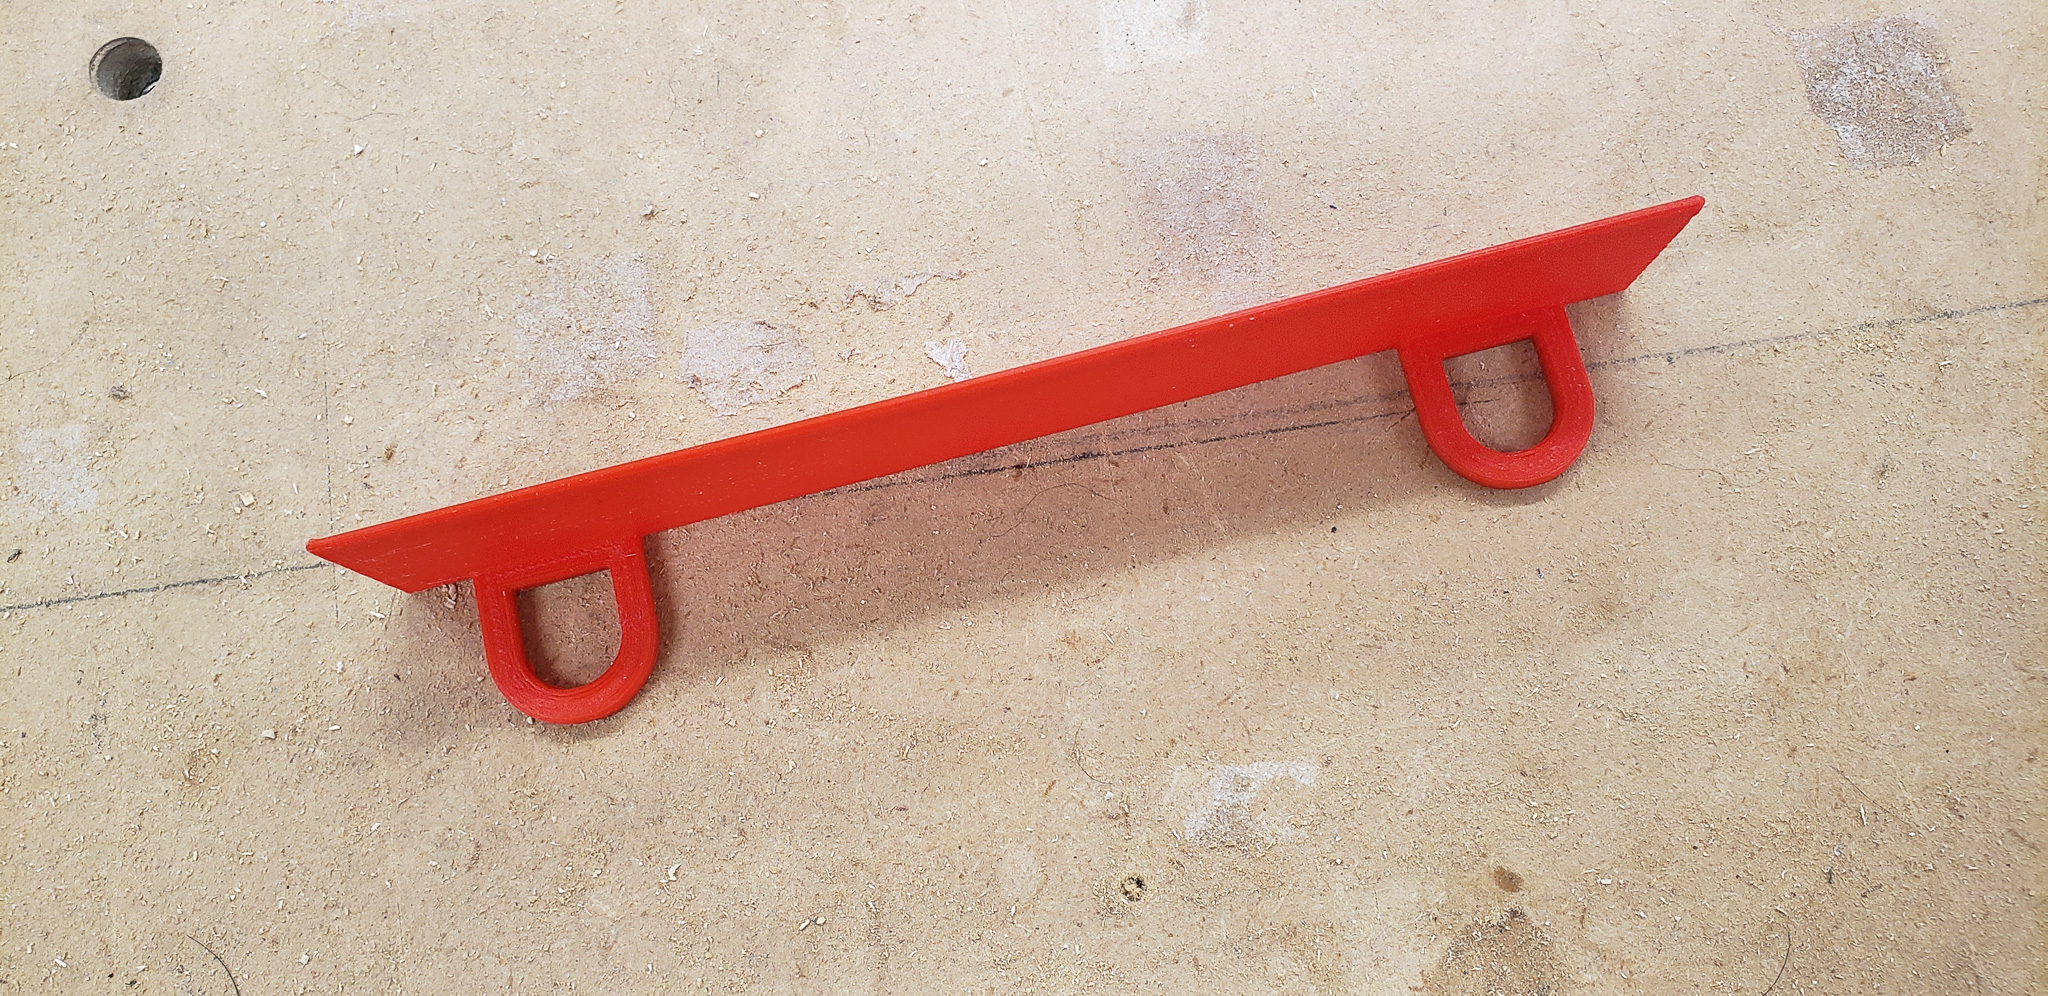
Of course, connecting them to each other and to the crossbars required printing another type of bracket:
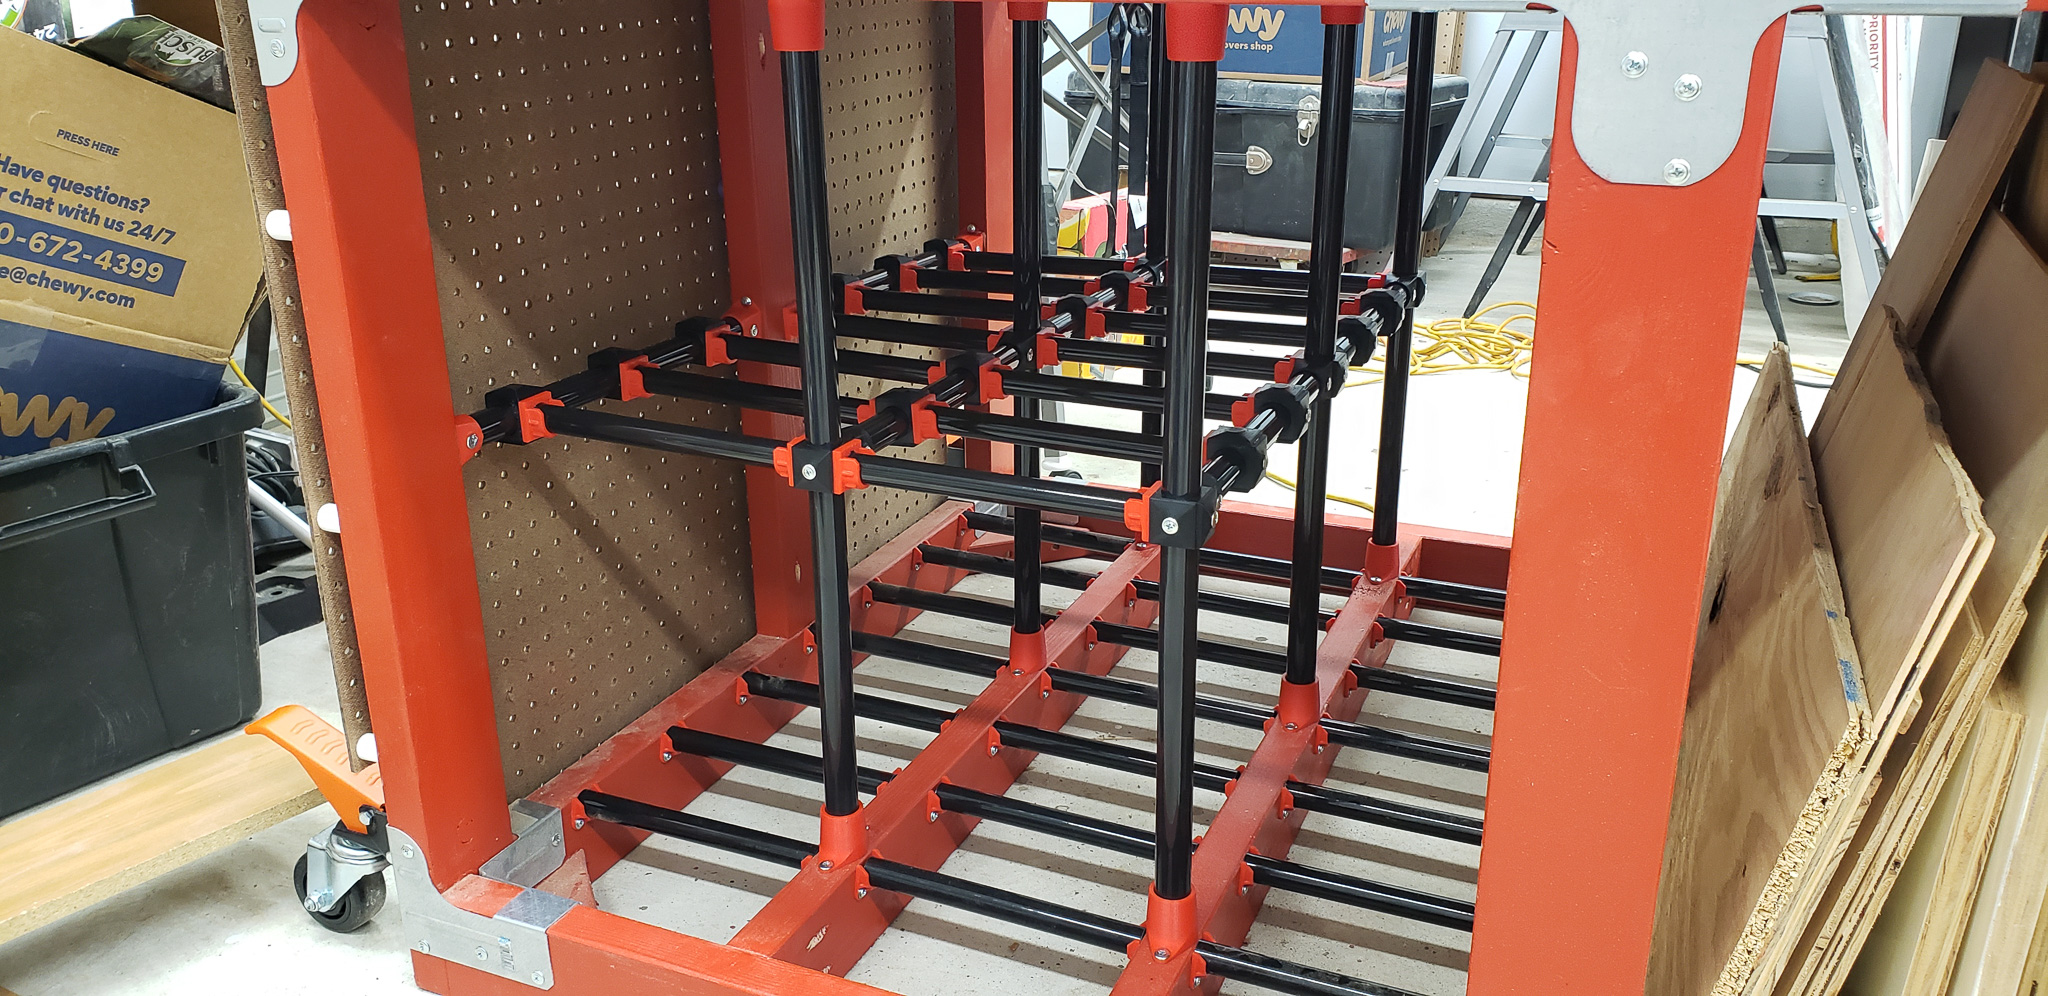
Everything turned out exactly as planned:
The only pity is that this “plan” emerged during the project rather than before it started. That’s not typically my style. But all’s well that ends well. This time, my lack of foresight during the planning stage didn’t lead to serious consequences. Lucky me…
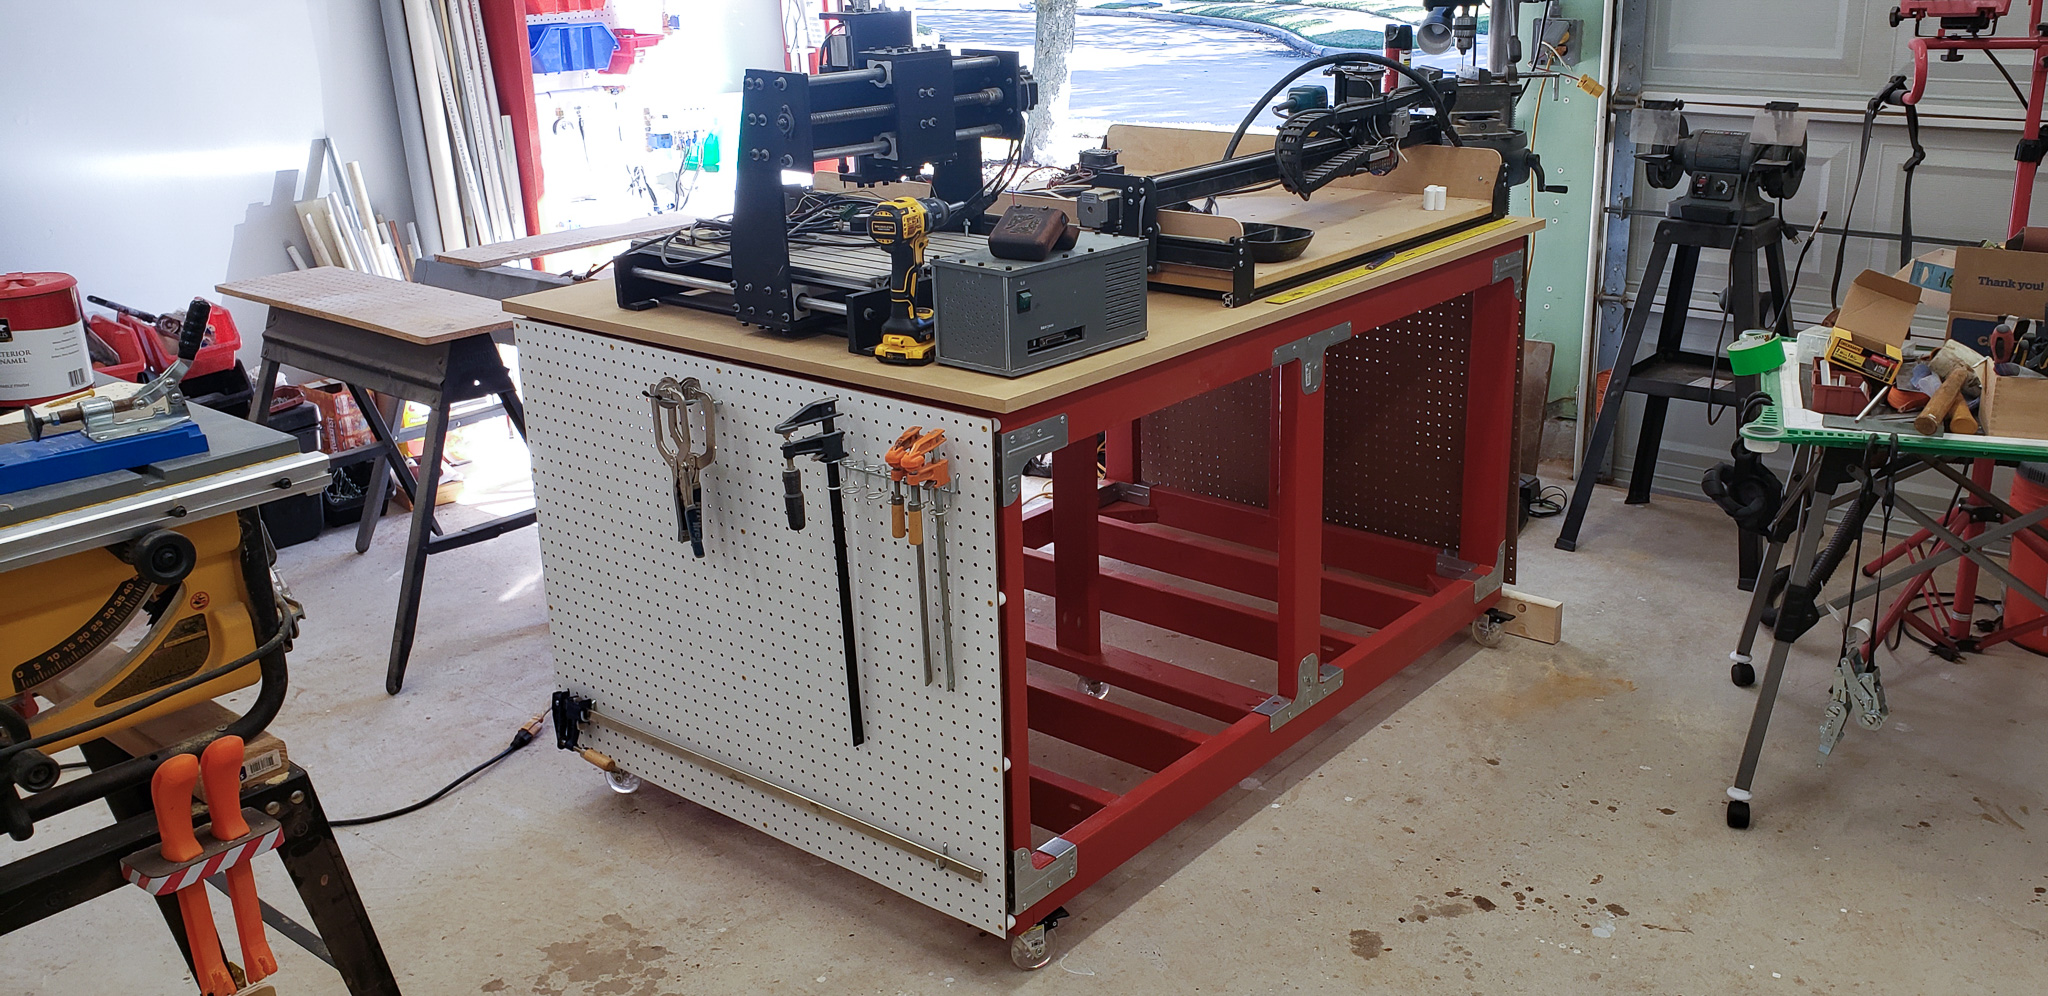
In the end, I got my assembly table for the workshop:
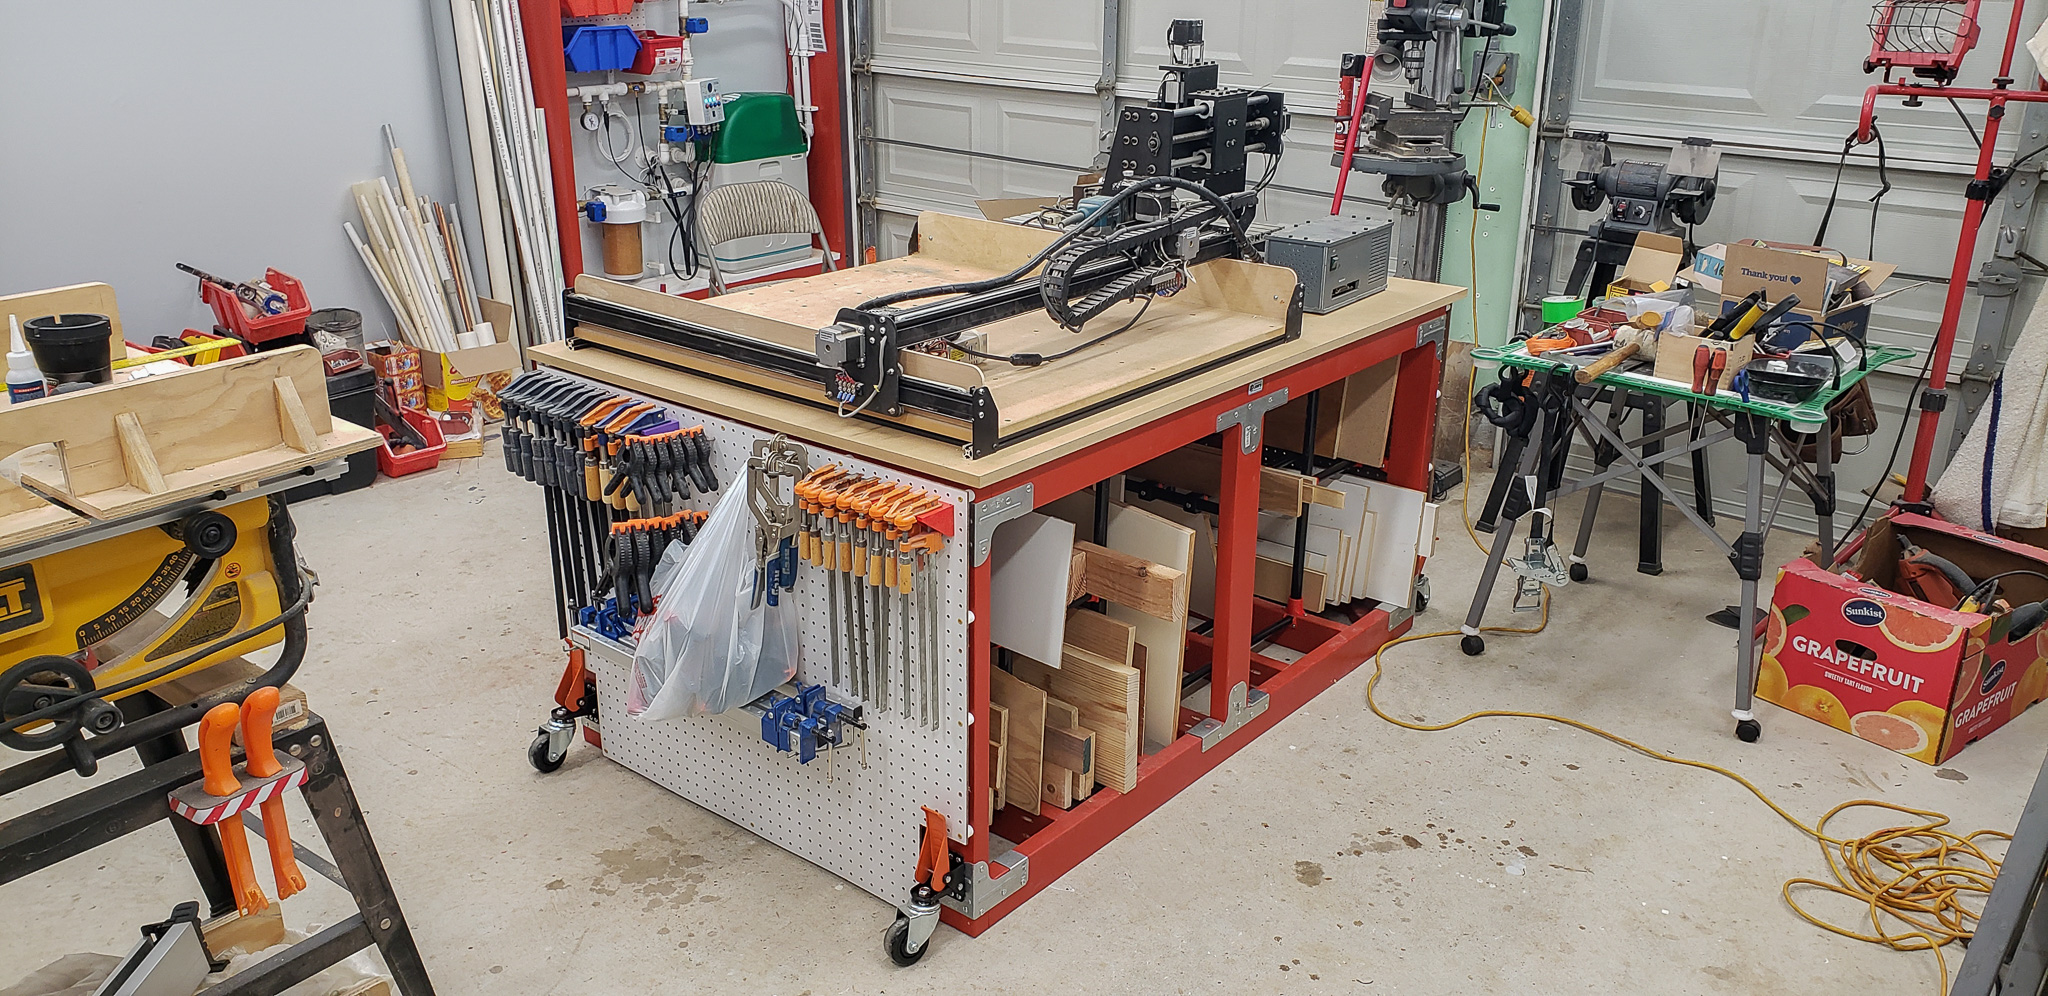
Some articles on this blog are written “after the fact,” so many projects can be reviewed in hindsight. Quite a bit of time has passed since this table was built. It is still actively in use, perfectly fulfilling its purpose, and not a single complaint has arisen about it during all this time. By all accounts, this project can be considered a success.
That’s how it is…