
Since simplicity, reliability, functionality, and completeness were the cornerstones of the project, there are hardly any optional decorative frills on the printer — and there are no plans to add them.
As a result, the number of accessories is unlikely to grow anytime soon. Whatever came to mind during the project or naturally found its place became part of the setup.
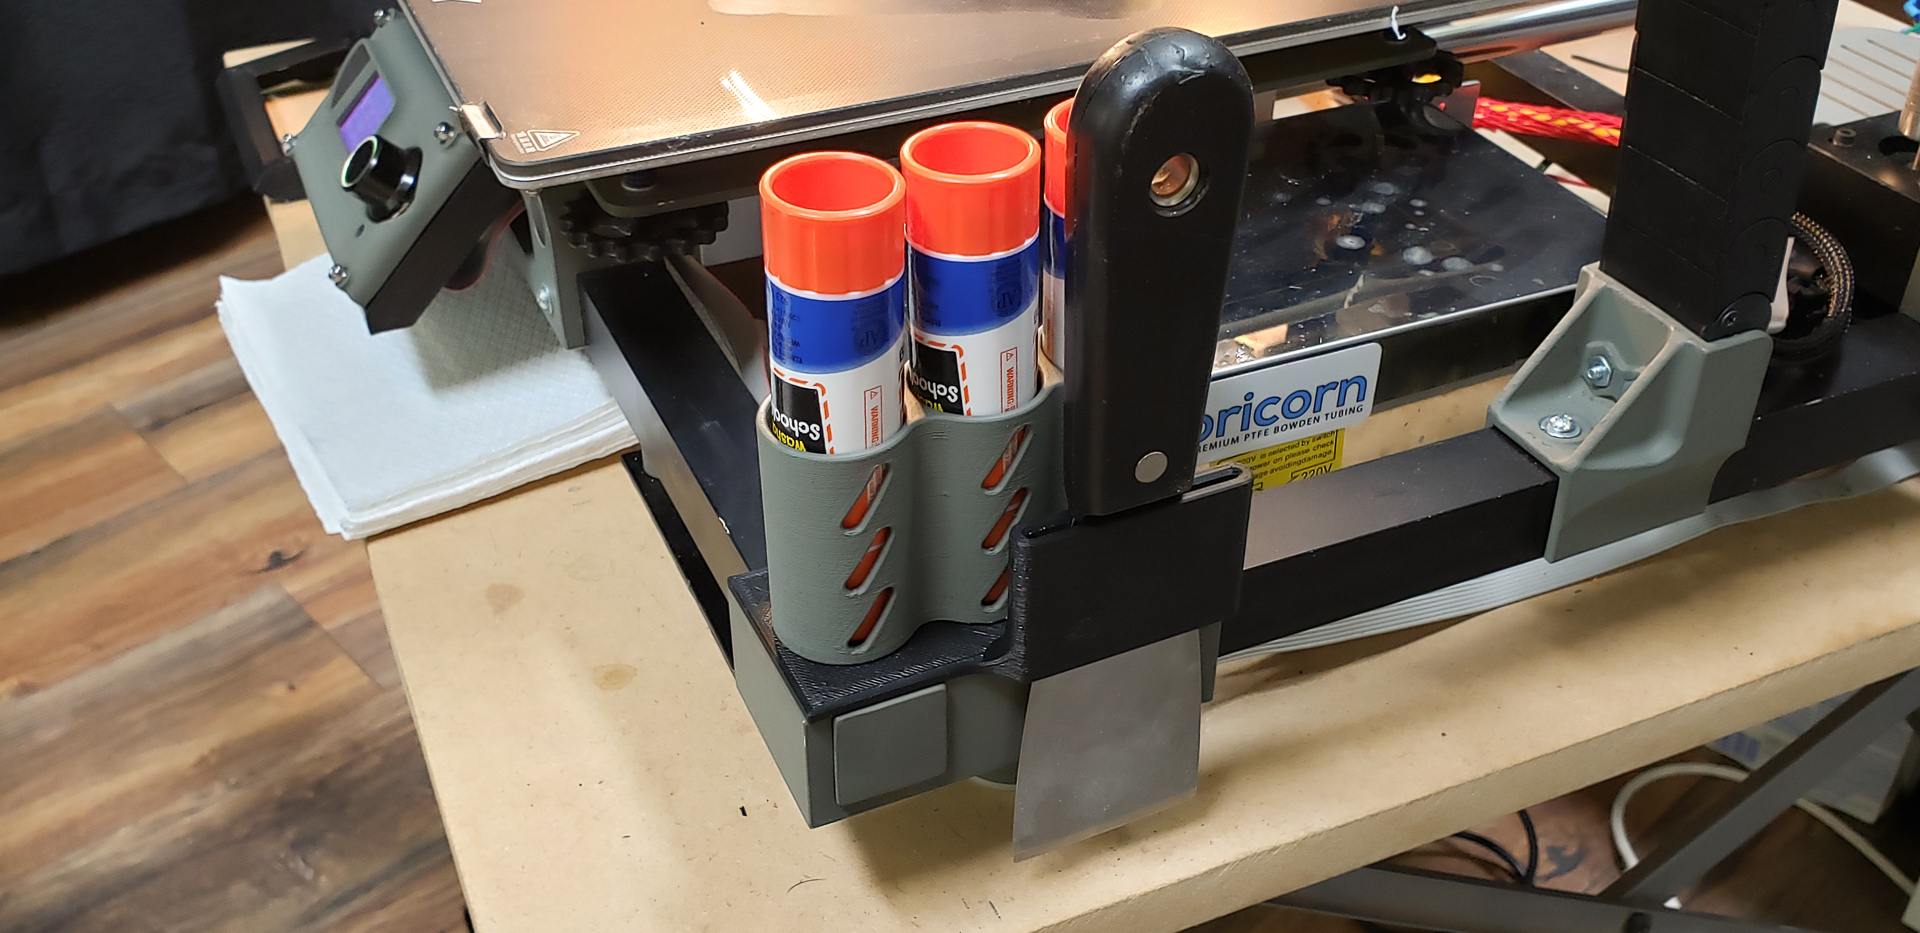
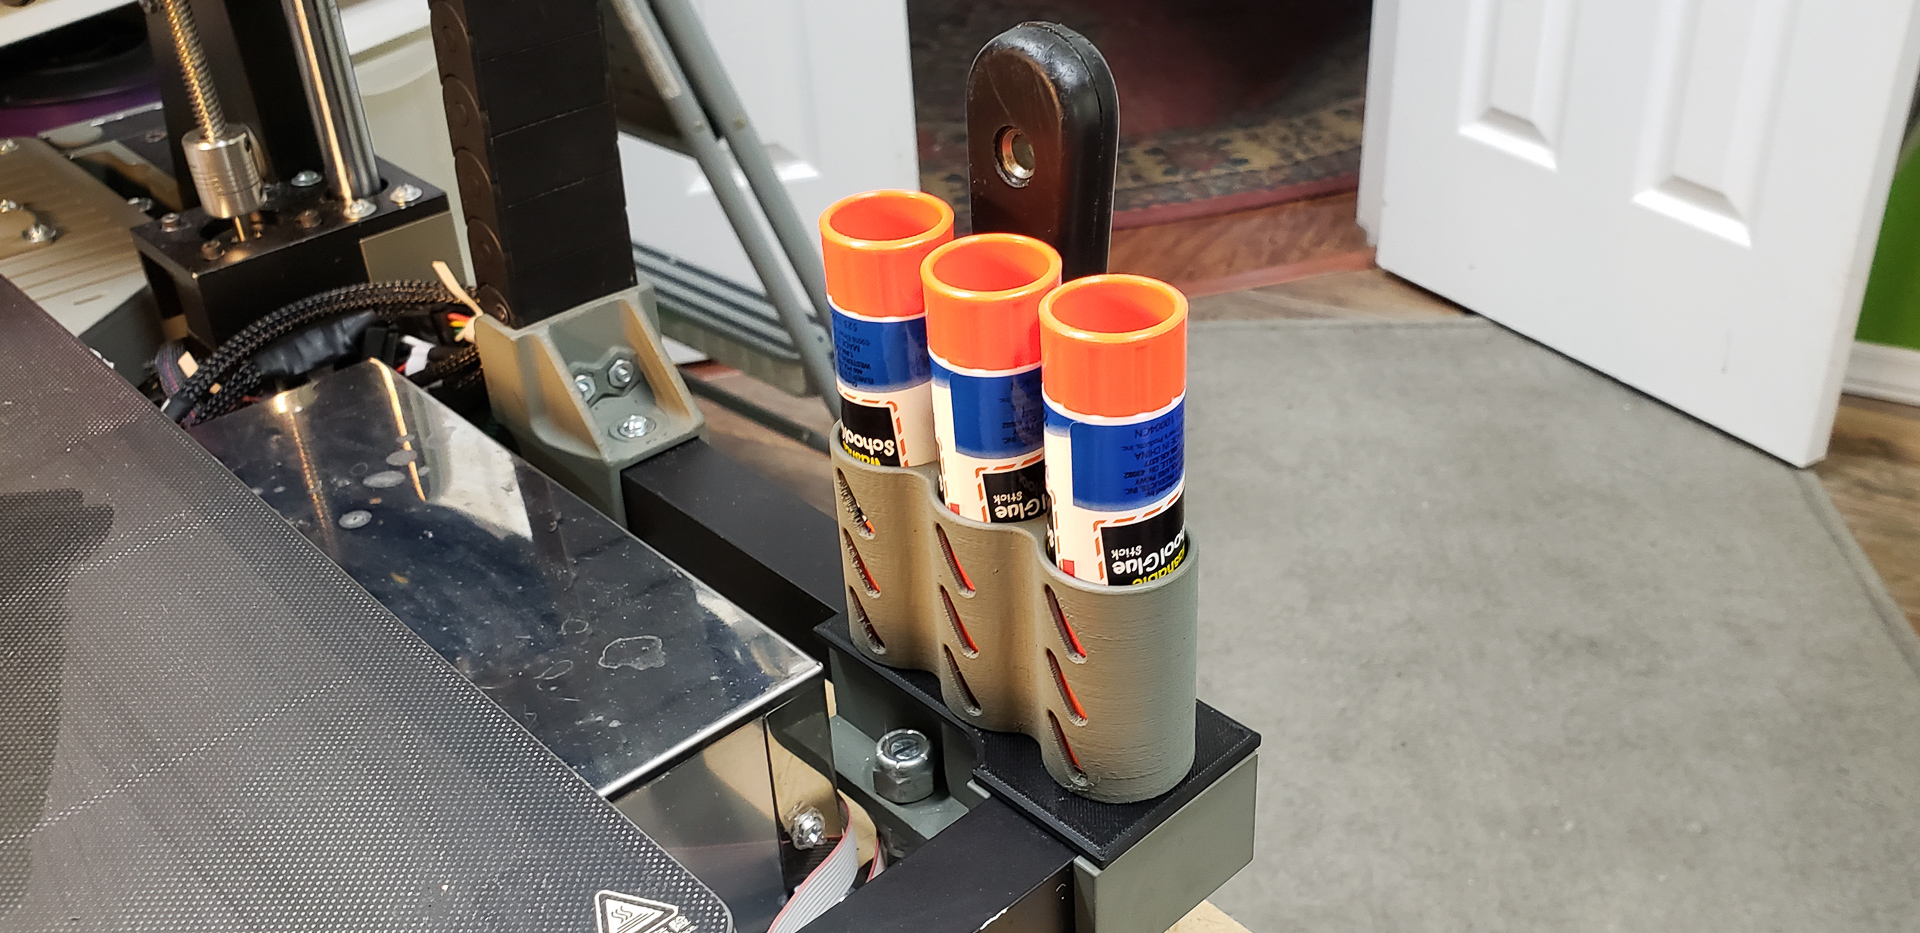
The very first accessories for the printer were glue stick holders and a spatula stand. They appeared right when the printer started its initial attempts to produce something meaningful.
That was roughly when I realized that the remarkable “stick and release” properties of the proprietary polymer coating on the print bed’s glass surface were, to put it mildly, somewhat exaggerated by the manufacturer.
It’s probably worth explaining here: the thicker the glass, the more evenly and consistently it retains heat. Typically, 3D printers use glass that’s 3–4 mm thick. For the Marsh Turret, I chose 5 mm glass. The description claimed it was 7 mm, but that was a blatant lie! User comments revealed it was just over 5 mm thick — and they were right. This suited me fine. Moreover, it was tempered glass, not the more common and cheaper borosilicate kind.
While borosilicate is supposedly more resistant to temperature fluctuations and thermal deformation, in my experience, it breaks faster. Whether I kept getting poor-quality products or something else was at play, I’m not sure. I’ve had three pieces of glass: one tempered and two borosilicate. Over a couple of years, one borosilicate pane cracked in half, while the other developed strange edge chips. Meanwhile, the tempered glass still looks brand-new and was in active use with the Black Widow up until the very end. And it’s the oldest of the three!
If it had been the right size for the new printer, it might have been the only part worth borrowing from the old one.
When choosing the print bed glass, I focused on thickness, type, and size. Features like polymer coatings — theoretically “sticky” when heated and non-sticky when cooled — were secondary. If they worked, great. If not, no big deal. After all, the trusty glue stick has never let me down, and I see no reason to stop using it.
As it turned out, the “smart” polymer coating on the glass was completely useless, and the glue stick became an essential part of working with the new printer once again.
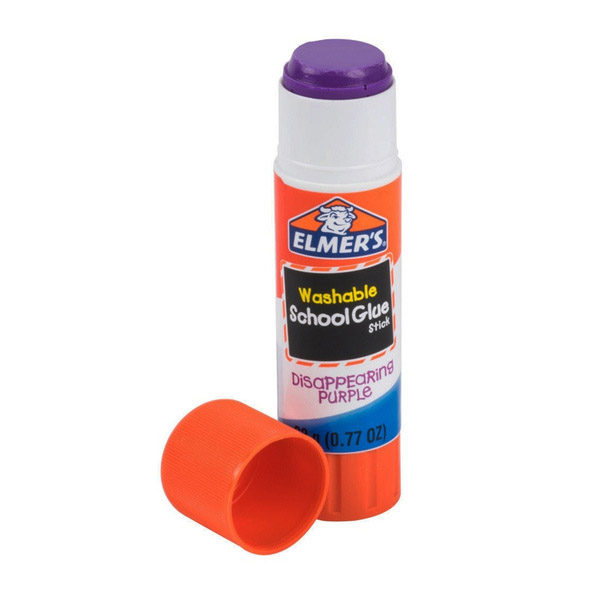
Unfortunately, glue sticks have one major flaw — they always seem to disappear. You could swear you were just holding one, and then poof — it’s gone. Later, you might find it somewhere on the desk behind the keyboard, under a sheet of blueprints, in the cat’s bed, on the bookshelf, or even in the box with spare batteries. Basically, they can turn up anywhere, but only when you don’t need them. Because of these mysterious tendencies, I always keep several glue sticks scattered across the workspace. Surely, one of them will surface when it’s needed.
The same goes for the spatula used to pry finished parts off the glass bed.

But the spatula situation is much worse. You can’t just use any spatula. It needs to be very thin but sturdy, flexible but firm, sharp but not razor-sharp, wide but narrow. In short, it needs to be perfect — capable of sliding under and lifting a part off the print bed without damaging either the part or the glass underneath. I don’t even remember where I got my current spatula. One day, it simply appeared in my hand, as if by fate.
Tools like these can’t simply be purchased at a store. You just can’t. Believe me, I’ve tried. I’ve bought and tested enough spatulas to equip an entire spatula factory, and none of them worked. The handle might be awkward, or the blade too thick, too thin, too rounded, or just plain wrong. The truth is, a truly “perfect” spatula only comes to a maker on its own terms, and only when it decides to appear. I got lucky once, and now I have my “ideal” spatula for 3D printing — but only one.
When this magical spatula decides to vanish, it’s a disaster. A lot of time gets wasted searching for it, and sometimes I end up using my hands or nails to remove the part, which often leads to unfortunate consequences, like having to reprint the part entirely.
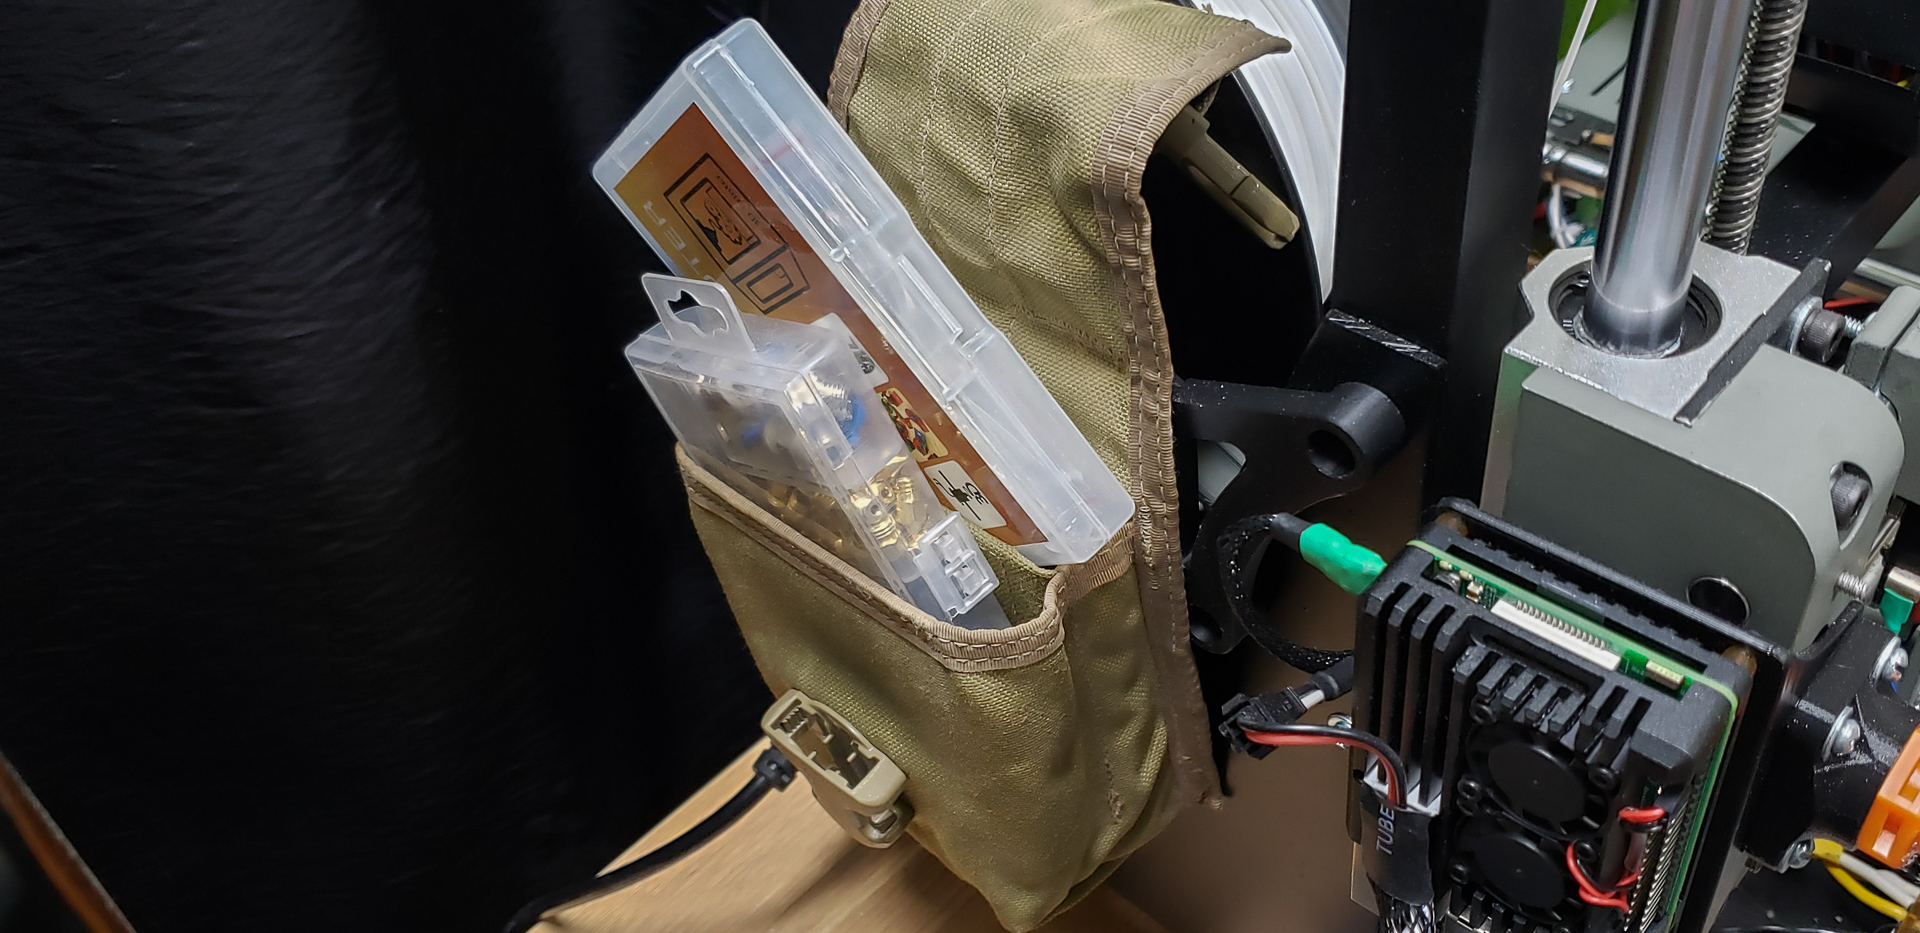
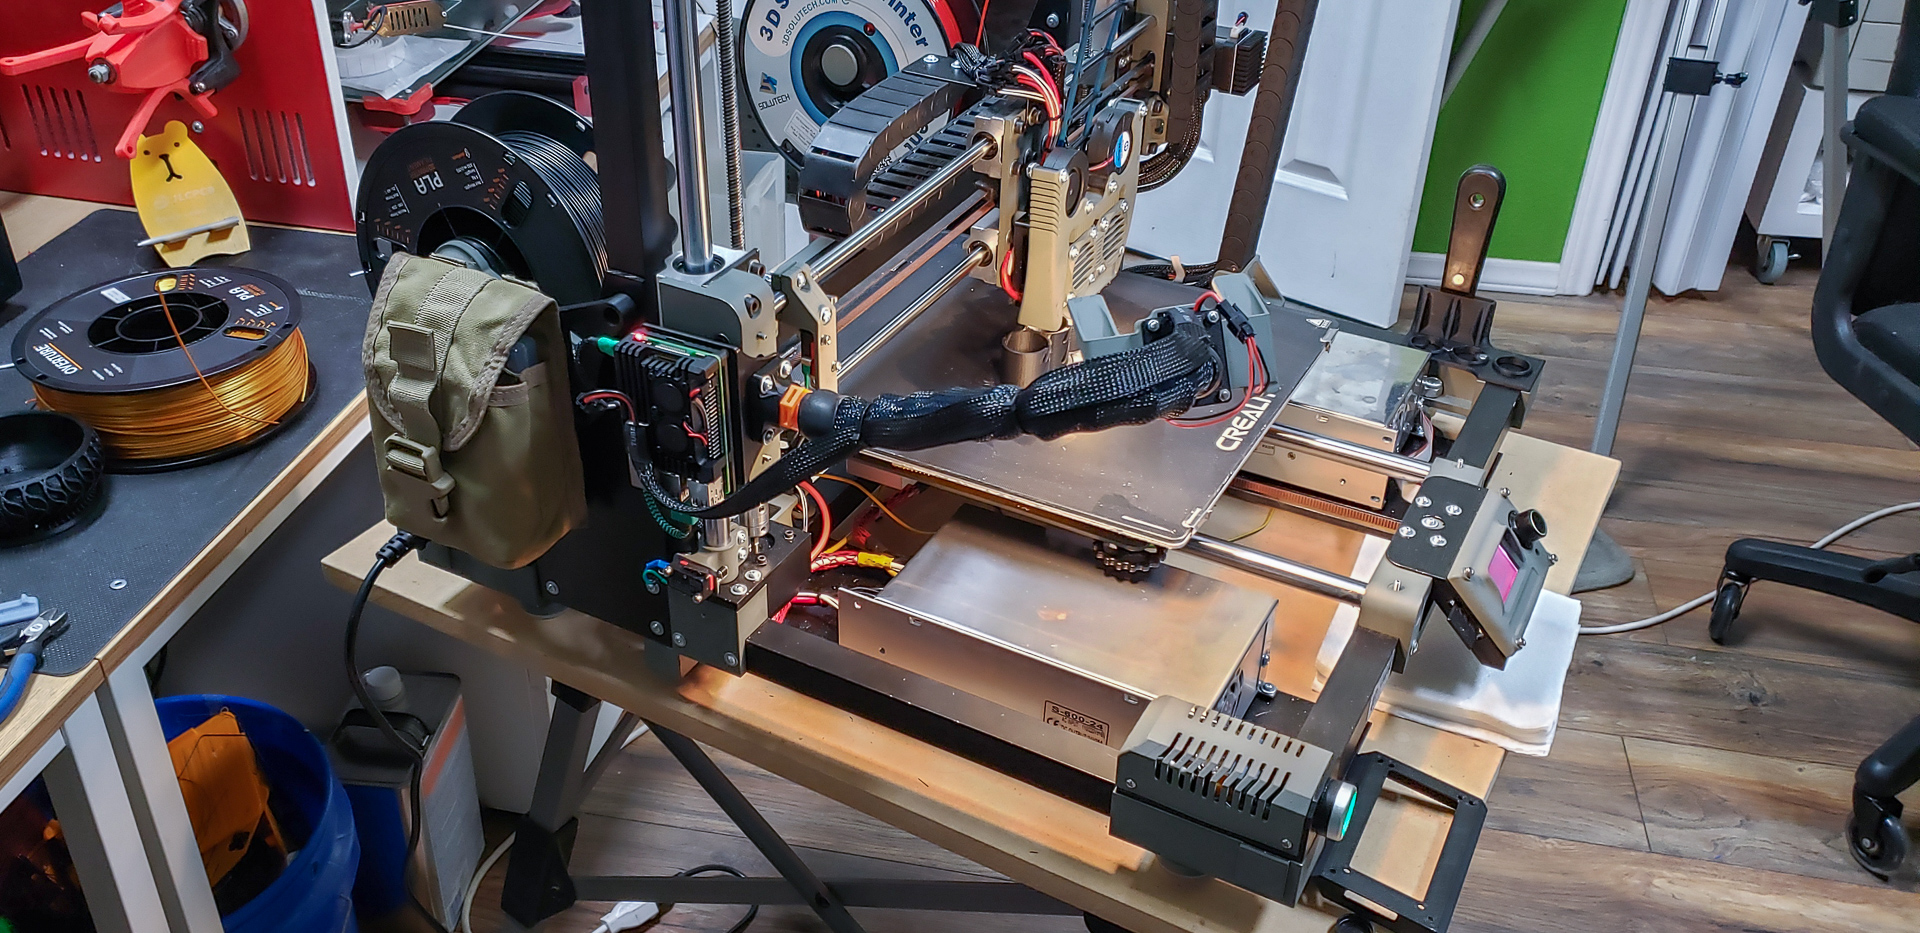
I started to think that these problems arose because there was never a designated place for the glue stick or spatula near the printer. Naturally, they wandered off wherever they pleased. To test this theory, I decided to equip the Marsh Turret with a custom accessory.
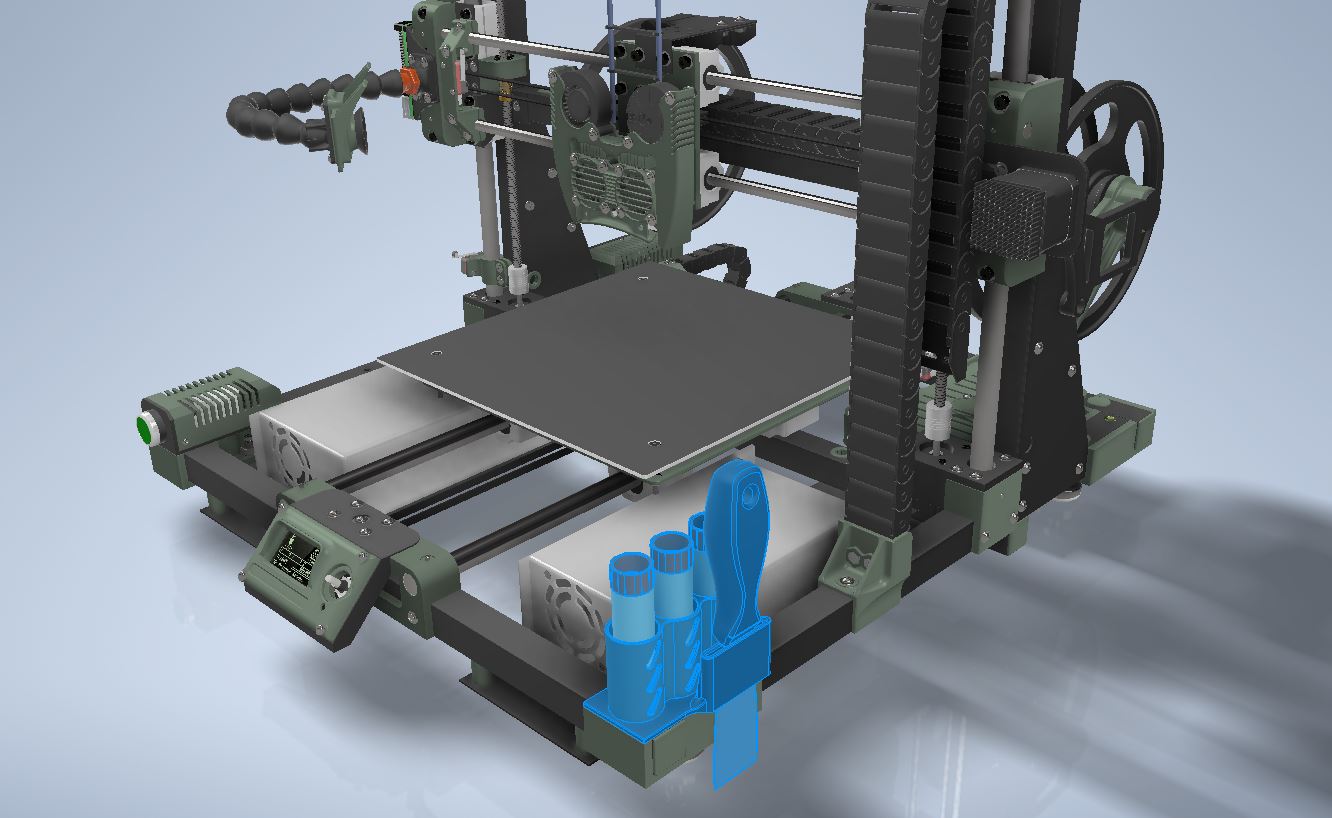
As with everything unrelated to the printer’s mechanism, these glue stick holders and spatula stand were designed as completely independent modules:
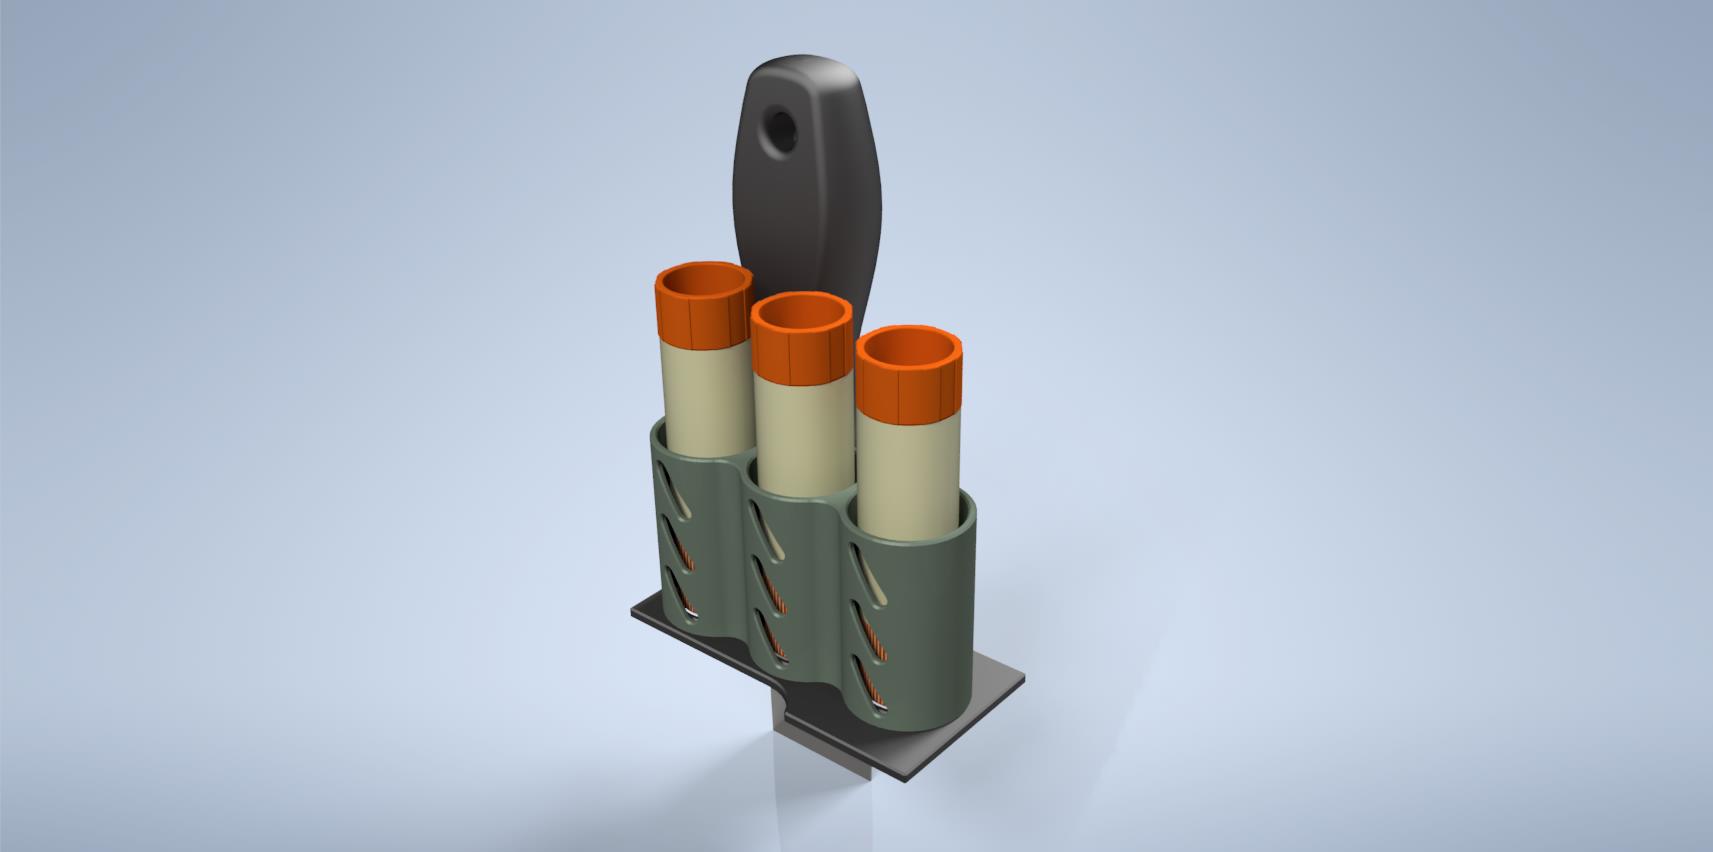
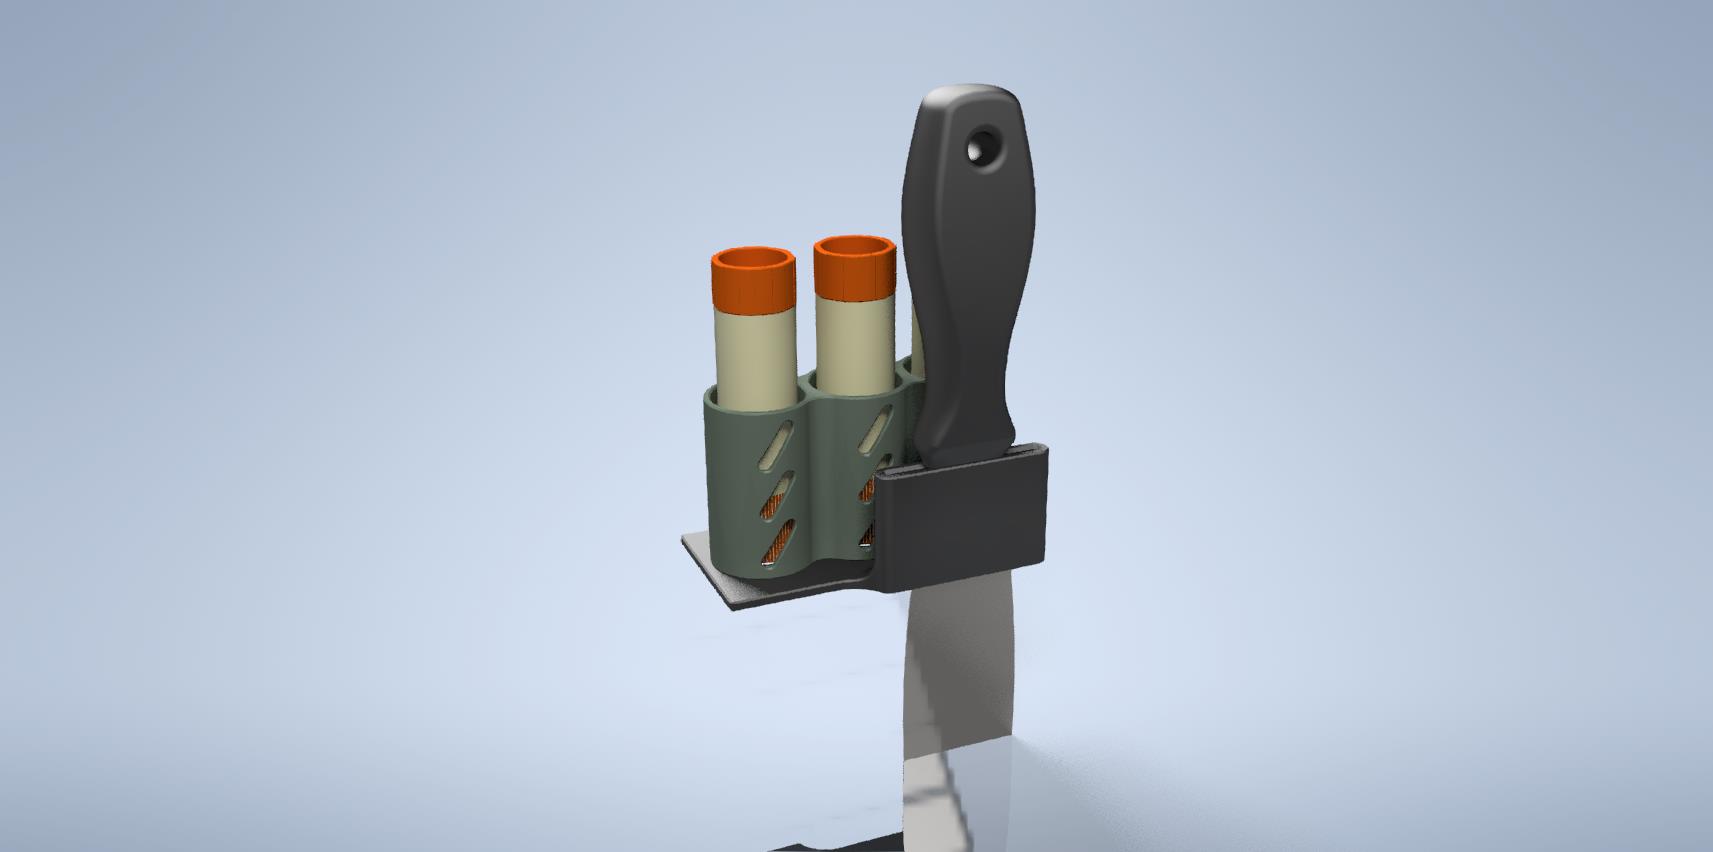
They simply attach to the frame using its standard mounting holes.
On the opposite side of the frame, a similar mounting hole is used for attaching a block with a power switch. During the manufacturing of the frame components, all its parts were made identical for simplicity and universality. Thus, if there are mounting holes on the right-side crossbeam of the frame, there will be identical holes on the left side as well — even if nothing was initially planned to be attached there. Turns out, they came in handy after all.
So far, this setup seems convenient:
But the usefulness of such accessories can only be confirmed over time. For now, it’s too early to draw any conclusions. We’ll see how this affects the frequency of glue stick and spatula disappearances over the next year or two. If necessary, this “module” can be redesigned, rebuilt, or even removed entirely if it proves completely useless.
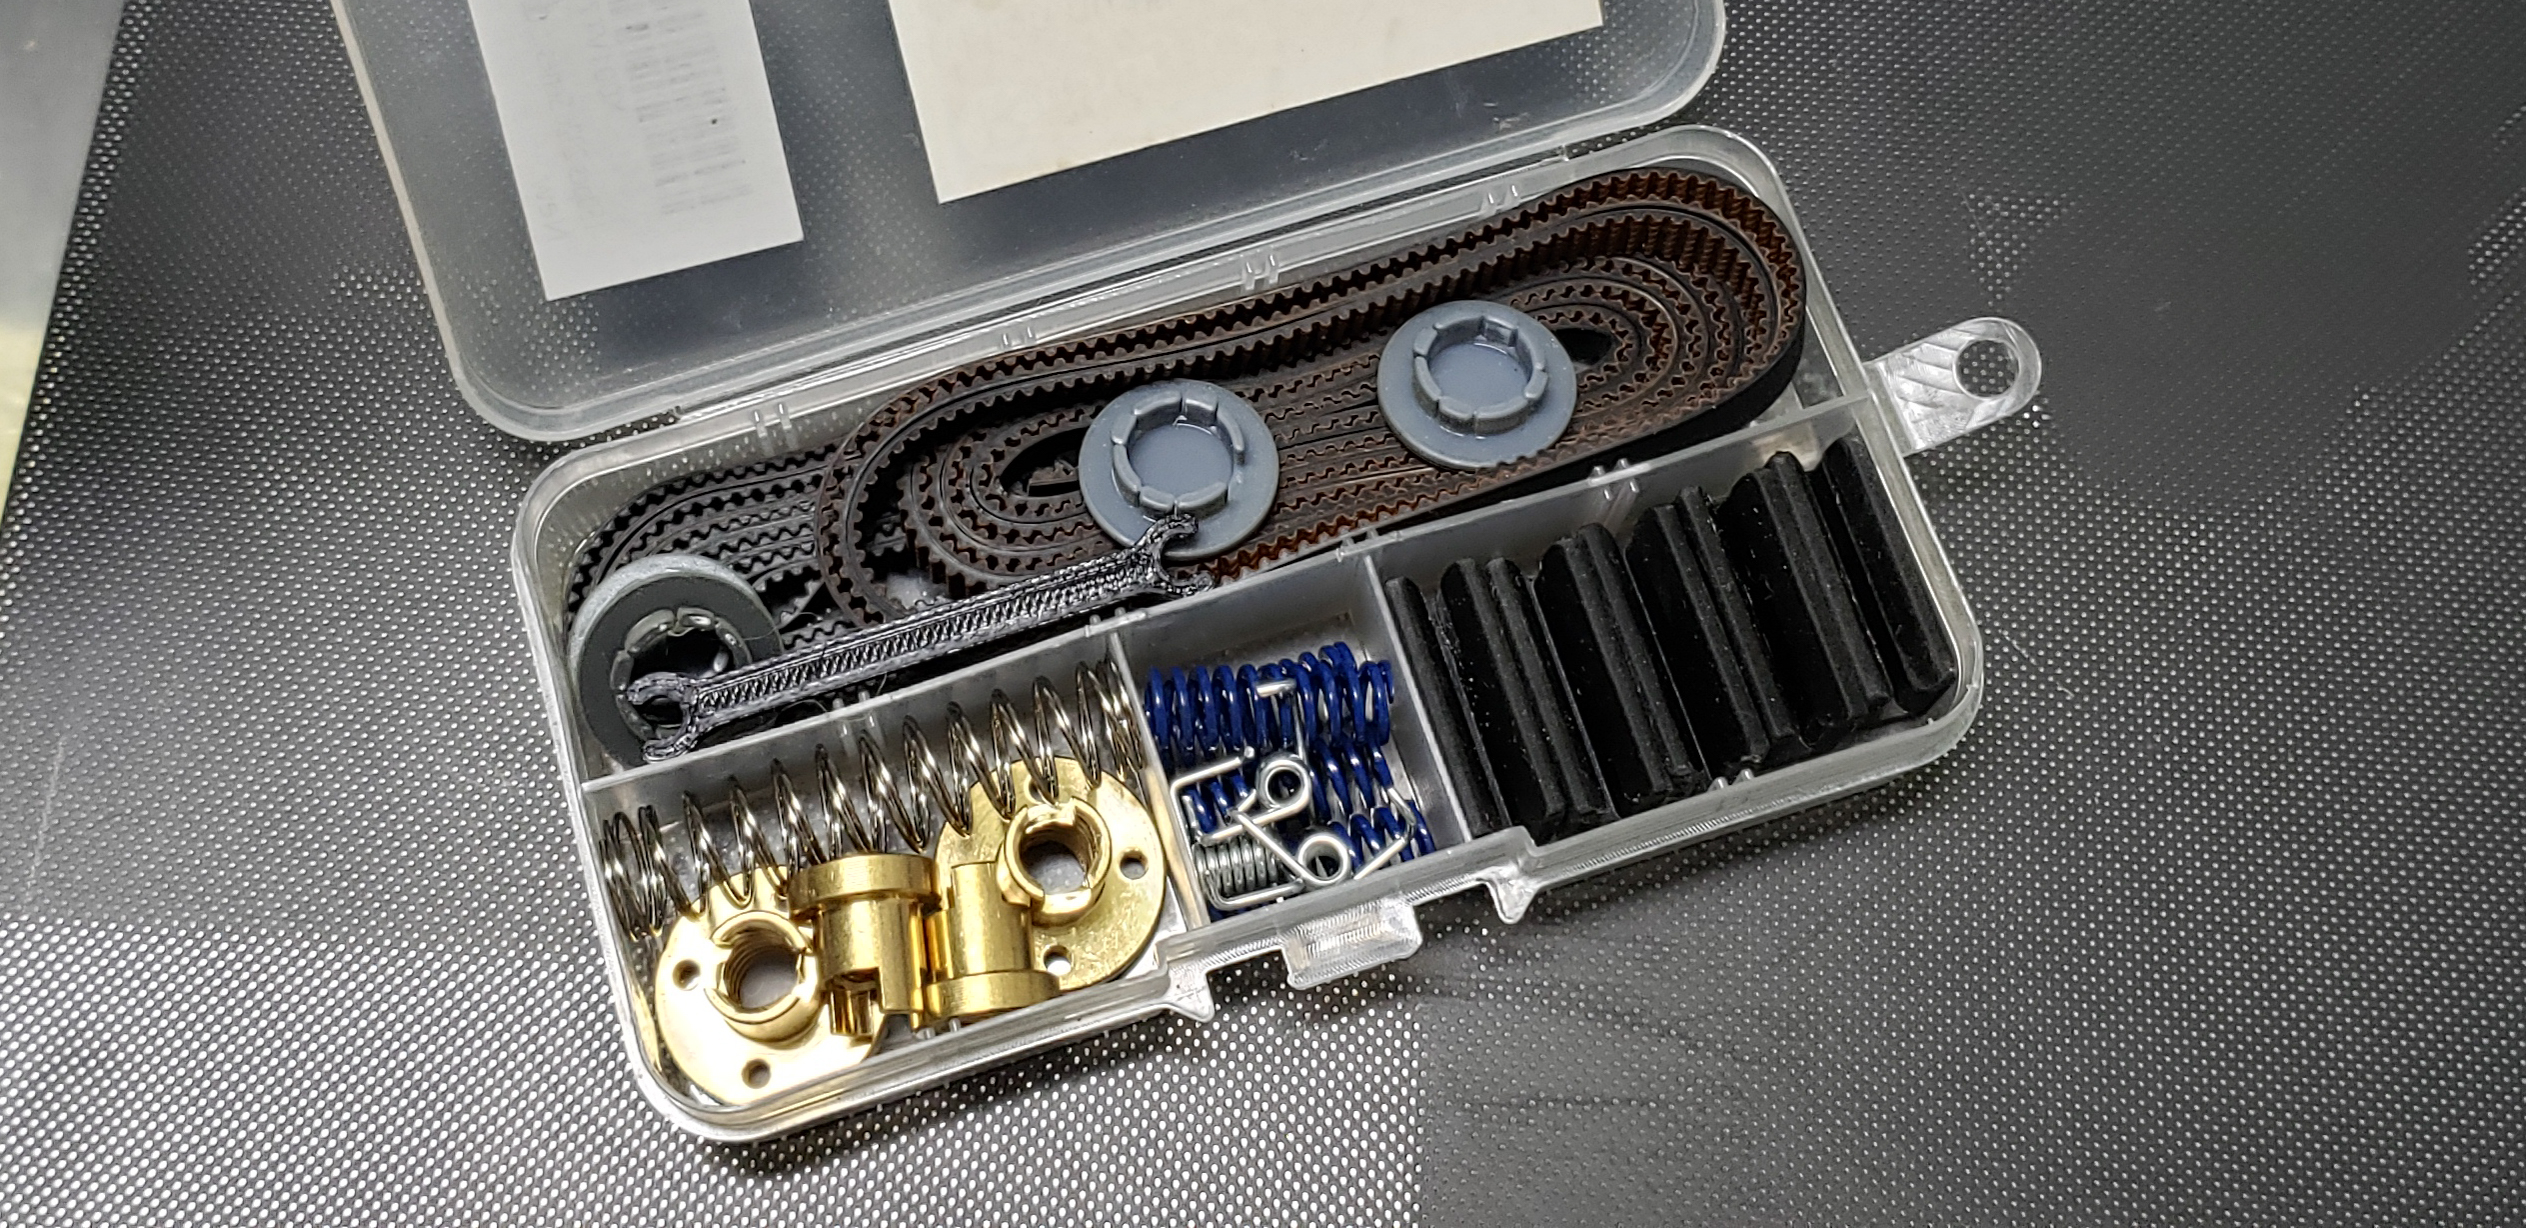
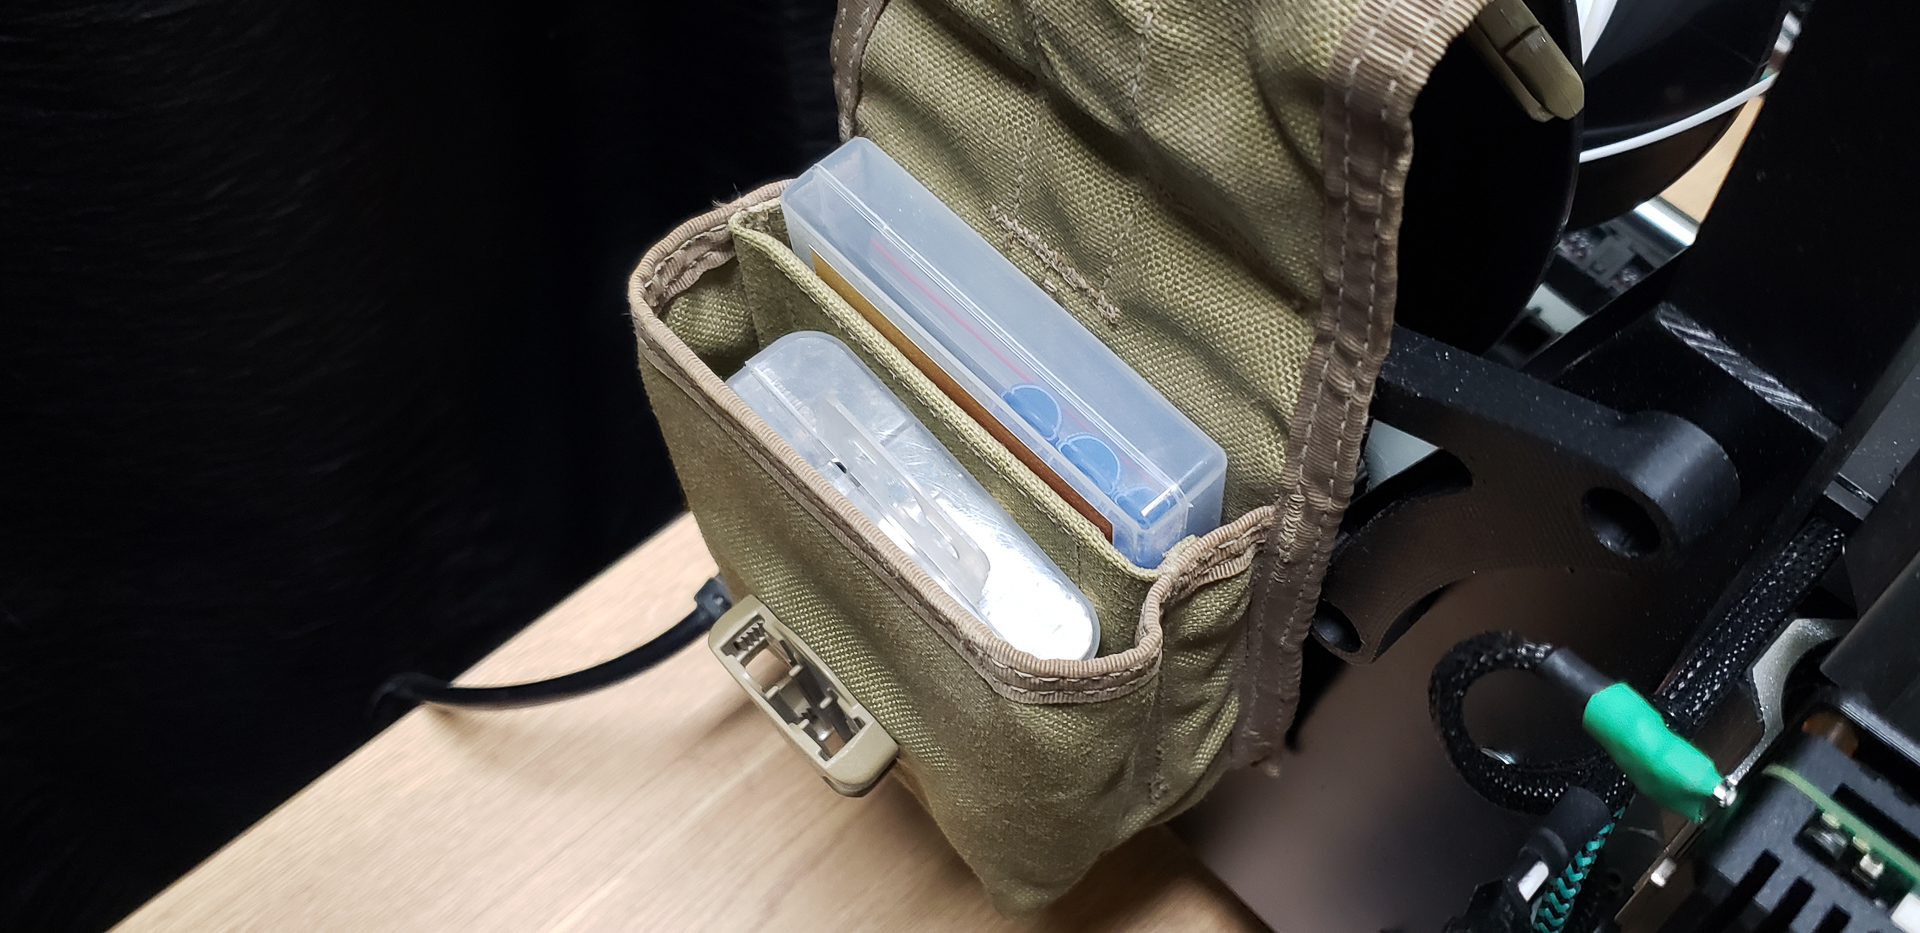
In addition to essential items like glue and a spatula, the printer also has a unique set of spare parts and tools that, while not often needed, are indispensable. These spare parts and tools are exclusive to the printer — they aren’t used anywhere else in the workshop. For instance, replacement nozzles for the hotend, insulating “pants” for the heaters, ultra-thin needles for clearing clogged nozzles, channel brushes, and so on. Or, for example, the wire cutters, which I’ve forbidden myself from using for anything other than clean, precise filament trimming.
Additionally, various custom parts were made specifically for the Turret, such as belt lockers, plugs for the frame’s holes, and similar items. These also need to be kept as spare parts, but they are only useful for the Turret.
This collection of miscellaneous items isn’t very large, but it exists. I stored a similar assortment for the Widow in small boxes inside my desk drawer. Unlike the glue stick and spatula, these items didn’t tend to mysteriously disappear. However, they were a nuisance inside the drawer itself, because my desk drawer is meant for stationery — paperclips, pencils, pens, and so on. Printer spare parts among all this didn’t exactly belong there, disrupting the feng shui of the drawer, disturbing the room’s aura, and polluting its chakras.
A logical solution was to create something like a “trunk” within the printer itself to store these spare parts:

As mentioned earlier, the aesthetic design of the Marsh Turret was a low priority, sitting somewhere at the very end of the task list. Nevertheless, over time, the Turret naturally adopted a military-style aesthetic for its appearance. It chose this direction itself, and I didn’t object.
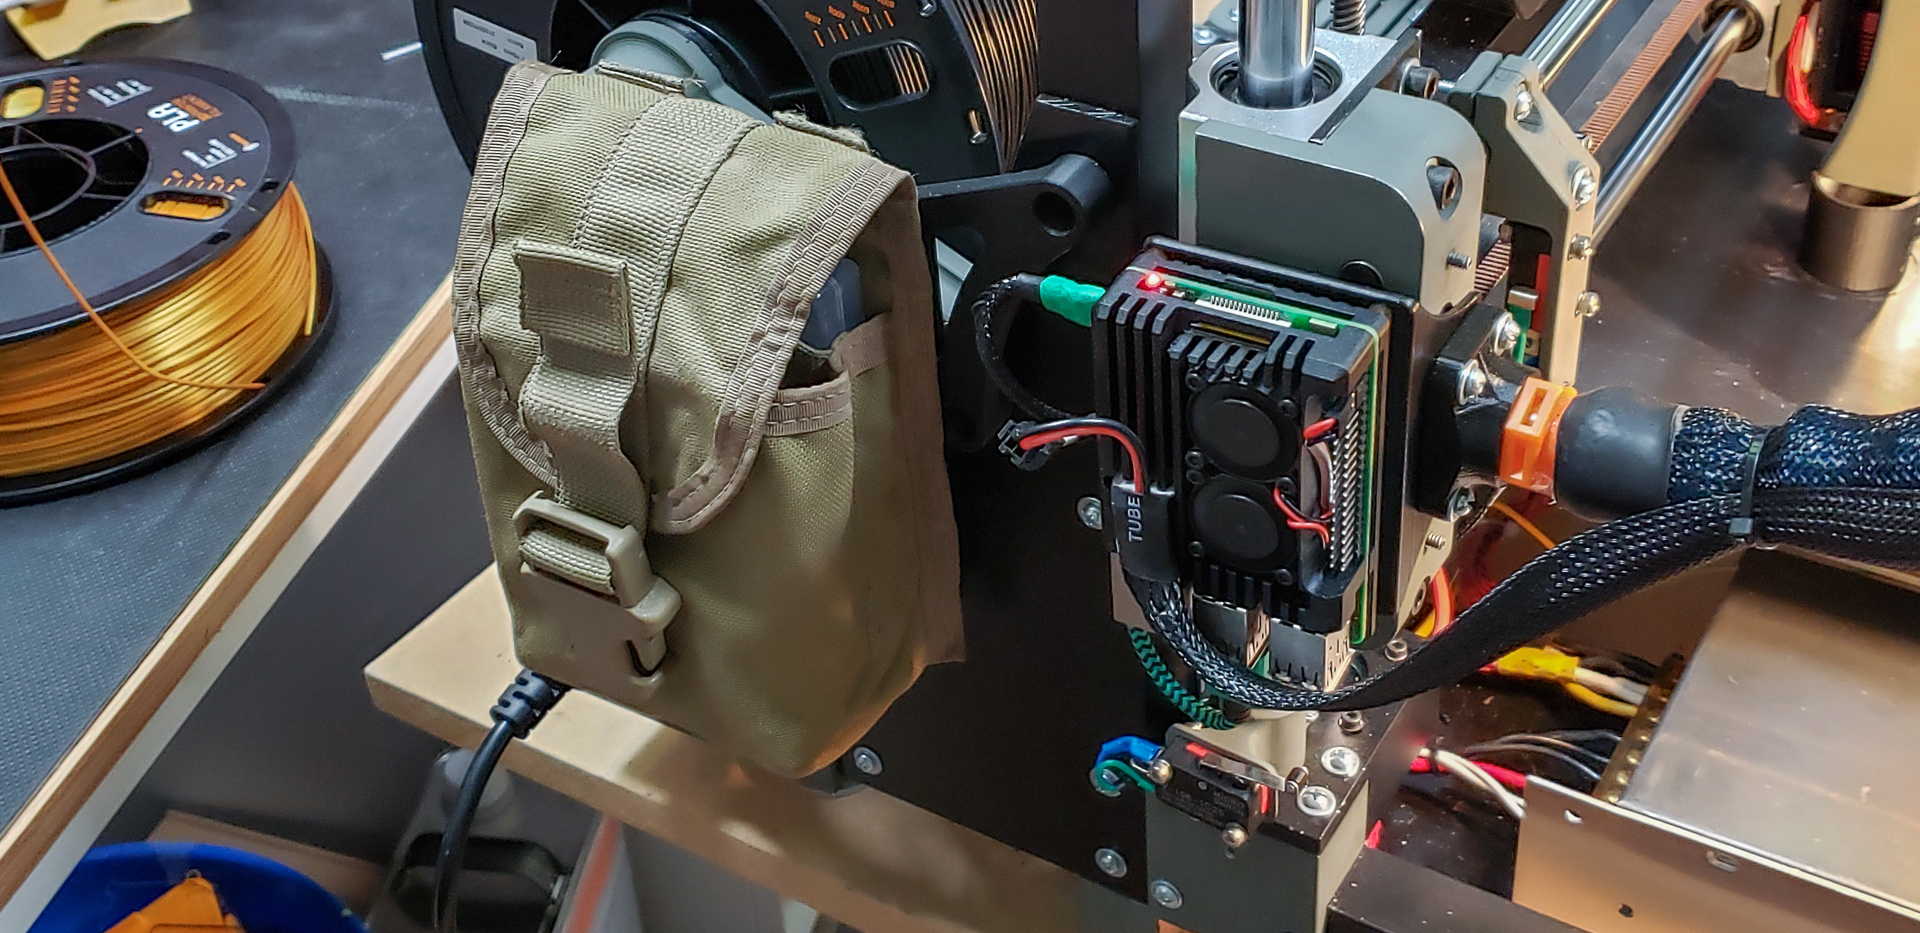
When it came time to add a “trunk” to the printer, the first thought that came to mind was the military MOLLE system (Modular Lightweight Load-carrying Equipment). More specifically, I thought of its related system, PALS (Pouch Attachment Ladder System), rather than MOLLE itself (though, admittedly, a backpack-sized add-on for the Turret would look pretty awesome). The PALS system allows soldiers to attach various pouches, holders, cases, and other items — whether specialized or general-purpose — in any configuration to suit their situation. They can easily attach, detach, and move them anywhere, from a backpack to a vest, from a vest to pants, or even to a helmet. It’s a universal system because it’s truly universal.
As it happened, I had a stash of PALS-compatible pouches and pockets lying around. They’re incredibly useful things! You can hang them on a pegboard in the workshop, attach them to a belt, combine them into modular storage systems, throw them in the car, or even leave them outdoors. Heat, cold, humidity — they handle it all without a problem. They’re practically indestructible.
The only issue was that I couldn’t find even two identical pouches in my stash. They varied not only in color and wear but also in shape and type. Nonetheless, I managed to select a couple that perfectly fit the spare parts boxes for the printer.
The final step was to equip the printer itself with PALS-compatible mounting points to hang these pouches. Naturally, I didn’t sew canvas straps onto the aluminum frame. Instead, I printed plastic mounting loops that fit the standard:

And with that, the Marsh Turret fully embraced its militarized aesthetic:


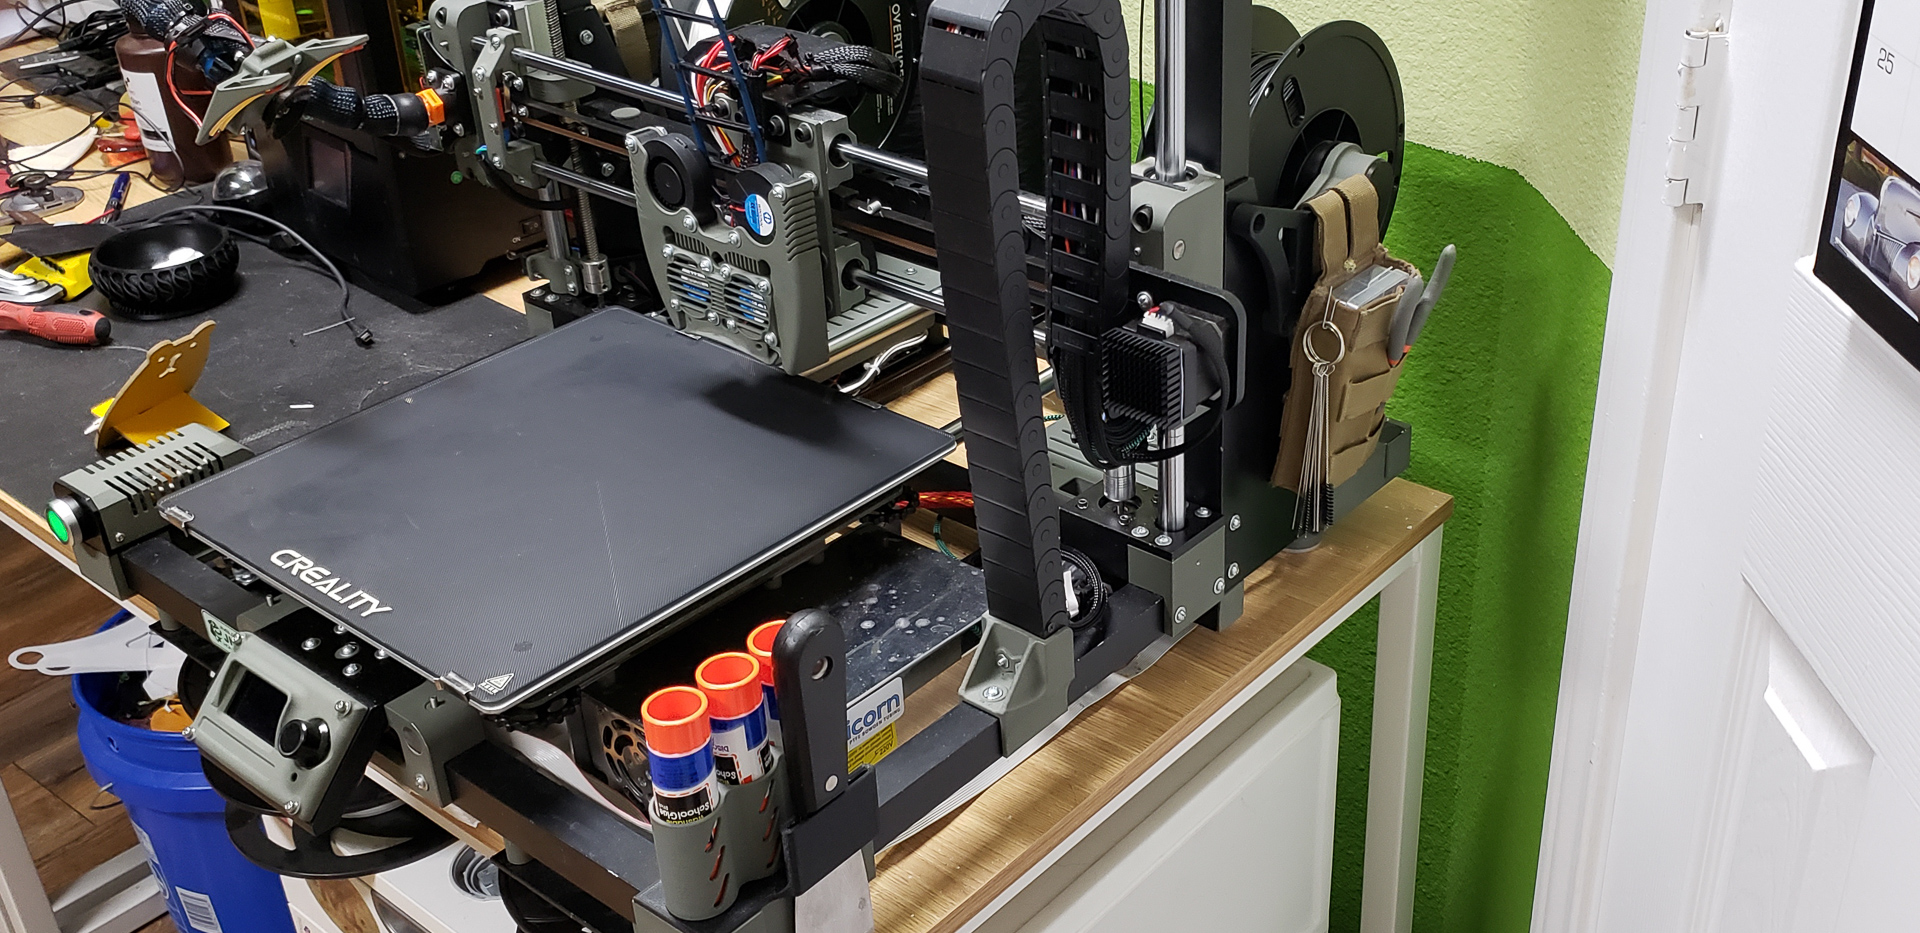
That’s it. The MARSH TURRET has no other accessories or frills.
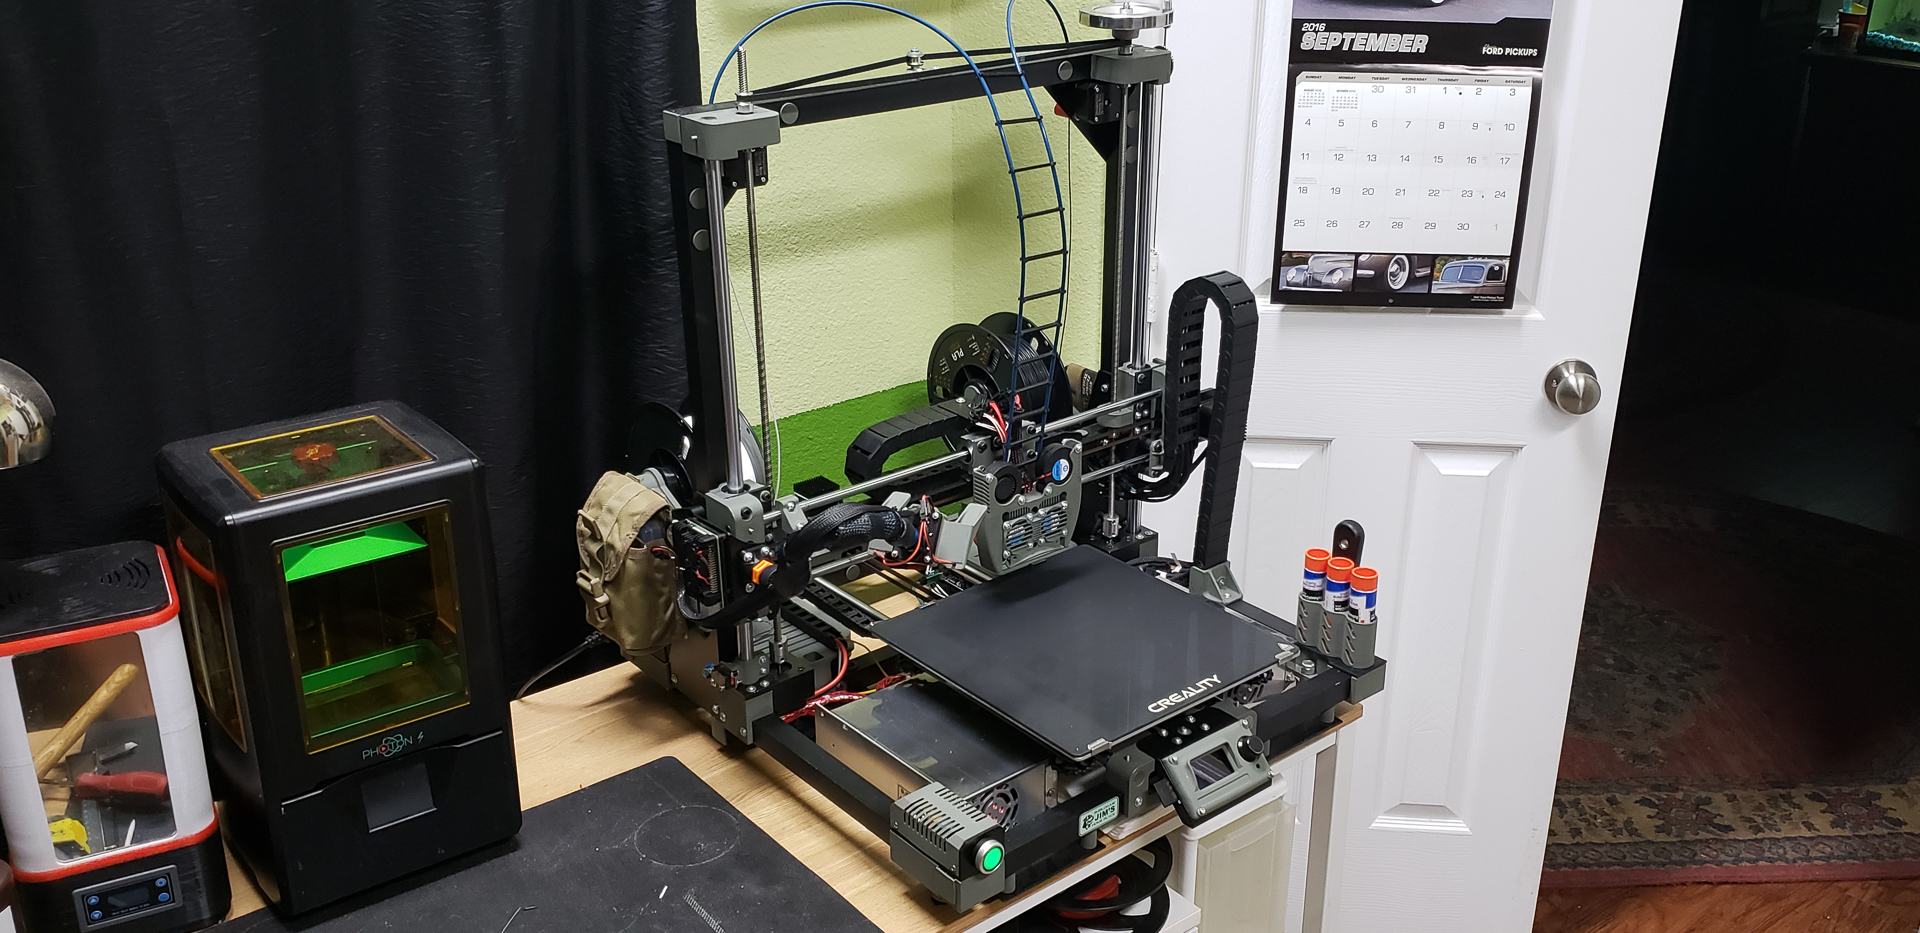
In its nearly final form, the Marsh Turret seemed fully armed and operational:
Almost…
There was still one minor issue to address concerning the essential printer accessories. The problem was simple: for years, there had been no proper place to store filament spools. This issue dated back to the days of the Black Widow. I kept meaning to solve it but never got around to it.
Well, “no proper place” isn’t entirely accurate. There was a place: the desk drawer under the printer. But it was far from ideal. Round spools lying flat don’t mesh well with a rectangular drawer, and standing them upright wasn’t an option due to height constraints. Everything inside was always jumbled together, and a lot of space was wasted because of the mismatch between the geometry of the drawer and its contents. Not to mention, the drawer itself was better suited for more traditional items.
For instance, I kept rubber gloves in there for working with the resin printer on the same desk, along with packs of filters, soft brushes for cleaning both printers, a strategic stash of cleaning wipes, and other small odds and ends. But definitely not large filament spools.
It would’ve been possible to store the spools on shelves in the workshop. However, all the suitable shelves were on the opposite side of the room, far from the printer. I wanted tools and consumables to stay in one centralized location, not scattered across the house.
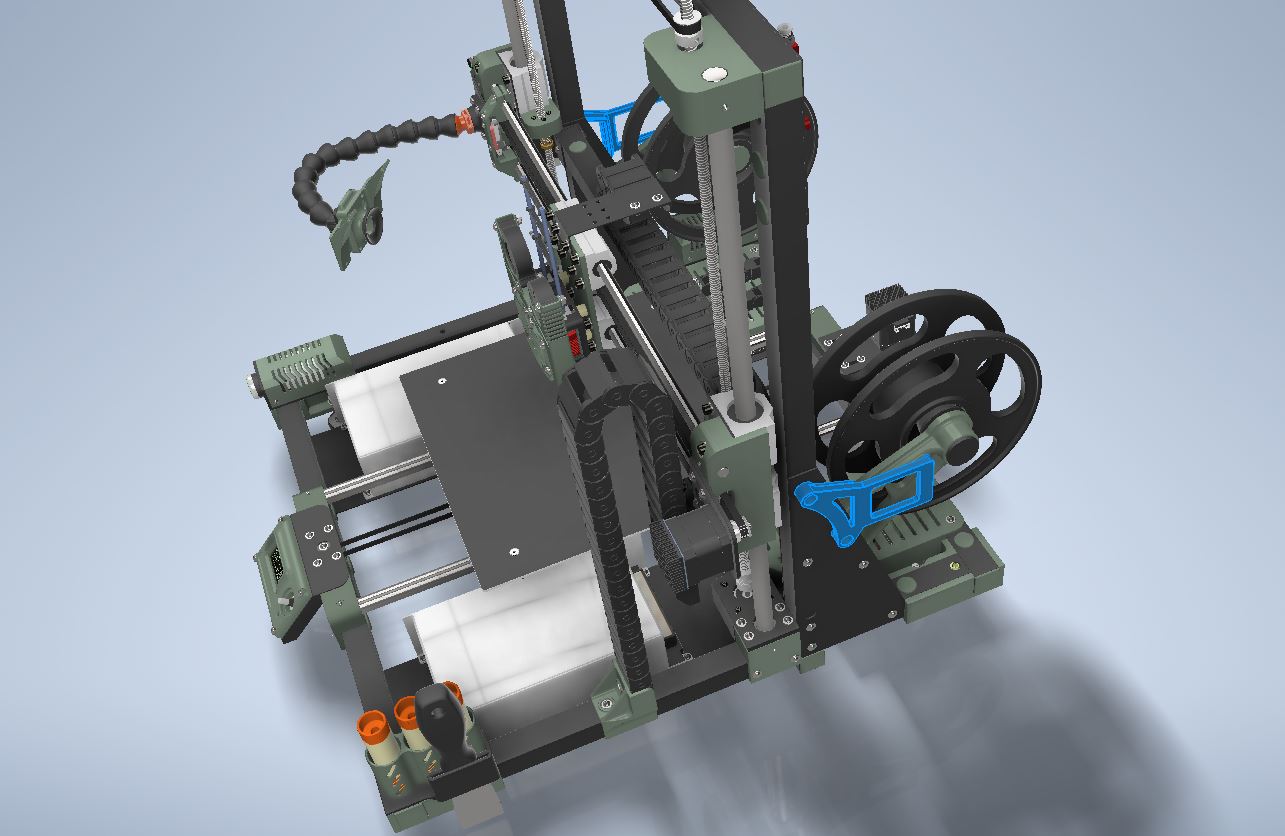
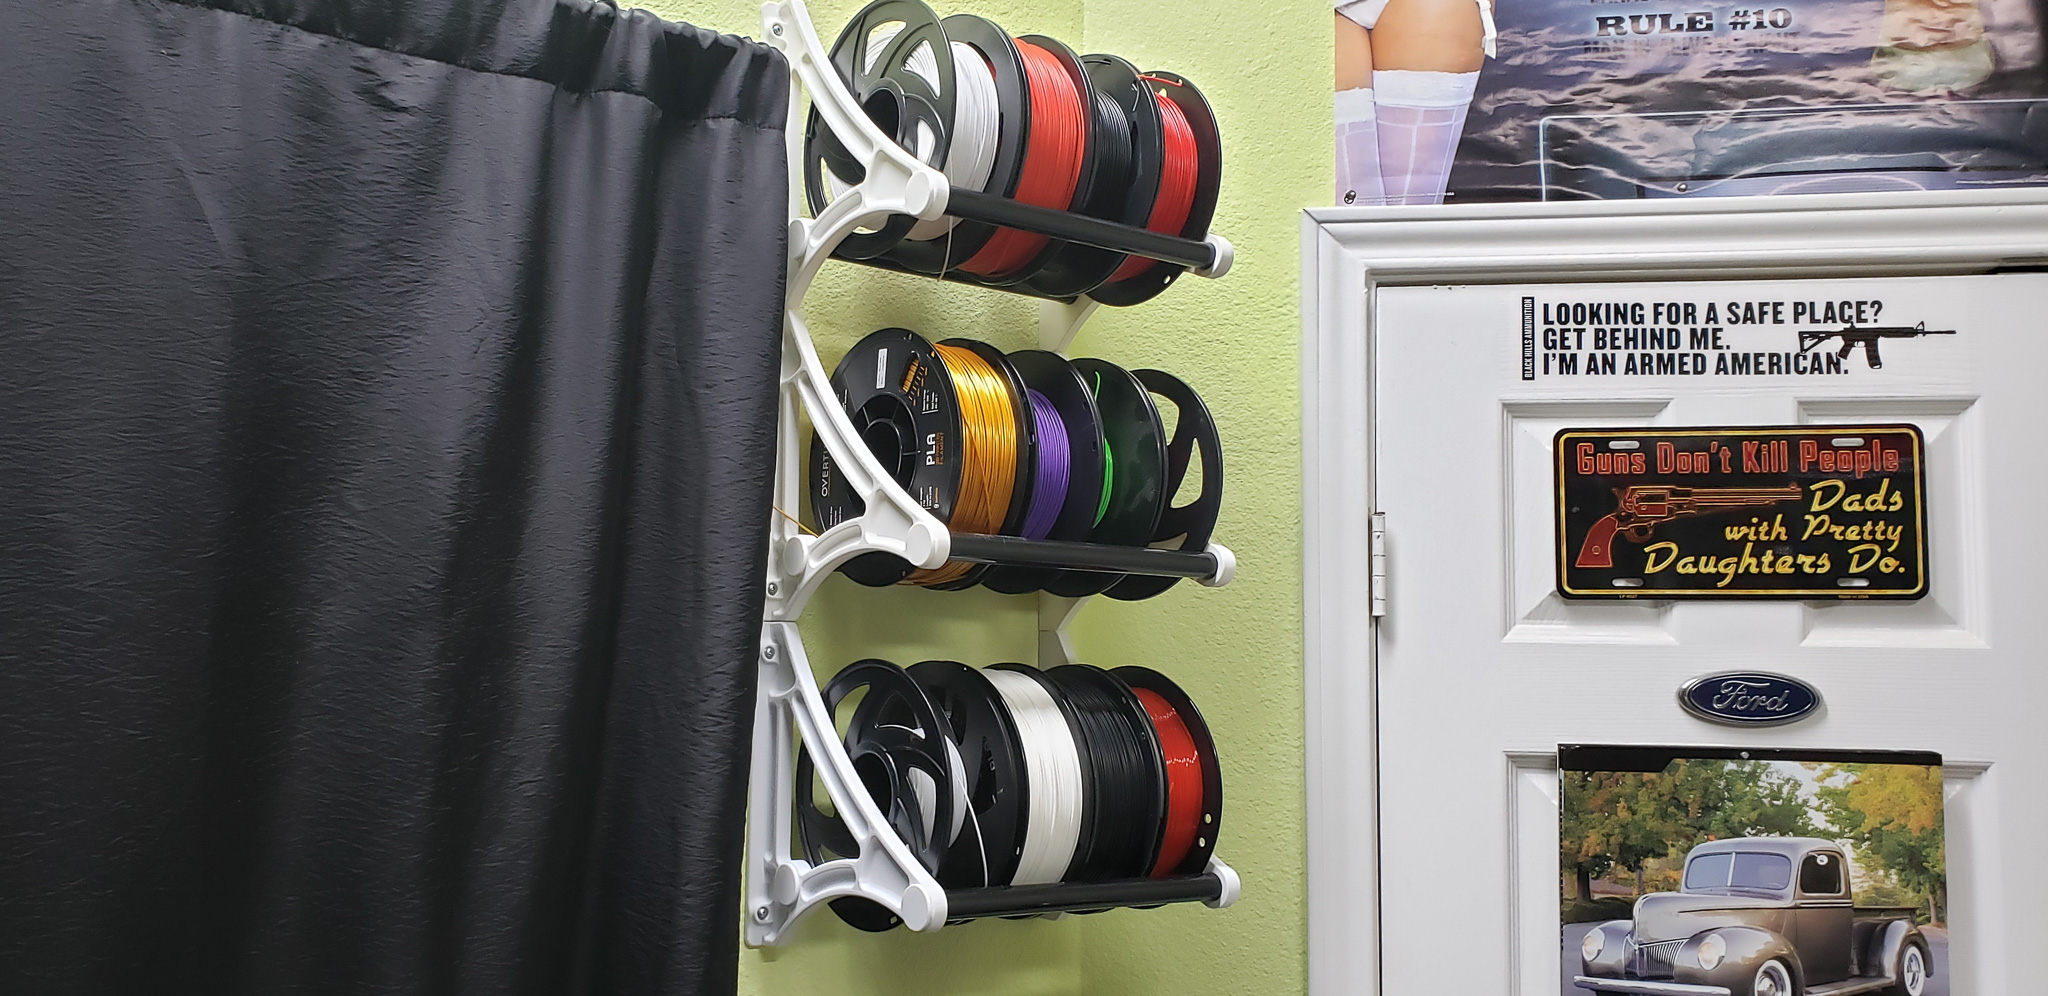
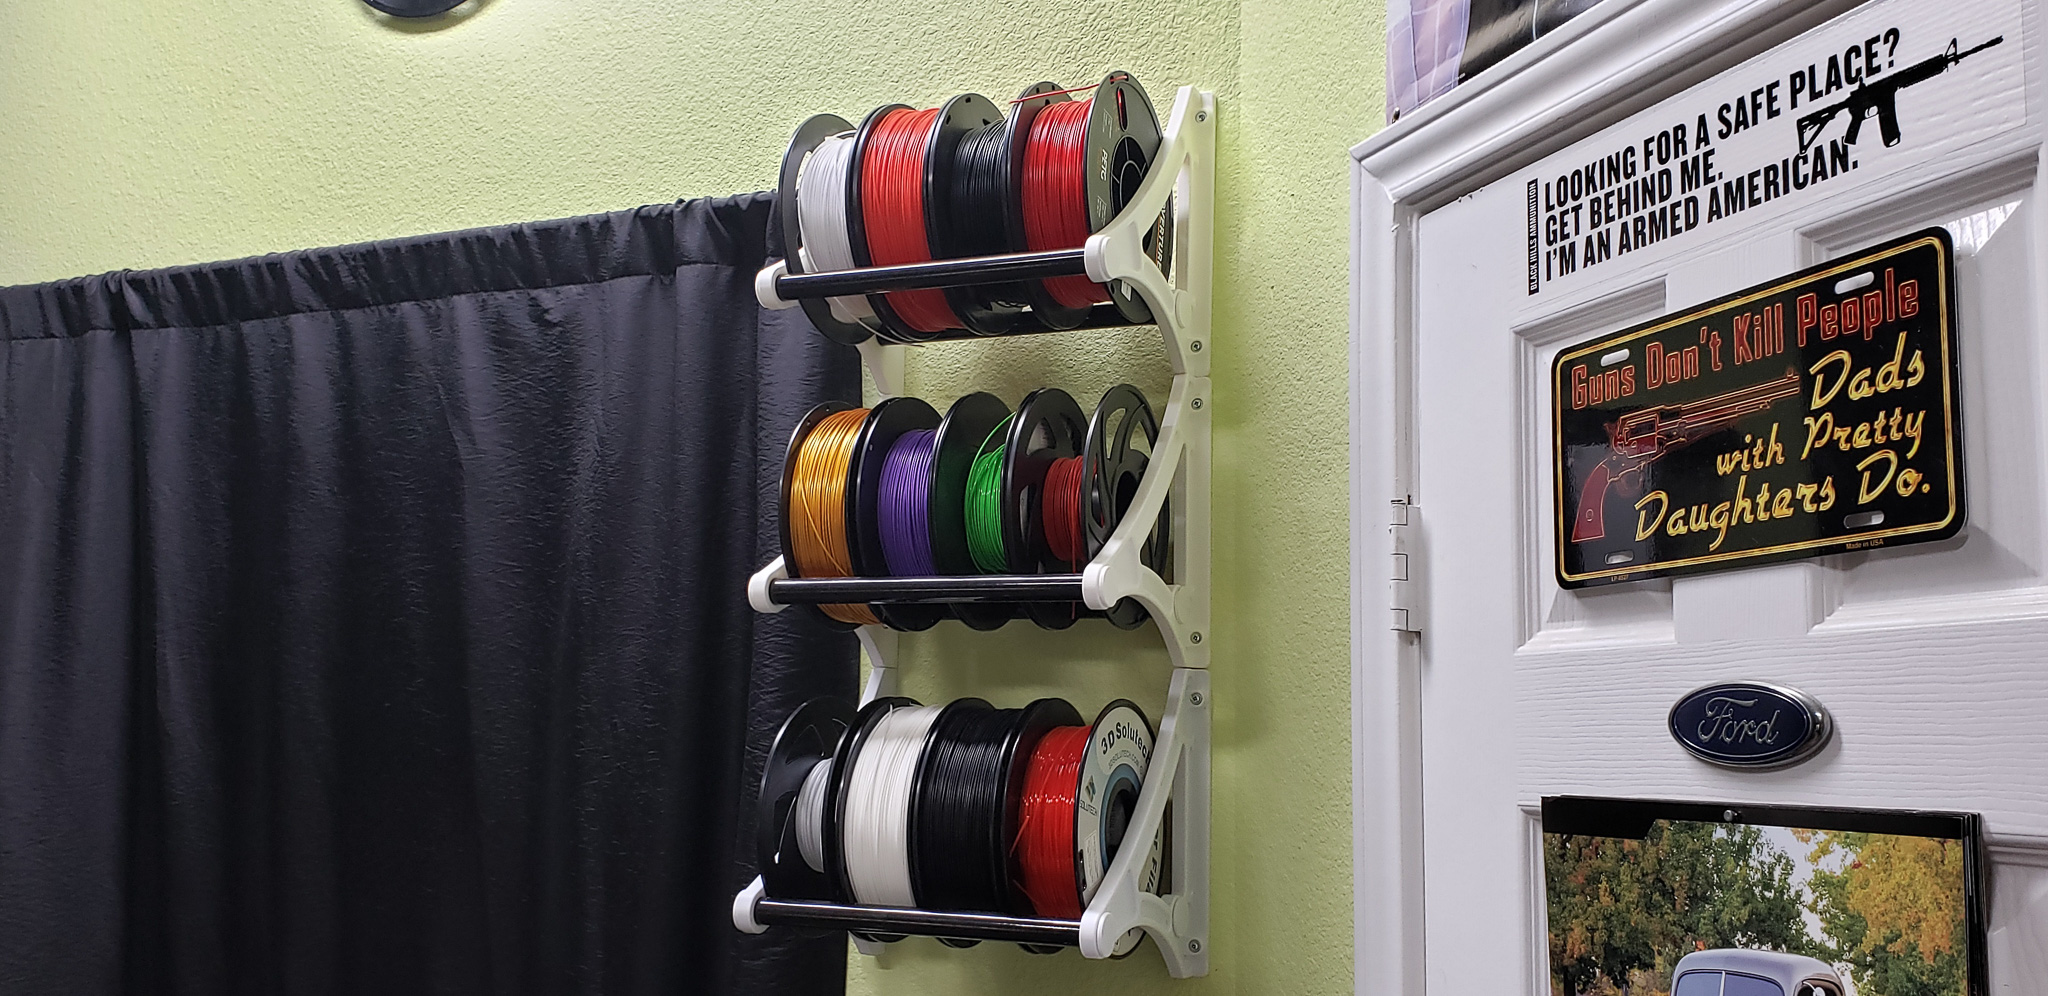
This led to the idea of creating wall-mounted shelves above the printer, designed specifically for filament spools. Right here:

As you can see, there isn’t much space available. But I don’t keep large quantities of filament anyway. There’s no point. If filament isn’t stored in an airtight container or sealed bag, it either absorbs moisture from the air, dries out, or collects a layer of dust.
All of these issues — moisture, dryness, and dust — can ruin print quality. A year of open-air storage, and it’s game over. Sure, a printed part can last for generations, much to the dismay of environmentalists, but problems arise during the printing process itself. You get bubbles and “curls” oozing from the nozzle, brittle plastic breaking like spaghetti, clogged nozzles… just a whole lot of hassle.
Investing in specialized storage boxes for long-term, humidity- and dust-controlled storage? Absolutely pointless for me. Such systems take up space and require constant attention.
or personal, small-scale DIY projects — not a commercial “3D farm” with dozens of printers (where bulk raw material purchases make economic sense) — it’s much simpler to buy filament in small amounts, just enough for the current project, and no more.
Luckily, Amazon can deliver a spool or two on the same day of purchase, or the next day at most. In my case, I have an even better option. The local ZILtech filament manufacturer is just a 20-25 minute drive from my home. They produce excellent filament, tested and proven personally, many times over. And since the purchase is direct, not through a dealer, there’s minimal markup. I can simply call them or place an order on their website with the note “self-pickup.” They’ll ship out a spool or two straight from the conveyor belt, still warm. Forty minutes — well, fine, let’s say even an hour — for a round trip by car is nothing. So why would I ever stockpile filament at home in bulk?
As a result, my usual household supply is about half a dozen spools in basic colors (white, black, red, green, blue). The wall space behind the printer is more than enough for that quantity.
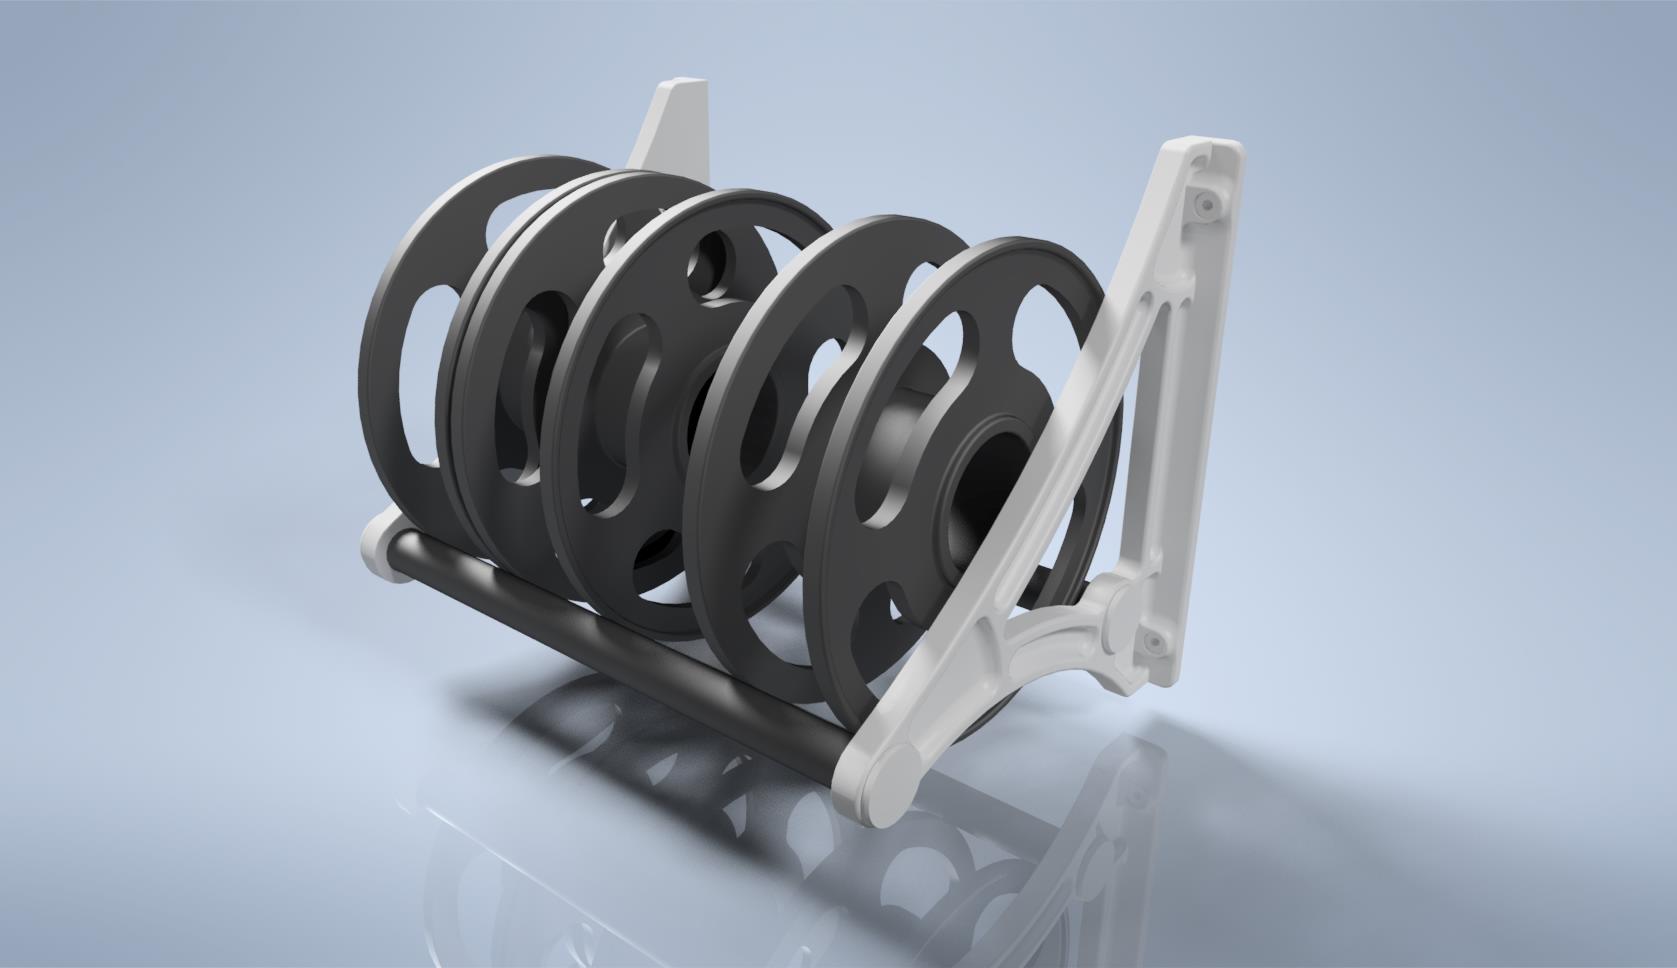
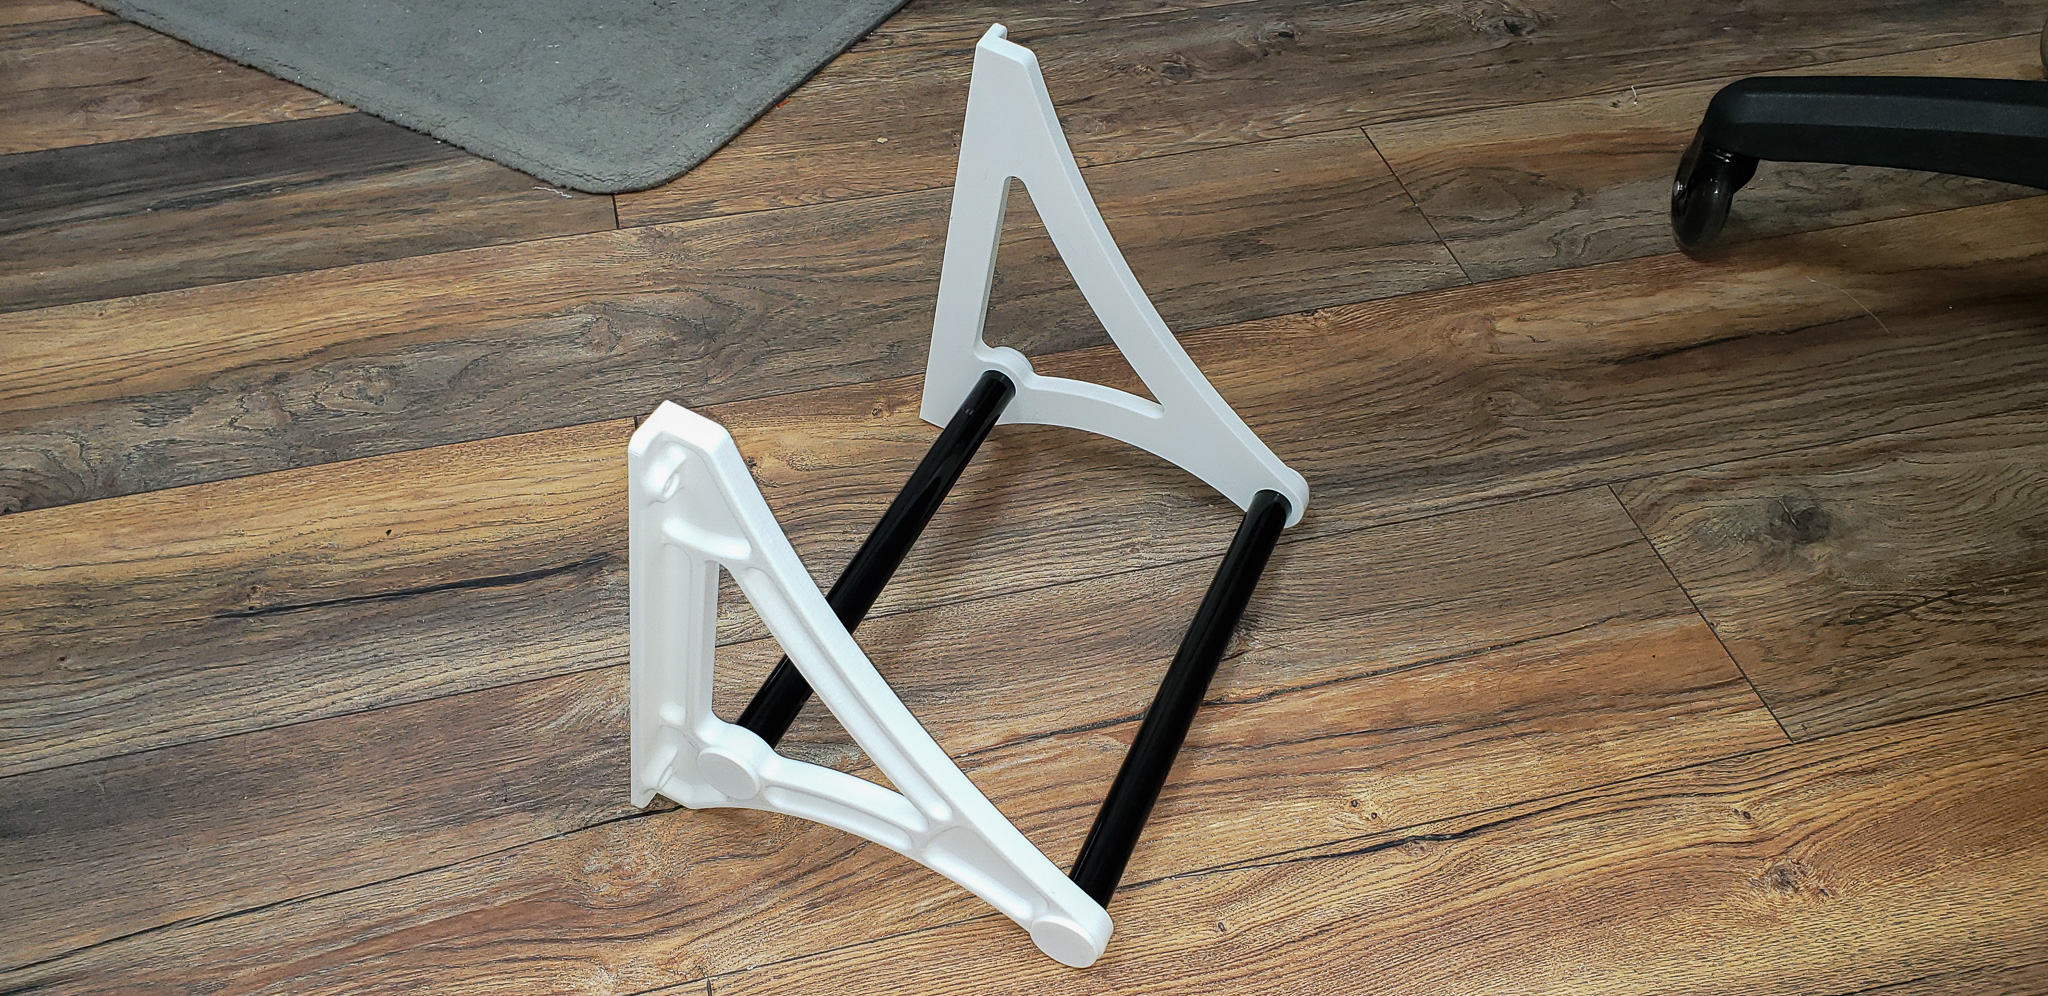
Thus, the idea was born to create a simple three-tiered vertical rack, each tier capable of holding up to four standard 1 kg spools, for a total of 12 spools. For me, this is a storage solution with a very generous margin.
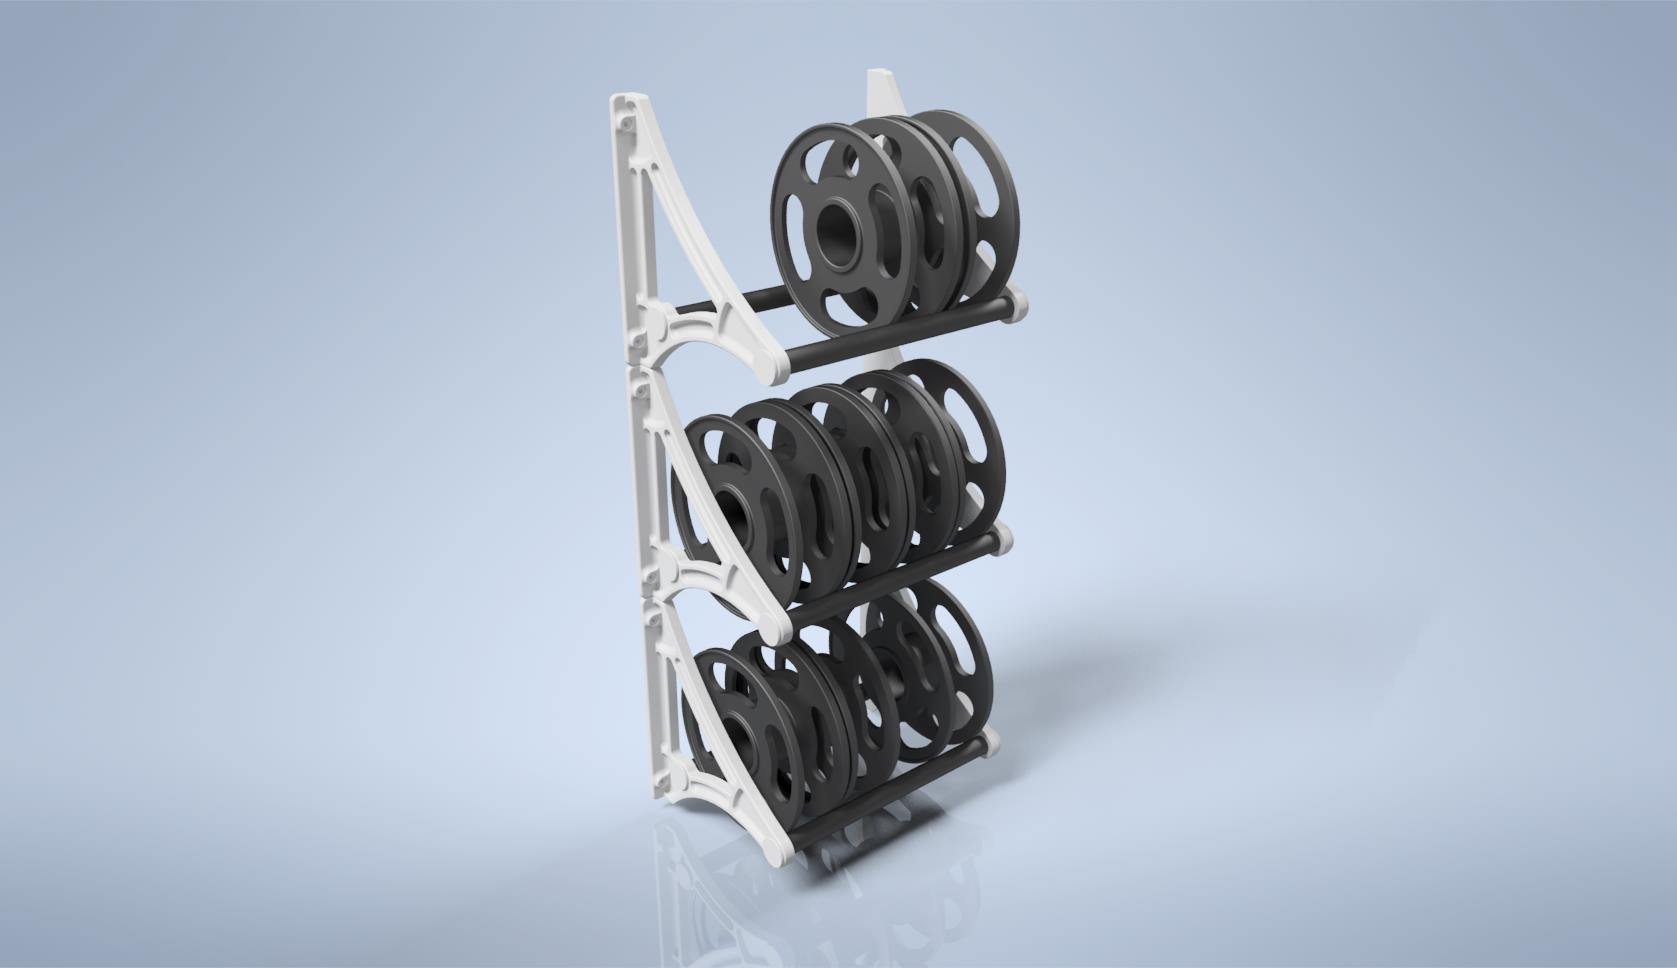
At the moment, my current stock of filament is experiencing a severe bout of overabundance, totaling 11 spools. This happened accidentally. I bought a fresh batch of red, white, and black filament for ongoing projects, only to unexpectedly find several unopened spools of the same colors in a corner of the cabinet while organizing. This coincidence led to the 12-slot design for the shelves. But in reality, I rarely need that much at once.
Each shelf tier consists of the bare minimum of parts: a pair of brackets, two rods, and decorative end caps:
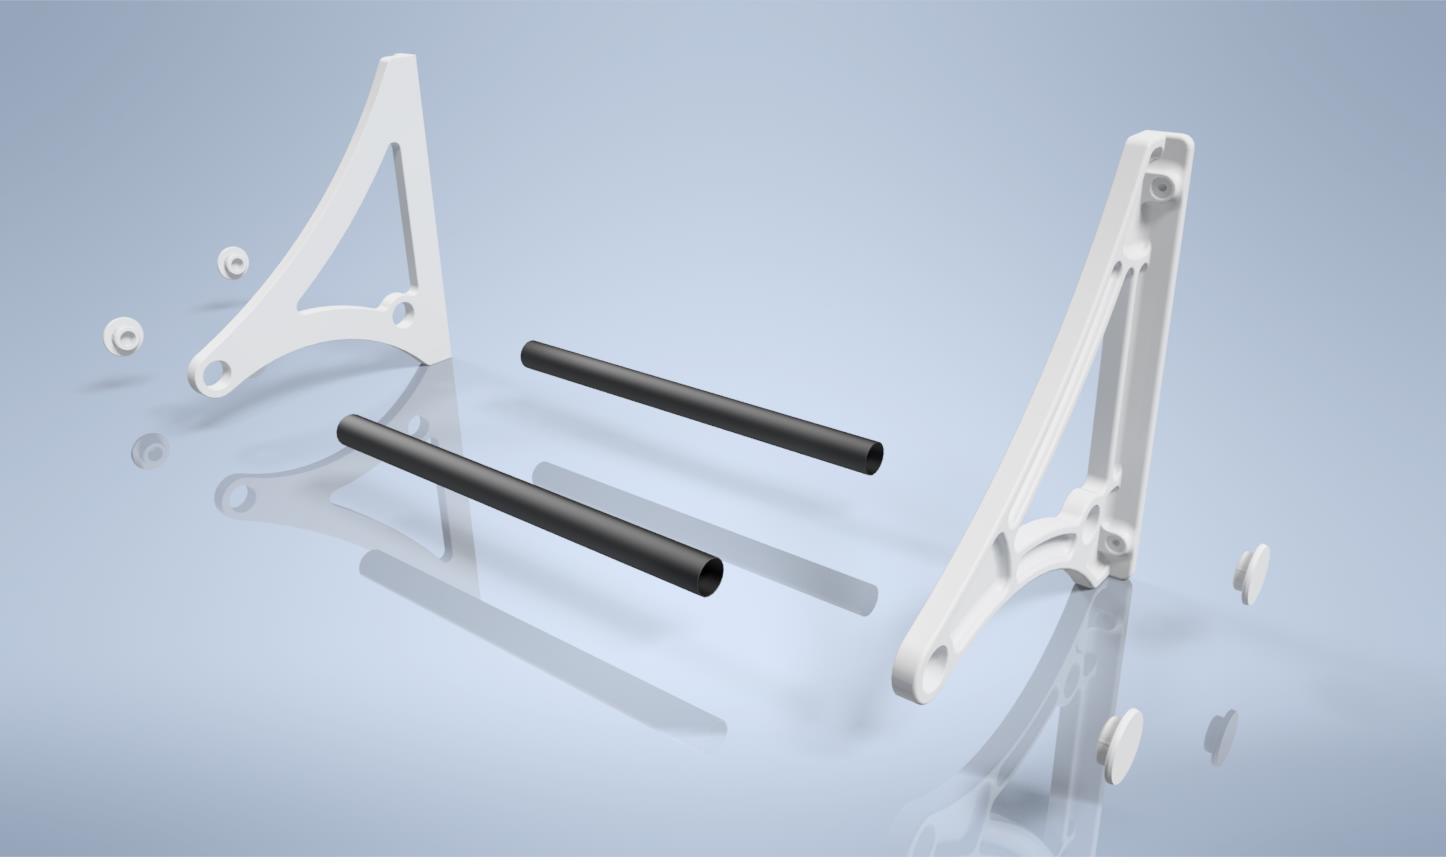
The brackets and caps, of course, were 3D-printed. As for the rods…
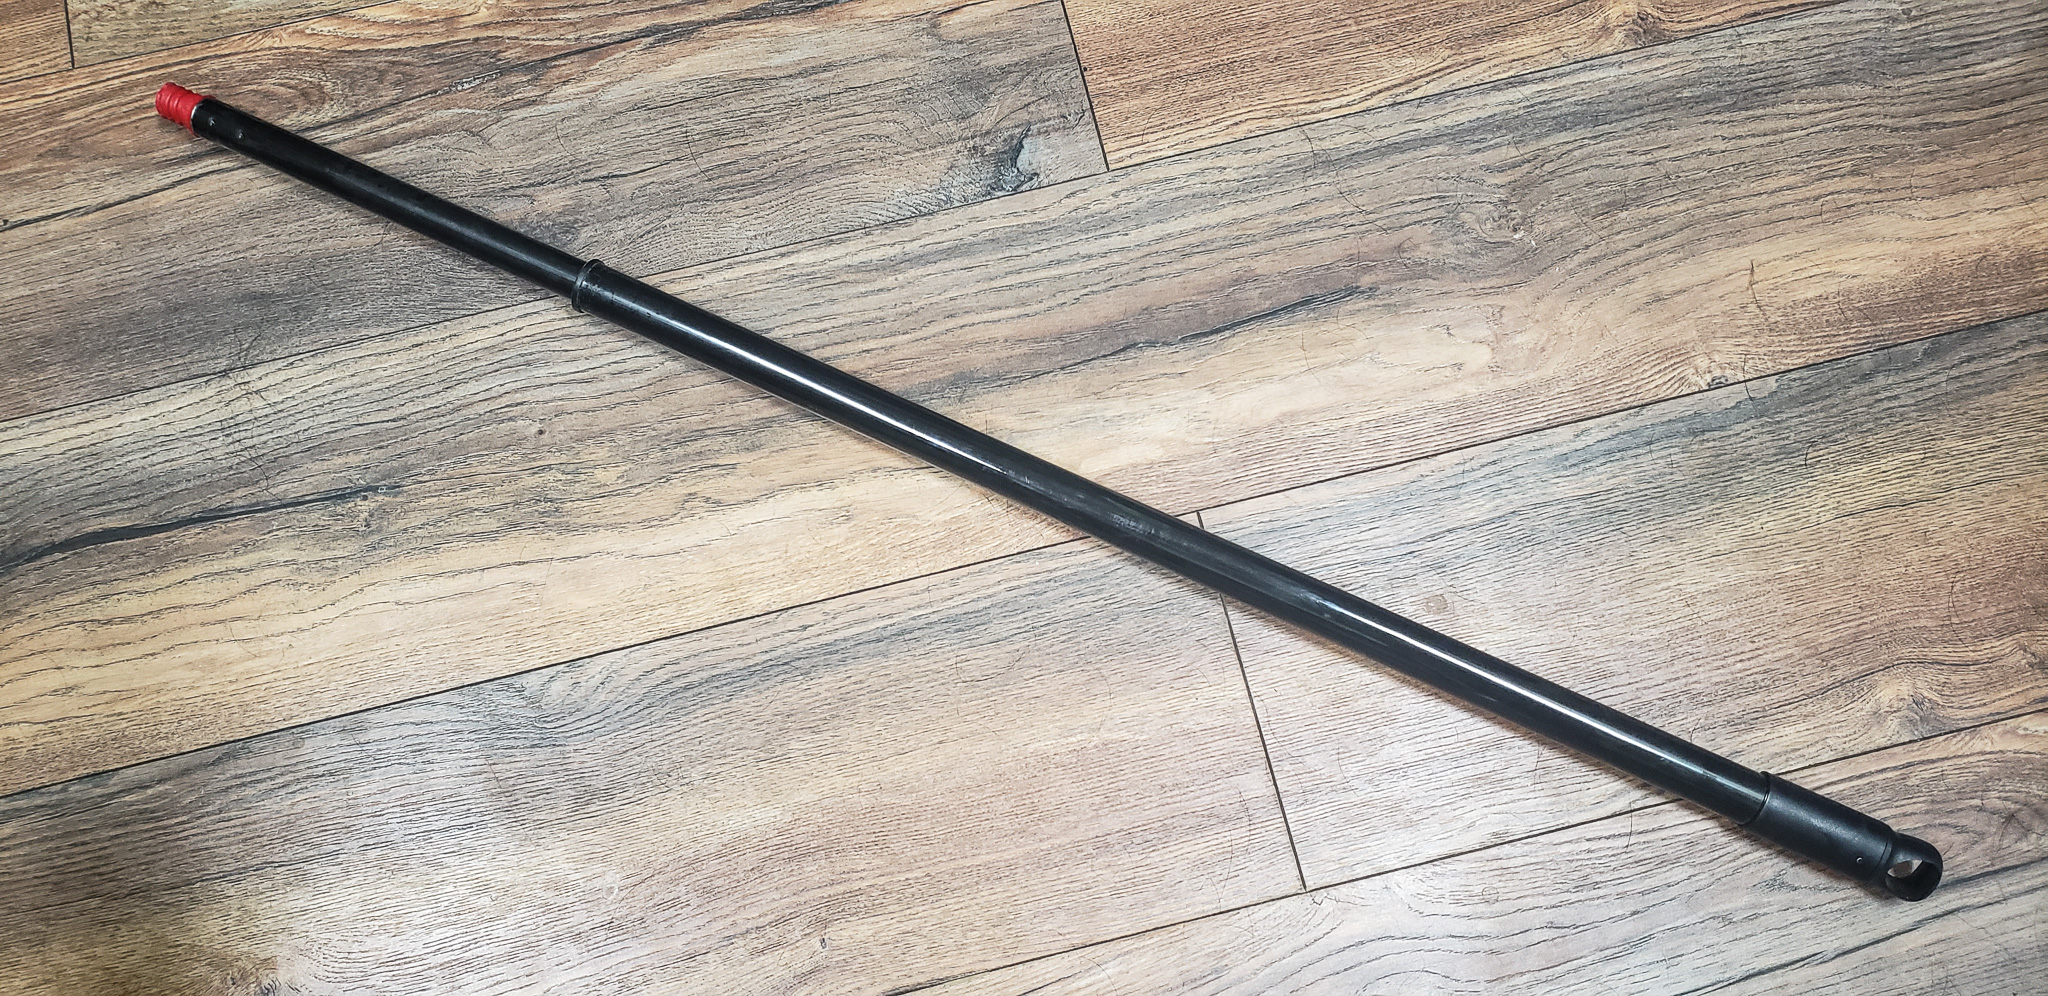
Well, a couple of years ago, I stumbled upon three boxes of brand-new telescopic mop handles for free. Now I have around fifty of them (or maybe more) stashed away. I have no idea how good they are for actual mopping — I’ve never tried. Judging by their thin walls and flimsy feel, they’re probably awful as mop handles. But for DIY projects? Perfect! They’re metal, coated with a thick, pleasant-to-touch polymer layer. The dimensions are convenient for crafting: the “thin” section has a 7/8-inch diameter, and the “thick” section is exactly 1 inch. These are handy, standard imperial measurements I’m completely used to. Metric users wouldn’t understand.
I use these handles here and there for various projects. The Marsh Turret got its share in the form of the rods for these spool holders.
Everything was measured in place as part of the computer model, and then all that remained was to bring it into the real world.
Due to the exceptionally simple design, it took about 30 minutes to draw the models, including fitting them into the existing room model and rendering images for the blog. Printing took three sessions since only one set fit on the print bed at a time.
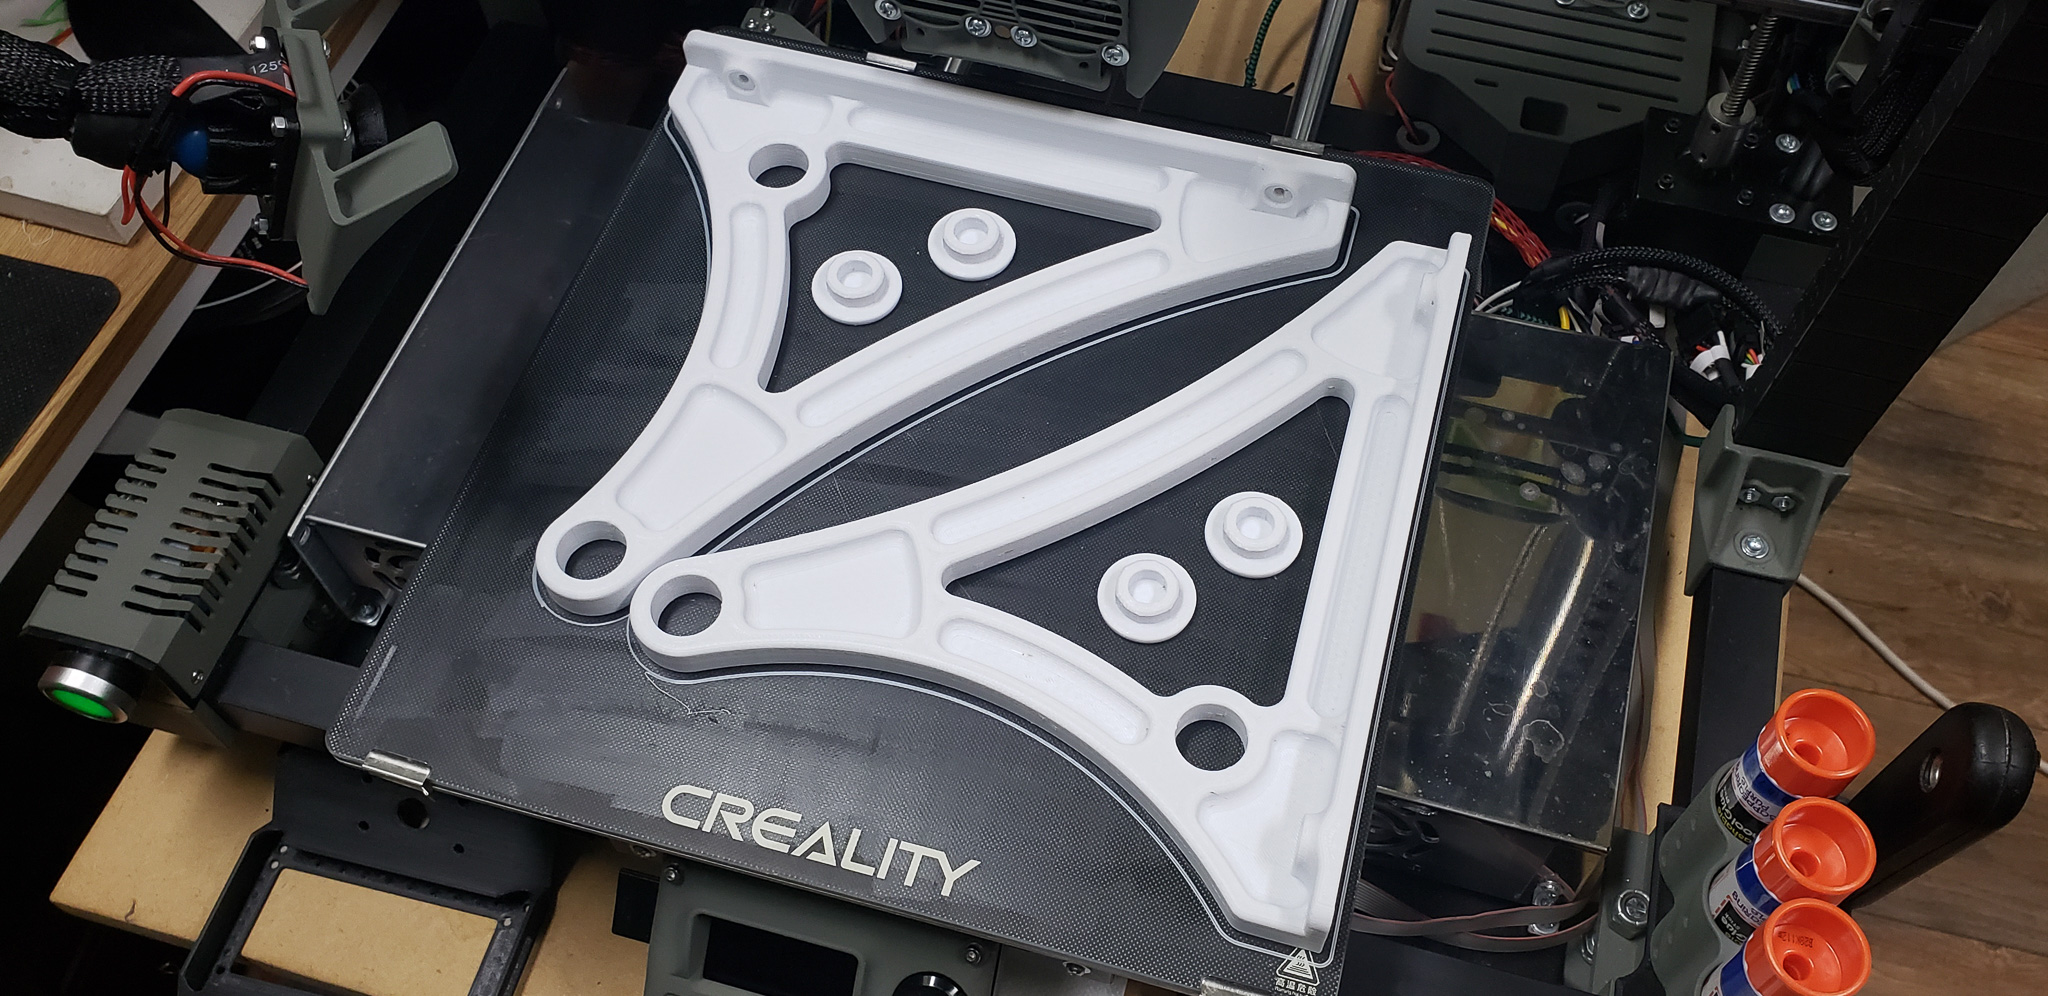
One morning before work, I started printing the first set. By the time I returned, it was ready. In the evening, I set up the second set before bed. By morning, it was done. Before leaving for work again, I loaded the third set. In total, I spent about half an hour drawing and another half hour assembling and mounting everything on the wall, placing the spools on the shelves. I love robots.


In theory, with the current arrangement of the printer on the desk and the spool shelves on the wall, filament could be fed directly into the printhead. The shelf rods are “slippery” enough for the spools to rotate freely without falling off their mounts. I can’t say this was intentional, and I’m not sure I’ll ever use this feature, but the possibility is there… theoretically.